Access
Click Alias Management > Arrays to access the functionality for managing aliases for arrays of fields.
Table of Contents
Overview
The Arrays Fields Alias functionality is related to a set of values from a specific table column. For more information about the Alias Management, open the Alias Management Overview page of the User Manual.
The value that this alias contains corresponds to dependencies that the user specified and the input that was used to start the evaluation.
The Arrays Fields Overview page looks as follows:
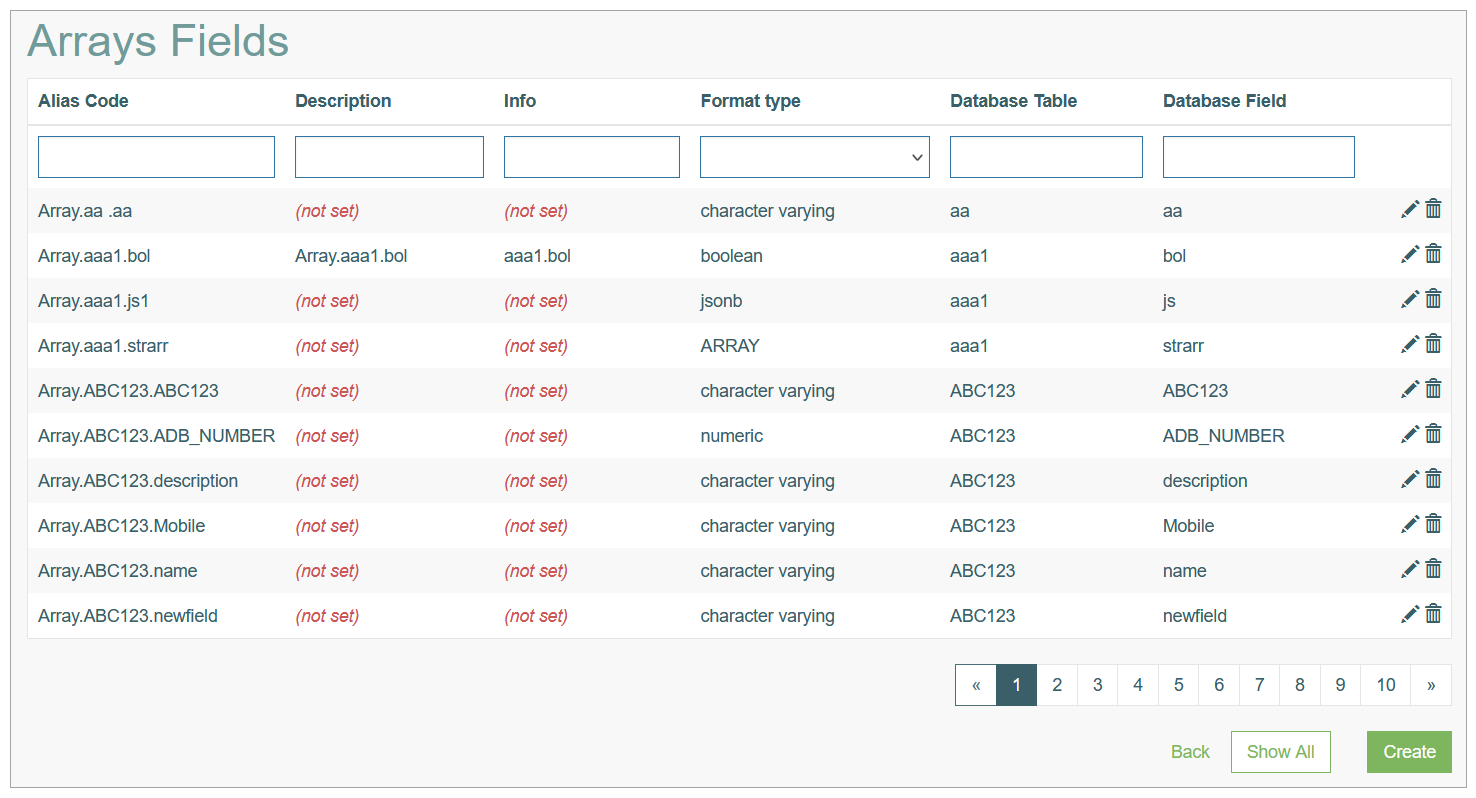
Search
You can search for a particular Array Alias or filter search results. For this, use any of the search filters such as Alias Code, Description, Info, Format type, Database Table, Database Field and click the Enter key or on any screen place.
The screen displays search results if found. To have an overview of all Array Alias existing the system, leave the filters empty.
Sort Search Results
You can sort search results by the columns in ascending (arranged from the smallest to the largest number and alphabetically for letters) or descending (arranged from the largest to the smallest number and in reverse alphabetical order for letters) order. Columns' names, by which search results can be sorted, are indicated with arrows. Click the appropriate column name to sort search results by it.
Navigate
Use the navigation bar at the bottom of the Overview page to navigate through the pages. Click the appropriate page number to open it. Use the Arrow icons to go to the next page or the previous page of the search results list accordingly.
Create Arrays Fields Alias
Click the Create button on the Overview page to create a new Arrays Fields Alias. This opens the page in creation mode.
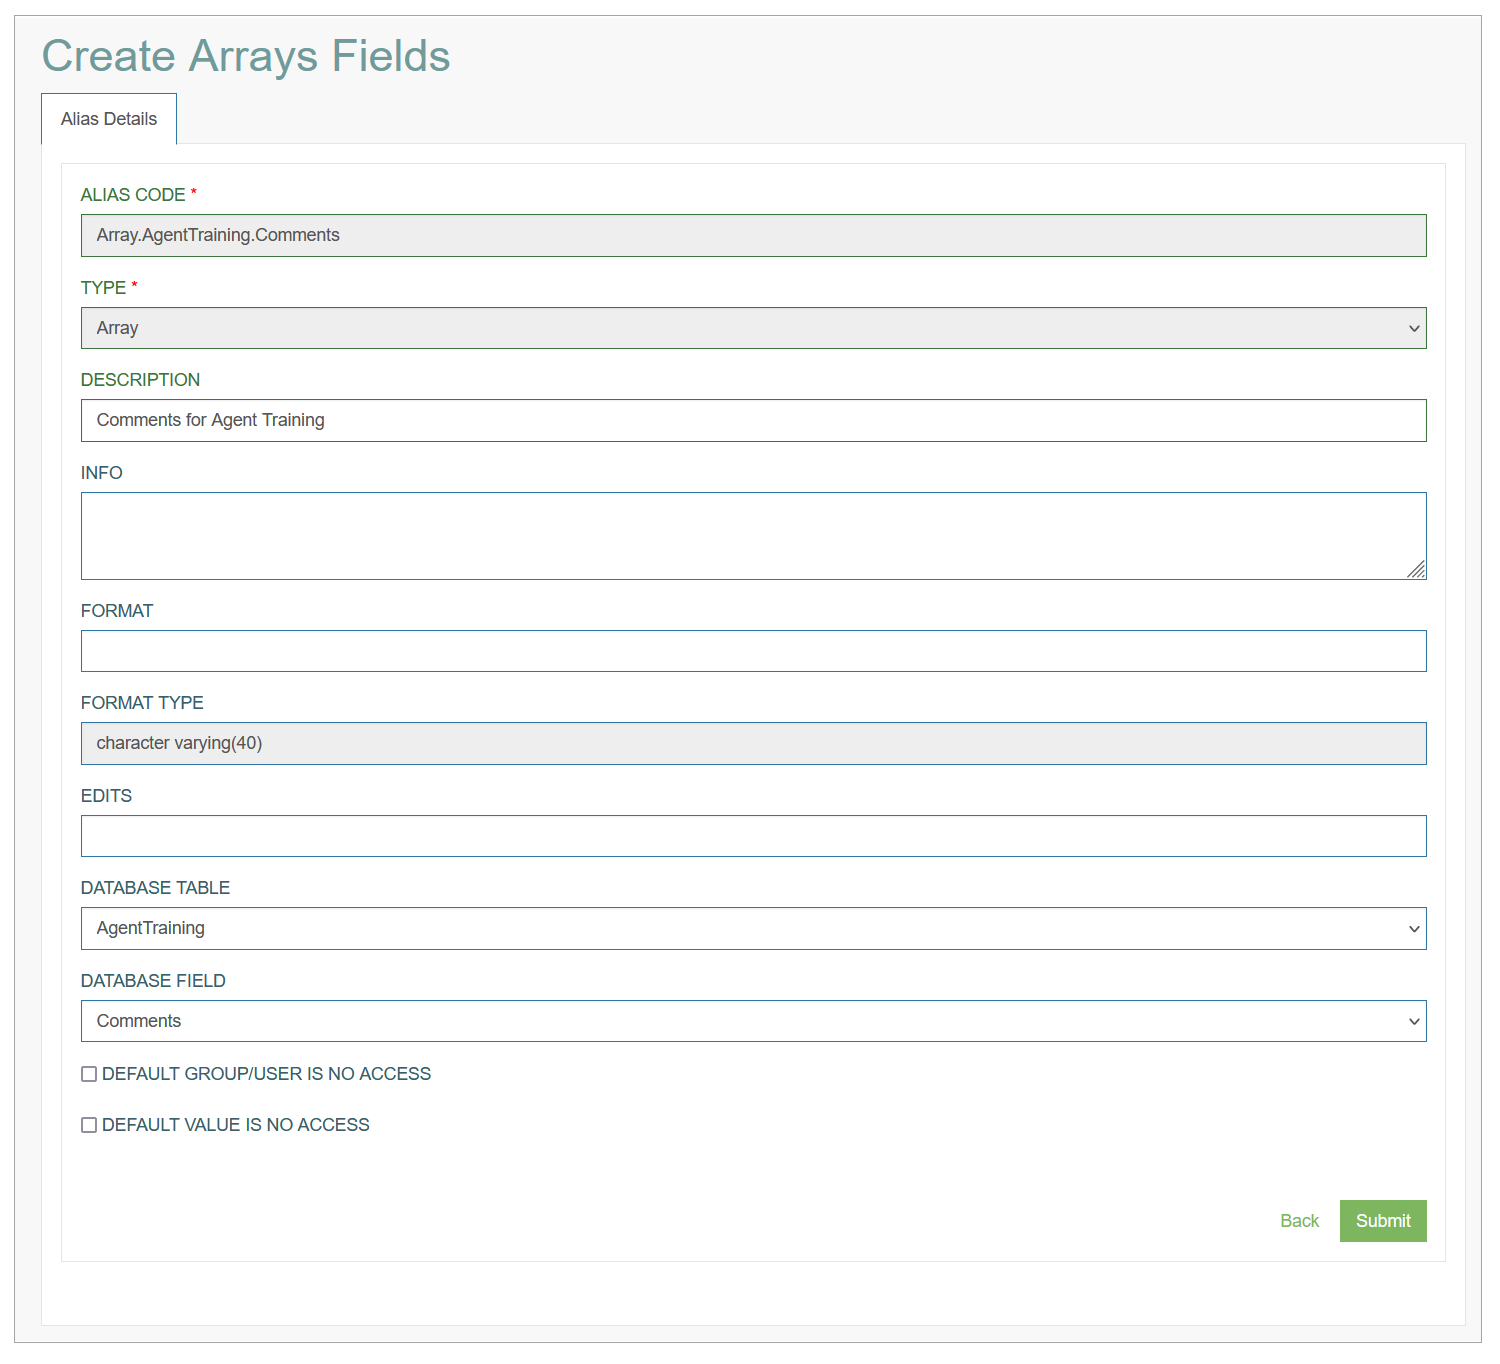
Fill in the following fields:
Alias Code - this field is filled in automatically based on the selected Database Table and Field name. The Alias code is named according the Alias naming convention. See more information about the naming convention in the Alias Naming Convention section of the Alias Management Overview page of the User Manual.
Type - the alias type is pre-selected depending on the page, from which the alias is created. In this case, this is Array. More information about other alias types can be found in the Alias Types section of the Alias Management Overview page of the User Manual.
Description - enter a description for the alias you are creating.
Info - add additional helpful information.
Format Type - is automatically populated with a data format type value (e.g. character, numeric, etc.), when you select the database table.
Database Table - select the database table that corresponds to alias you are creating.
Database Field - after the database table selection, you are able to select the database field from the drop-down list.
Default Group/User is no access - select the check box to define, whether all groups/users are restricted from viewing the data that is stored in this alias.
This setting can be overridden using the Special Access Restrictions, this tab is available in the corresponding Alias.*.* alias. All settings set up to a specific Alias.*.*, apply to the same Array.*.* alias.Default Value is no access - select the check box to specify that all alias data is restricted no matter what the data (value) for the alias is. This setting can be overridden using the Special Access Restrictions, this tab is available in the corresponding Alias.*.* alias. All settings set up to a specific Alias.*.*, apply to the same Array.*.* alias.
After saving the data, the Alias Code and Type fields will not be manually editable.
After filling in the required and optional data, click the Submit button to save the Database Field alias. To return to the Overview page without saving, click the Back link.
Update Arrays Alias
To edit an Arrays alias, click the Edit (pencil) icon for the selected alias entry on the Overview page. The Update Arrays Alias opens for editing.
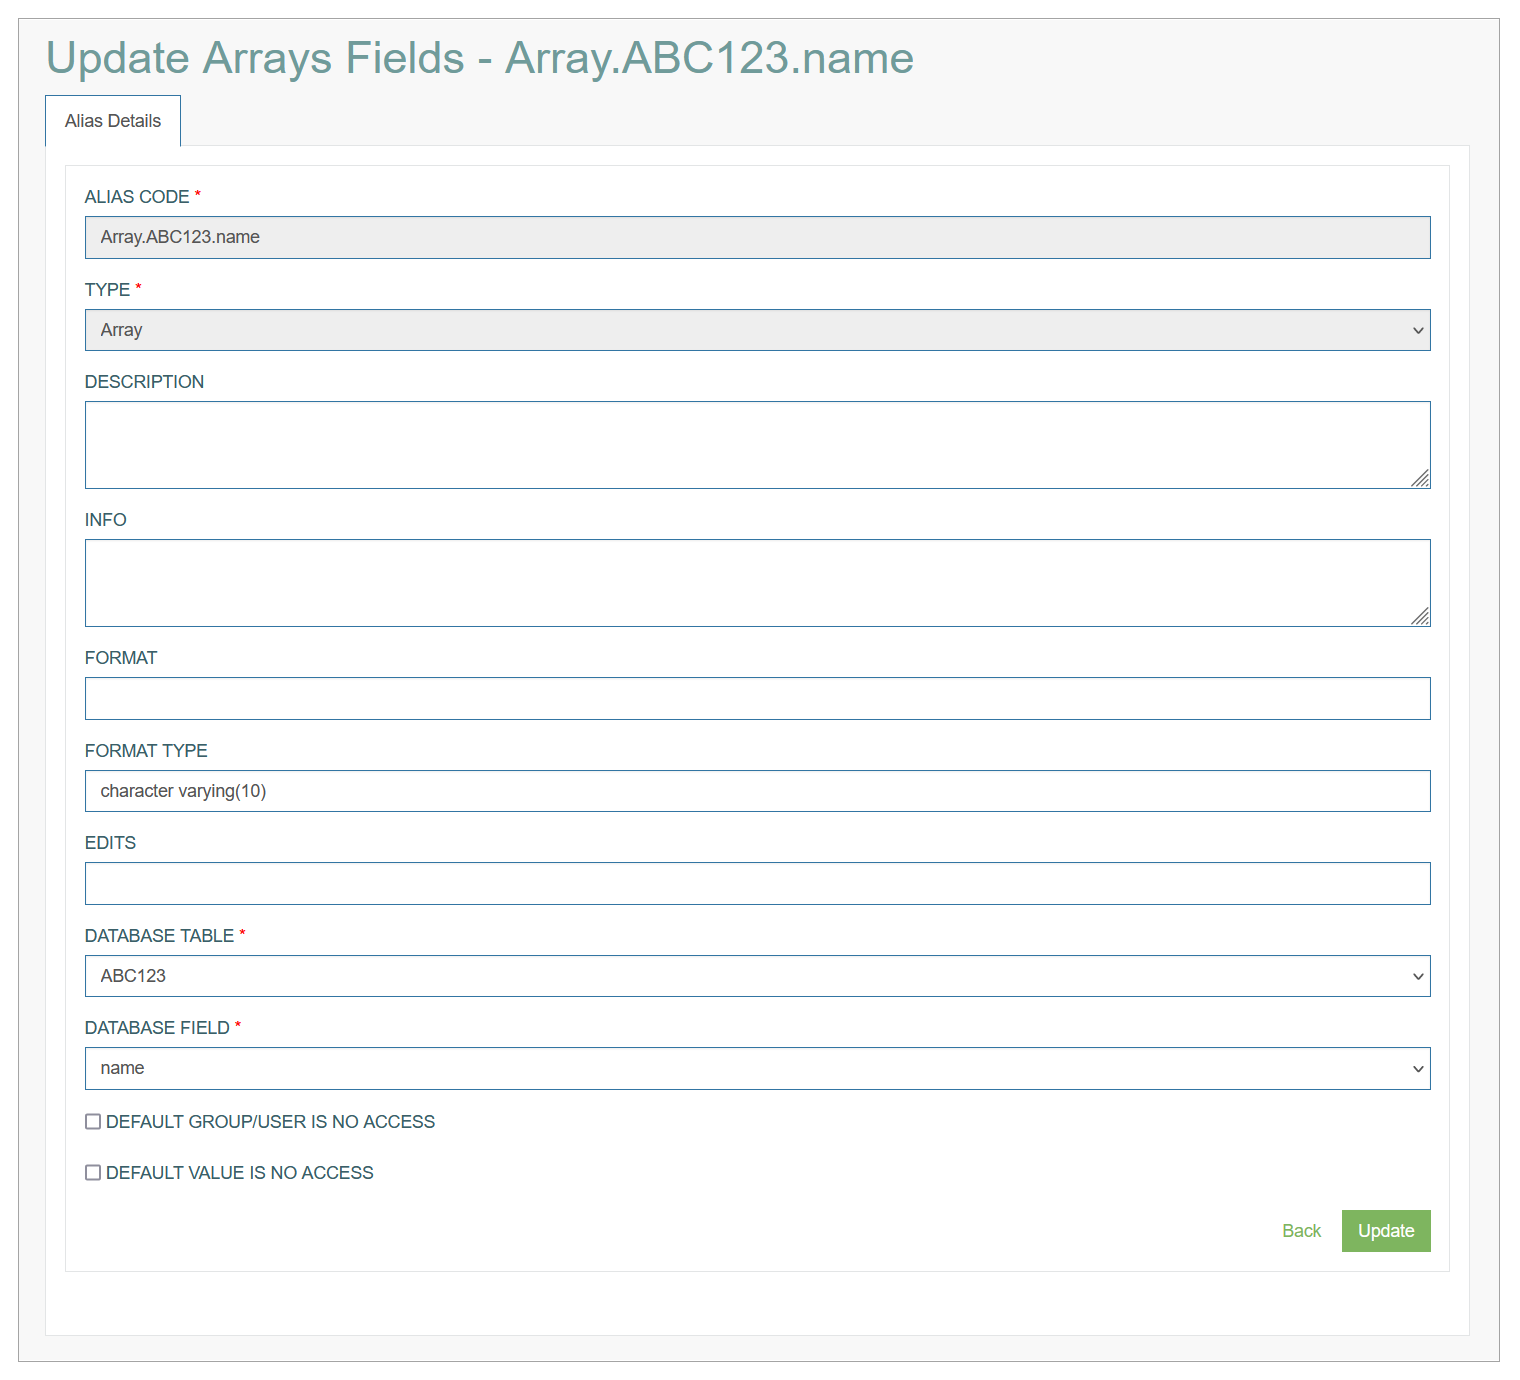
After making the necessary changes, click the Submit button. To return to the Overview page, click the Back link.
Delete Arrays Alias
To delete an Arrays alias, click the Delete icon on the Overview page for the selected entry. The confirmation pop-up will appear where you can confirm or cancel the Delete action.