Access
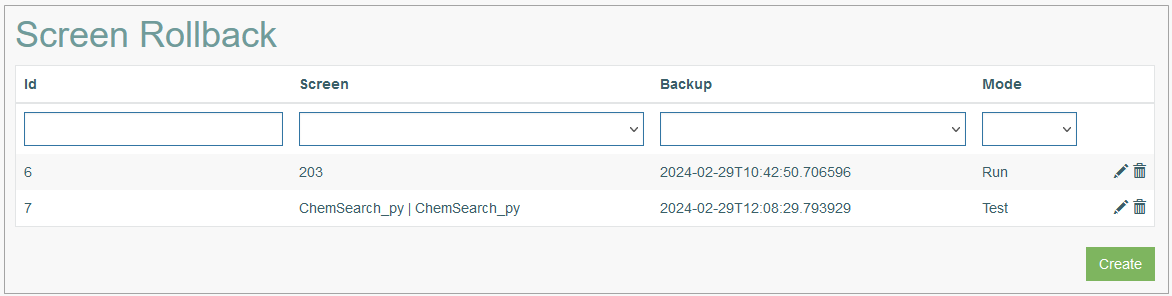
Click Features > Screen Rollback to have an overview of screen rollback entries and manage them.
Table of Contents
Overview
The Screen Rollback functionality enables users to undo modifications made to a screen, restoring it to a state captured during a previous backup or version.
Search
To search for a required screen transfer or filter the search results, use the following search filters:
ID - the Screen Rollback ID.
Screen - the transferred screen name.
Backup - the screen backup version.
Mode - the Screen Rollback mode.
After filling in the filters, click the Enter key or any screen place. The screen displays search results if found. Please note, that letters or part of the word entered in the search filter fields will be taken into account while searching as well.
Navigate
Use the navigation bar at the bottom of the Screen Rollback Overview page to navigate through the pages. Click the appropriate page number to open it. Use the Arrow icons to go to the next page of the previous page of the search results list accordingly.
Click the Show All button to display all the results on one page.
Create Screen Rollback
To create the Screen Rollback, click the Create button. This opens the Screen Rollback Create page with forms that should be filled in.
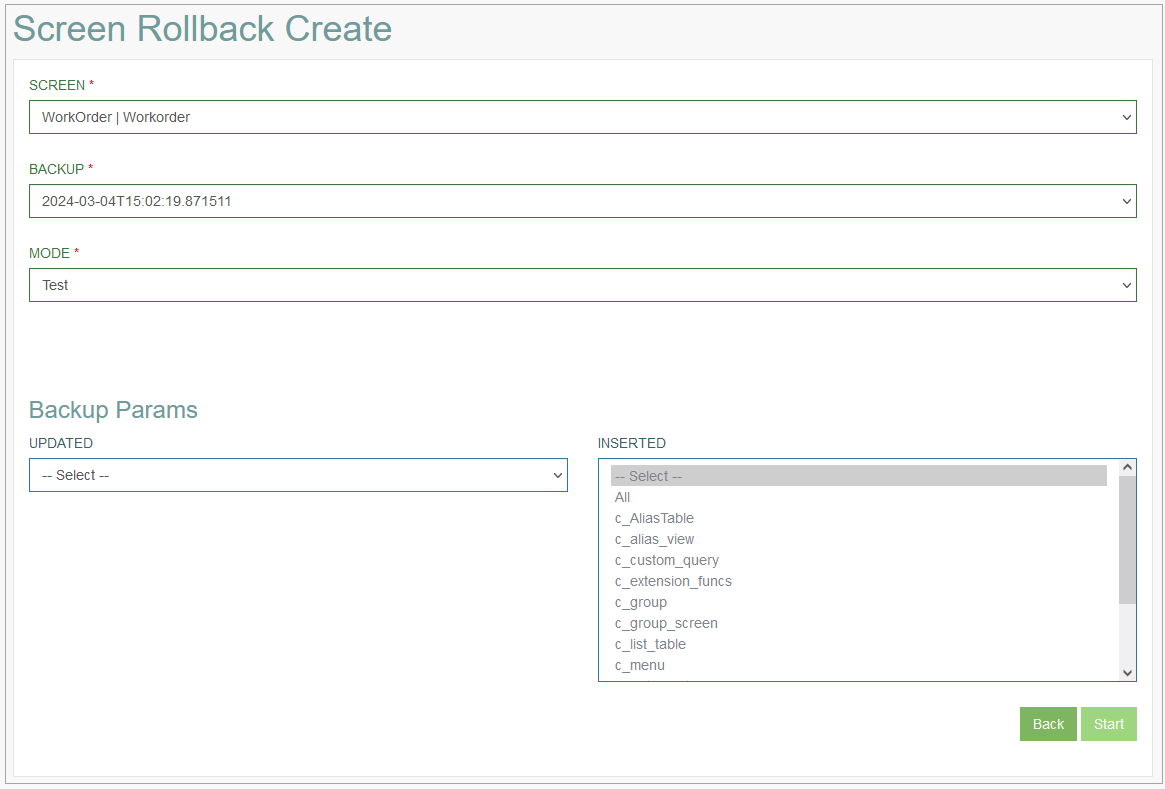
Fill in the following fields:
Screen - select the screen to be rolled back from the drop-down list.
Backup - select the version of the screen from the drop-down list.
Mode - select the mode, in which the Screen Rollback entry will be created, from the drop-down list:
Test - using this mode executes all required modifications without the implementation into the target database.
It is recommended to use this mode prior to switching to the Run mode to avoid errors during the Screen Rollback process.Run - using this mode executes all required modifications by implementing them into the target database at once.
In the Backup Parameters (Backup Params) section select the following parameters:
Updated - select the table that was updated but should be rolled back in this Screen Rollback entry. Users can select one or all tables from this list.
Inserted - select the table that was inserted but should be rolled back in this Screen Rollback entry. Users can select one, several, or all tables from this list.
Click the Start button, to execute the Screen Rollback process. The results of the Screen Rollback process execution will be displayed below in the Result section.
Click the Back button, to cancel the Screen Rollback process and return to the Screen Rollback Overview page.
Update Screen Rollback
To update a Screen Rollback entry, click the Edit (pencil) icon for the selected Screen Rollback entry in the search results table. The Screen Rollback Update page opens for editing.
After making the necessary changes, click the Start button. To return to the Overview page, click the Back link.
Delete Screen Rollback
To delete a Screen Rollback entry, click the Delete icon on the Overview page for the selected Screen Rollback entry. The confirmation pop-up will appear where you can confirm or cancel the action.