Access
Click Account Settings > Logos to manage logo images.
Table of Contents
Overview
It is possible to manage existing logos or create a new logo that will be used in the Render application.
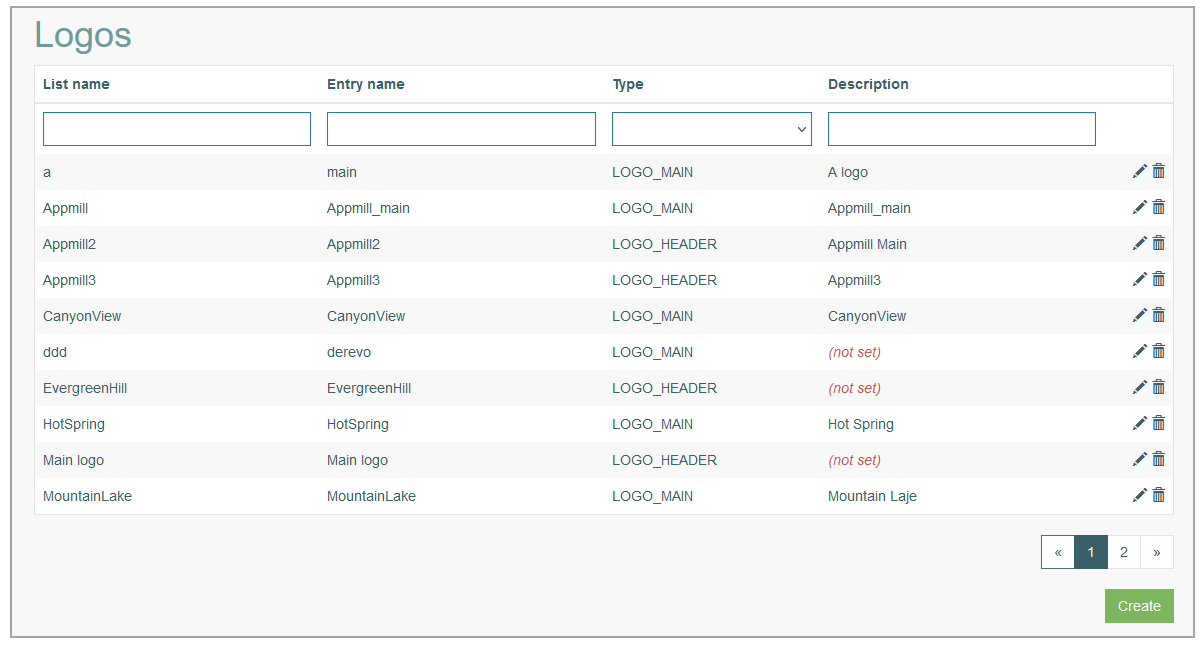
Search
To have an overview of all logos or search for a group or filter search results, enter List name, Entry name, Type, Description and click the Enter key or on any screen place. The screen displays search results if found.
Navigate
Use the navigation bar at the bottom of the Search Result page to navigate through the pages. Click the appropriate page number to open it. Use the Arrow icons to go to the next page or the previous page of the search results list accordingly.
Create Logo
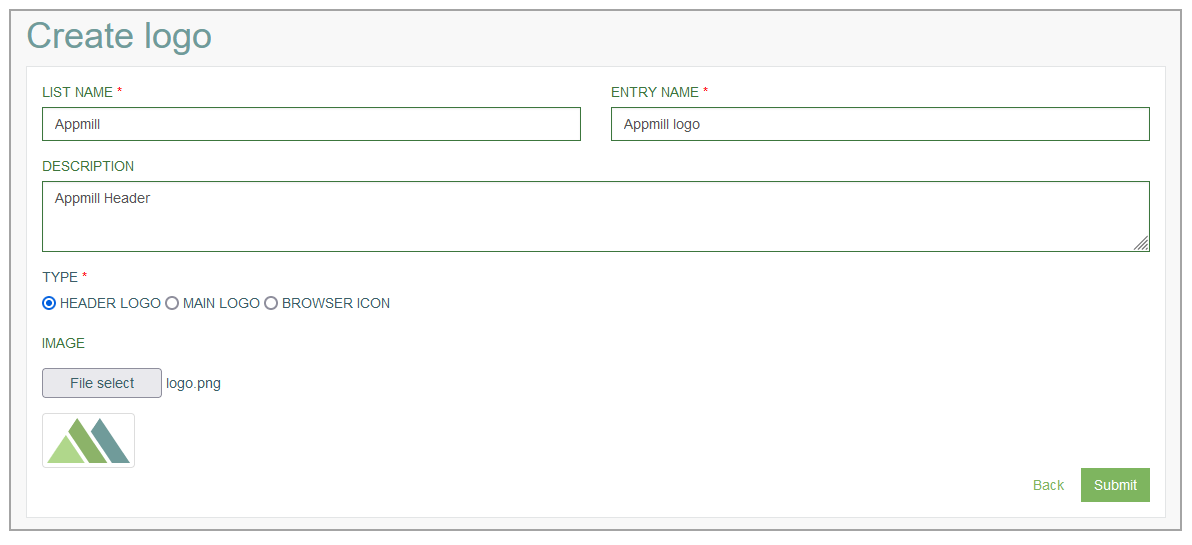
Click the Create button on the Search Result page to create a new Logo.
This opens the page in creation mode.
Fill in the following fields:
List Name – enter a list name. This field is required.
Entry Name – enter an entry name. This field is required.
Description - enter a description.
Type - activate a radio-button to select a type of logo from the list of available types:
Header logo - to use the image as a header logo.
Main logo - to use the image as a main logo. It will be displayed …
Browser icon - to use the image as a favicon for the browser tab.
Image - to select the image from your local storage, click the File select button.
Logo Types
There are three types of logos that can be displayed in the Render:
Header Logo
Main Logo
Browser Icon
Header Logo
The Header Logo is displayed at the top of the page.
To define the image as a Header logo, perform the following steps:
Upload the image and select it as a header logo on the Logo page. For more details on how to define the header logo, see the Create Logo section on the Logo page of the User Manual.
Select the uploaded image from the HEADER drop-down in the Logo section on the Tenant page (Account Settings > Tenant). For more details on how to define the header logo refer to the Logo section on the Tenant page of the User Manual.
Main Logo
The Main Logo can be displayed on the start page for users who have been assigned to the group with no start screen.
To display the Main logo on the start page, perform the following steps:
Upload the image and select it as a main logo on the Logo page. For more details on how to define the main logo, see the Create Logo section on the Logo page of the User Manual.
Select the uploaded image from the MAIN drop-down in the Logo section on the Tenant page (Account Settings > Tenant). For more details on how to define the main logo refer to the Logo section on the Tenant page of the User Manual.
Create the group with no start screen on the Groups page (Account Settings > Groups). For more details about the group creation, refer to the Create Group section on the Groups page of the User Manual.
Add the group with no start screen to the user’s primary group. For more information on how to define the primary group for the user, see the Create User section on the Users page (Account Settings > Users) page of the User Manual.
In case the user has predefined screen on the start page, the main logo will be hidden.
Browser Icon
The Browser Icon is displayed as a favicon on the browser tab.
To define the image as a Browser icon, perform the following steps:
Upload the image and select it as a browser icon on the Logo page. For more details on how to define the browser icon, see the Create Logo section on the Logo page of the User Manual.
Select the uploaded image from the BROWSER ICON drop-down in the Logo section on the Tenant page (Account Settings > Tenant). For more details on how to define the main logo refer to the Logo section on the Tenant page of the User Manual.
Edit Logo
To edit a Logo, click the Edit (pencil) icon for the selected group entry in the search results table. The Update logo page opens for editing.
After making the necessary changes, click the Submit button. To return to the Logos Overview page, click the Back link.
Delete Logo
To delete a Logo, click the Delete icon on the Search Result page for the selected group. The confirmation pop-up will appear where you can confirm or cancel the action.