Access
Click System Data > Swap Tables to access the functionality for creating and managing swap tables.
Table of Contents
Overview
The Swap Tables functionality provides the possibility to clone the existing table and use all data captured on the moment of table cloning. For instance, that can be useful in cases when the user needs to make a report based the stable data or collect some statistics, but the table data is constantly updated and the data used become not actual very quickly.
Search
To search for a menu or filter the search results, use the following search filters and enter any or all the search criteria:
Table Name
User Name
Plugin Name
After filling in the filters, click the Enter key or any screen place. The screen displays search results if found. Please note, that letters or part of the word entered in the search filter fields will be taken into account while searching as well.
Sort Results
You can sort search results by the columns in ascending (arranged from the smallest to the largest number and alphabetically for letters) or descending (arranged from the largest to the smallest number and in reverse alphabetical order for letters) order. Columns' names, by which search results can be sorted, are indicated with arrows. Click the appropriate column name to sort search results by it.
Navigate
Use the navigation bar at the bottom of the Overview page to navigate through the pages. Click the appropriate page number to open it. Use the Arrow icons to go to the next page of the previous page of the search results list accordingly.
Click the Show All button to display all the results on one page.
Create Swap Table
Click the Create button on the Overview page to create a Swap Table. This opens the Create Swap Table page.
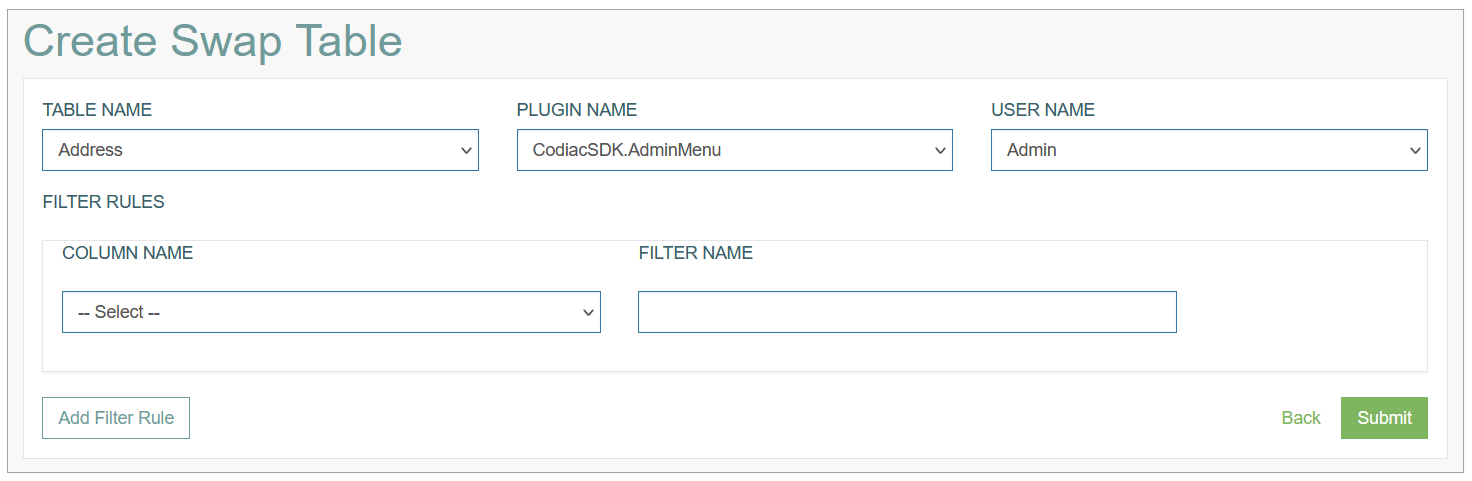
Fill in the following fields:
Table Name – select a table that should be swapped.
Plugin Name - select the plugin, where this table will be used.
User Name - select the user that will be responsible for this task and swap table.
Column Name - select the column that will be processed. Only the selected column will be copied to the swap table. Other data will not be cloned. You can add several columns by adding new filter rows below. If you leave the field empty, all the columns will be cloned.
Filter Name - specify the selection of the values by entering the filter name.
To define several columns and filters, click the Add Filter Rule button.
After filling in all mandatory and optional fields click the Submit button to save the created Swap Table. Click the Back button to go back to the Overview page without saving the data.
Update Swap Table
To edit a swap table, click the Edit (pencil) icon for the selected entry in the search results table. The Update Swap Table page opens for editing.
After making the necessary changes, click the Submit button. To return to the Overview page, click the Back link.
Delete Swap Table
To delete a swap table, click the Delete icon on the Overview page for the selected entry. The confirmation pop-up will appear where you can confirm or cancel the action.