Access
Click Features > Migration Tool to manage the database migrations.
Table of Contents
Overview
The Migration Tool functionality provides the possibility to completely migrate the database schema from the source database to the destination database.
It does not matter, what types the source and destination databases are. The databases could be different types. Currently, we support the following database types:
PostrgreSQL
OracleSQL
MicrosoftSQL
MySQL
SQLite
Please note that different databases have specific capabilities.
If, during database migration, a table contains functionality that is not supported by the destination database, the migration of that table will be canceled.
For example, PostgreSQL allows the use of autoincrement for any field, while some other databases only support autoincrement for the Primary Key field.
As a result, such a table will generate an error during migration and will not be migrated.
Create Database Migration
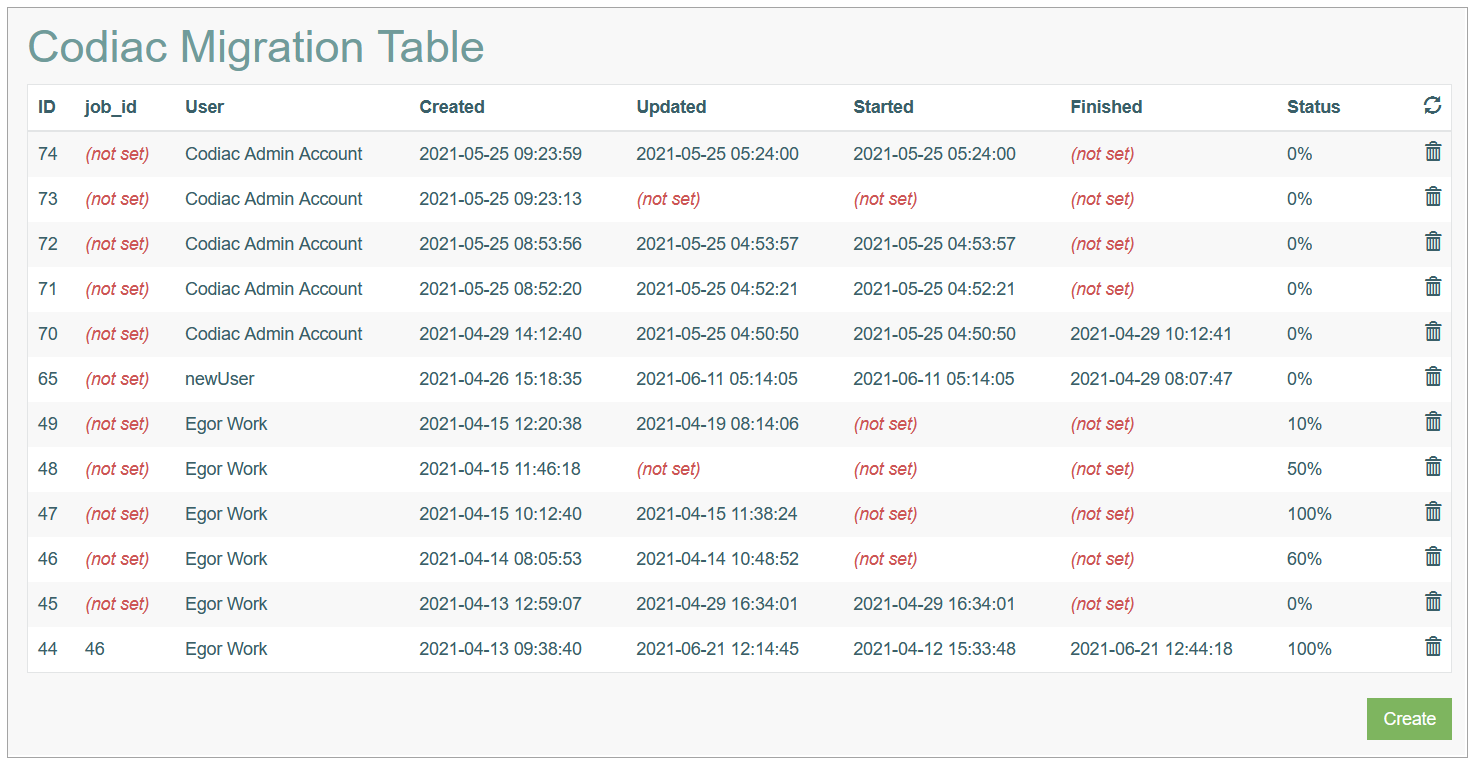
To migrate database, click the Create button. This opens the Create Migration page with Source and Destination databases forms that should be filled in.
Fill in the following fields for the Source and Destination databases:
Database Type - select the type of database from the drop-down list.
Host - define the host where the database is stored.
Port - define the port where the database is stored.
Database Name - enter the database name.
User - enter the user’s who has the access to the database.
Password - enter the password used to access the database.
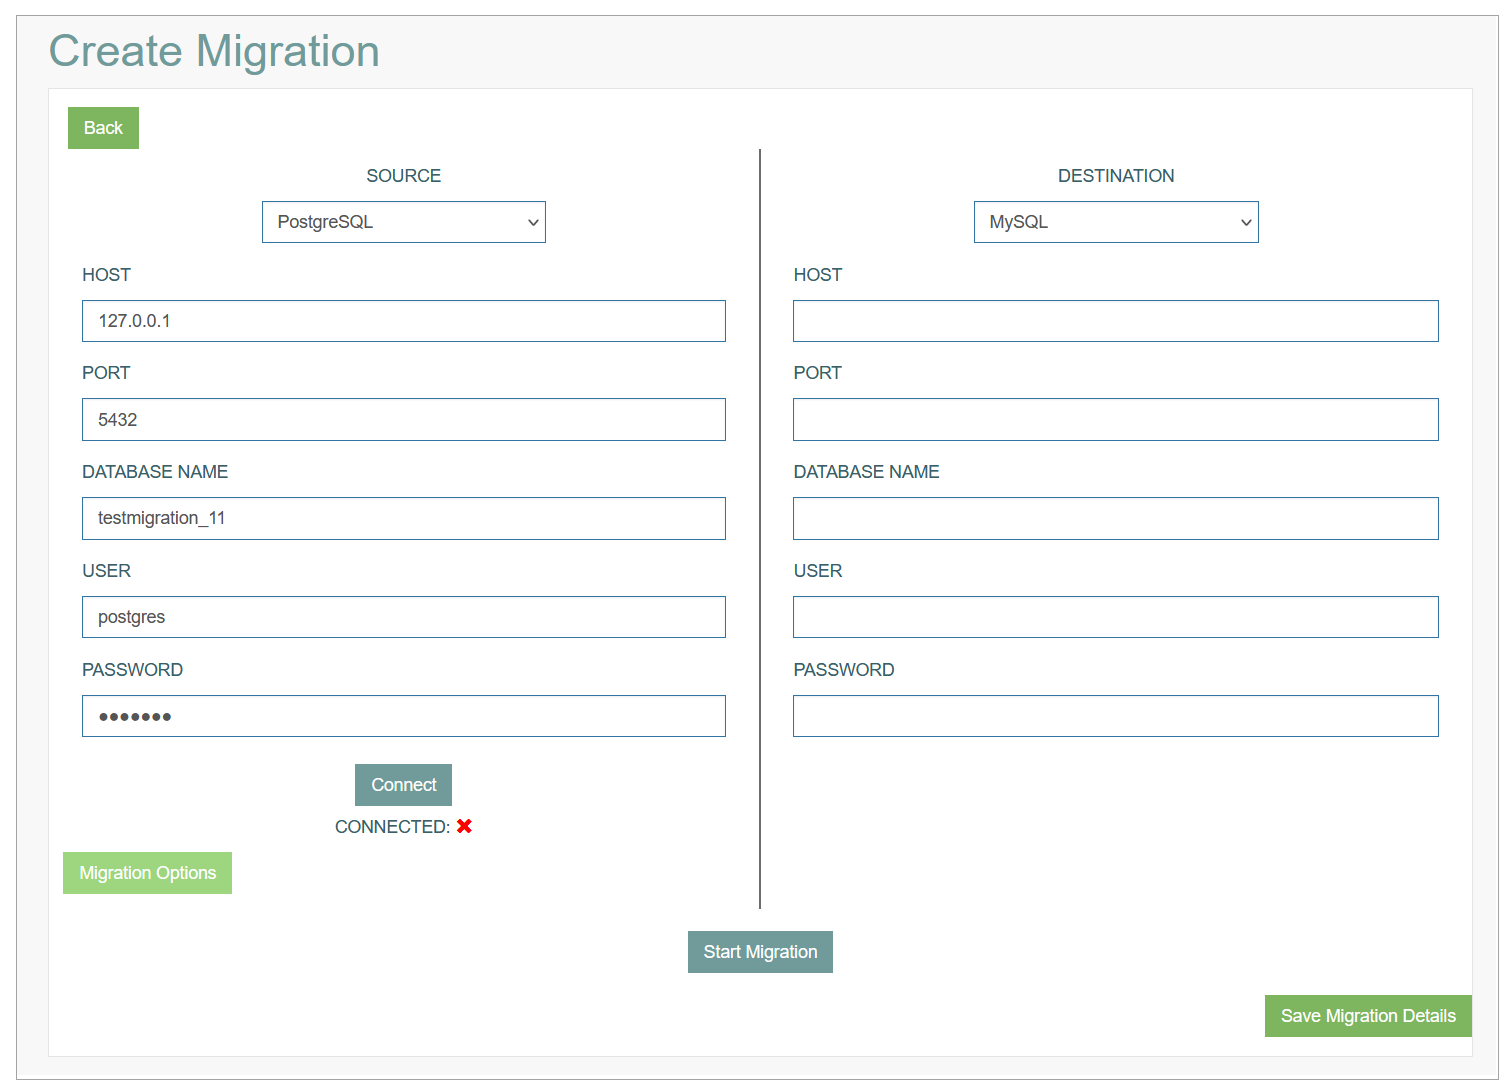
After filling in all the fields, click the Connect button below the form. If the connection is successful, you will see the green check mark icon. If the connection failed, the red cross icon will be shown next to the button.
Migration Options
In case of successful connection, the Migration Options button that previously was not available will be activated.
Click the Migration Options button to set up the details of migration: settings, table overriding, DevOPS information, filtering options, etc. The Migration Options pop-up window appears:
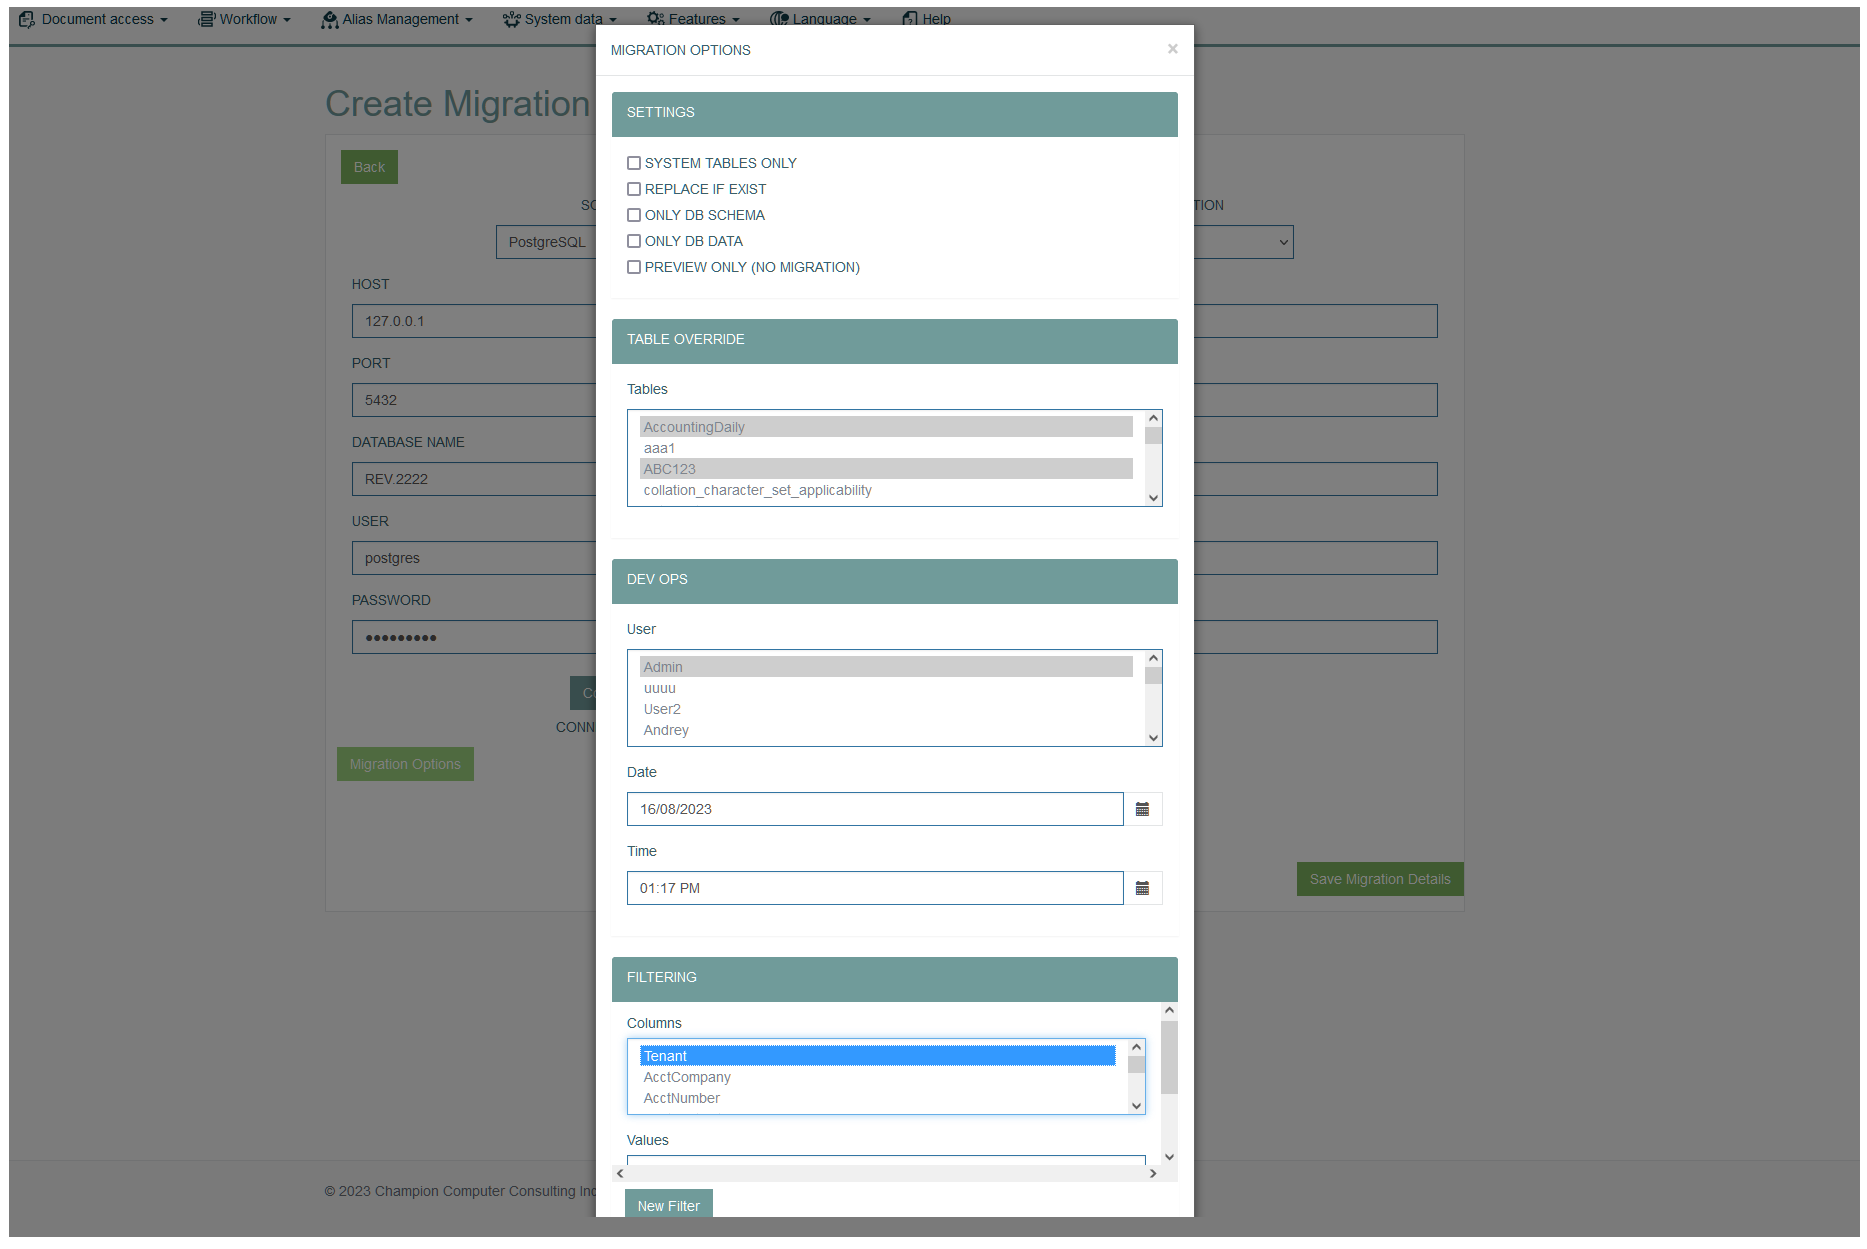
You can set up the parameters in the following sections:
Settings
Table Override
Dev Ops
Filtering
Data Mask
See the corresponding description below.
Settings
System tables only - this option allows you to transfer only the system tables (the names of system tables start with “c_“).
Replace if exist - select this option to specify that in case the destination table contains some data in primary fields, this data should be updated. In case the option is not selected and the data exist, the error message will occur during the migration.
Only DB schema - this option allows you to transfer DB schema only.
Only DB data - this option allows you to transfer DB data only.
Preview only (no migration) - this option allows you to only preview and check the queries that will be executed on the destination database. No migration will be performed in this case.
Note that the Preview only (no migration) option is available only when the DevOps details are added. This restriction is designed to avoid the large volume of statistics and performance issues.
Table Override
In the section, you can select the Tables that need to be migrated. In order not to migrate all the existing tables, but only those that should be migrated, you need to define the required tables.
Dev Ops
Based on the date-specific information specified in this section, the system will define which records should be transferred during the migration.
You can select the User, define Date and Time data and the system will consider only the records that were created after the specified date/time.
Filtering
In this section you can specify the columns and the values that will not be migrated to the destination database.
Column - select the column the values of which that you do not need to migrate. The list of available columns is restricted according to the tables selected above.
Values - enter the values that should be excluded from the migration.
Click the New Filter button to add more values to be filtered out.
Data Mask
Here you have the possibility to hide the transferred values and mask them out in case the data is sensitive or confidential. Fill in the following details:
Tables - select the tables containing the data to be mask out.
Columns - select the required columns.
Values - the values entered here will replace all real values during the migration to the destination database.
Click the New Mask button to add more data masks.
Start Migration
When all the required parameters are set up, you can start the migration. For this, click the Start Migration button.
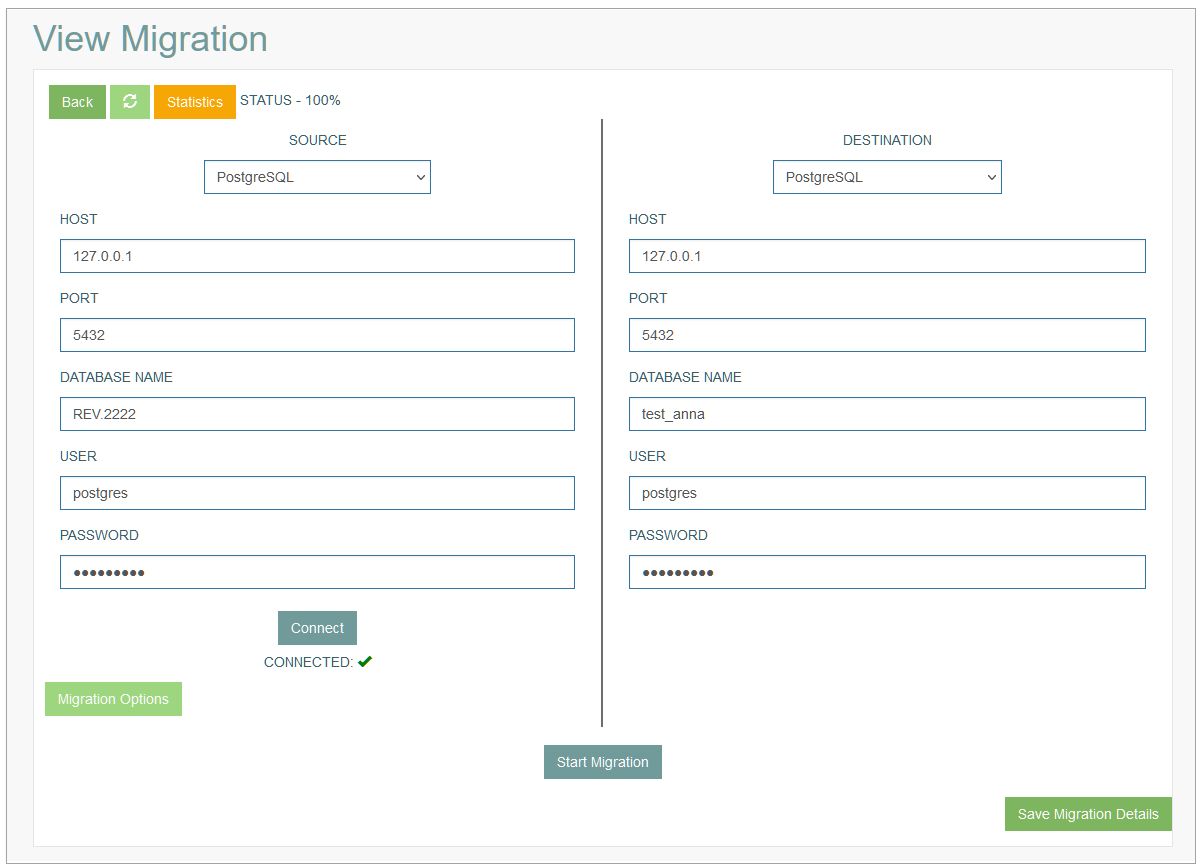
The confirmation pop-up with the information that you are in the Migration mode appears, confirm your action and the migration will be started. The page title will be changed to View Migration.
When the migration is finished, you will see new buttons and status info in the upper left corner of the form:
Reload - click the Reload button to reload the migration page manually and update the statistics. This can be useful in case the migration takes long time.
Statistics - click the button to open the information about the migration (successful migration or some errors).
Status - shows the completion of the migration process.
To save the changes done on the Migration page click the Save Migration Details button.
To cancel the Migration process, click the Cancel button below the Save Migration Details button.
To leave pages without saving, click the Back button.
View Migration
To view the Migration details, click the selected entry row in the search results table. The View Migration page opens for editing.
To return to the Overview page, click the Back button in the upper left corner of the form.
Delete Migration
To delete a Migration entry, click the Delete icon on the Overview page. The confirmation pop-up will appear where you can confirm or cancel the action.