Access
Click Account Settings > Tenant to access the functionality for managing tenants.
Table of Contents
Overview
The Architect functionality provides the possibility to manage tenants, departments, divisions in the organization so that the whole business structure can be completely included in all business processes set up for the Render. Based on the tenants and their location, you can specify different branding styles, regional settings, email and SMS servers, SAML and SSO, etc. The unique security filters are defined taking the tenant code into account to filter access be similar tasks and functions.
Search
On the Tenants page, you can have an overview of all tenants created in the application.
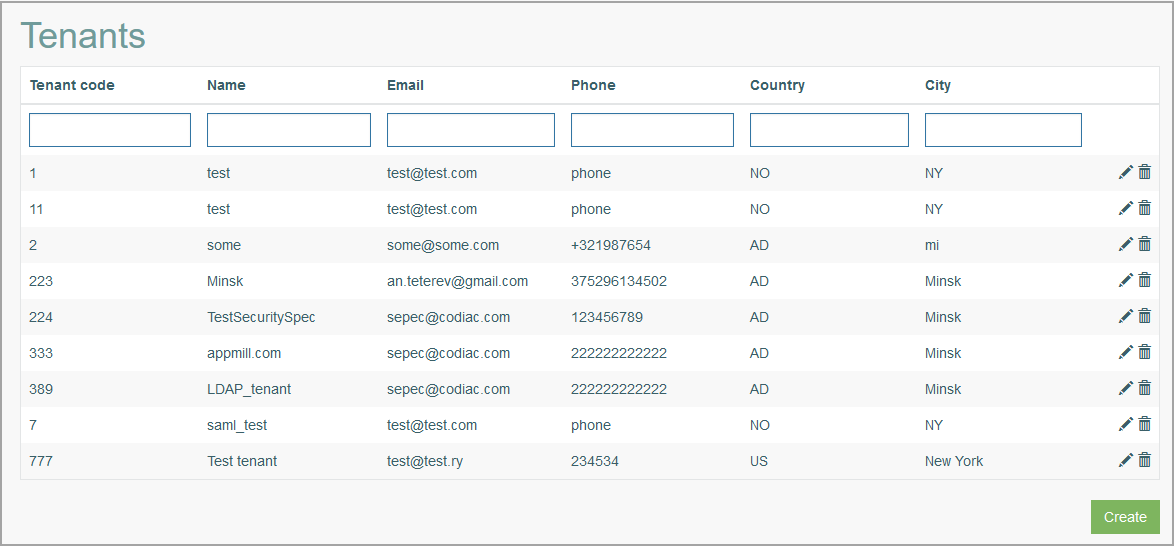
To search for a specific tenant or to filter search results, enter the following parameters in the search filters section, if known, and click the Enter key or on any screen place:
Tenant Code
Name
Email
Phone
Country
City
The screen displays search results if found.
Navigate
Use the navigation bar at the bottom of the Search Result page to navigate through the pages. Click the appropriate page number to open it. Use the Arrow icons to go to the next page or the previous page of the search results list accordingly.
Create Tenant
Click the Create button on the Overview page to create a new Tenant. This opens the page in creation mode.
First of all, fill in the general information:
Tenant Code – enter a tenant code. The entered value must be an integer. The maximum allowed length of Tenant Code is 3 characters. This field is required.
Name – enter a tenant name. This field is required.
These two values will be displayed and used to identify the tenant in other application features, e.g. when creating users and defining security filters.
System Unavailable - select the check box to specify that the Render should not be allowed to log in for users of this tenant.
When the System Unavailable check box is enabled, the authorization behavior will be the same as for an inactive user.
Note that a user with the superuser rights can log in to the Render even in case the System Unavailable check box is selected for their tenant.
For users with the "Login" and "Guest" types, the access will be allowed as well.
If the tenant has settings for SAML, then it is redirected to the SAML authorization page.
After defining these fields, you can specify the Tenant data on the following tabs:
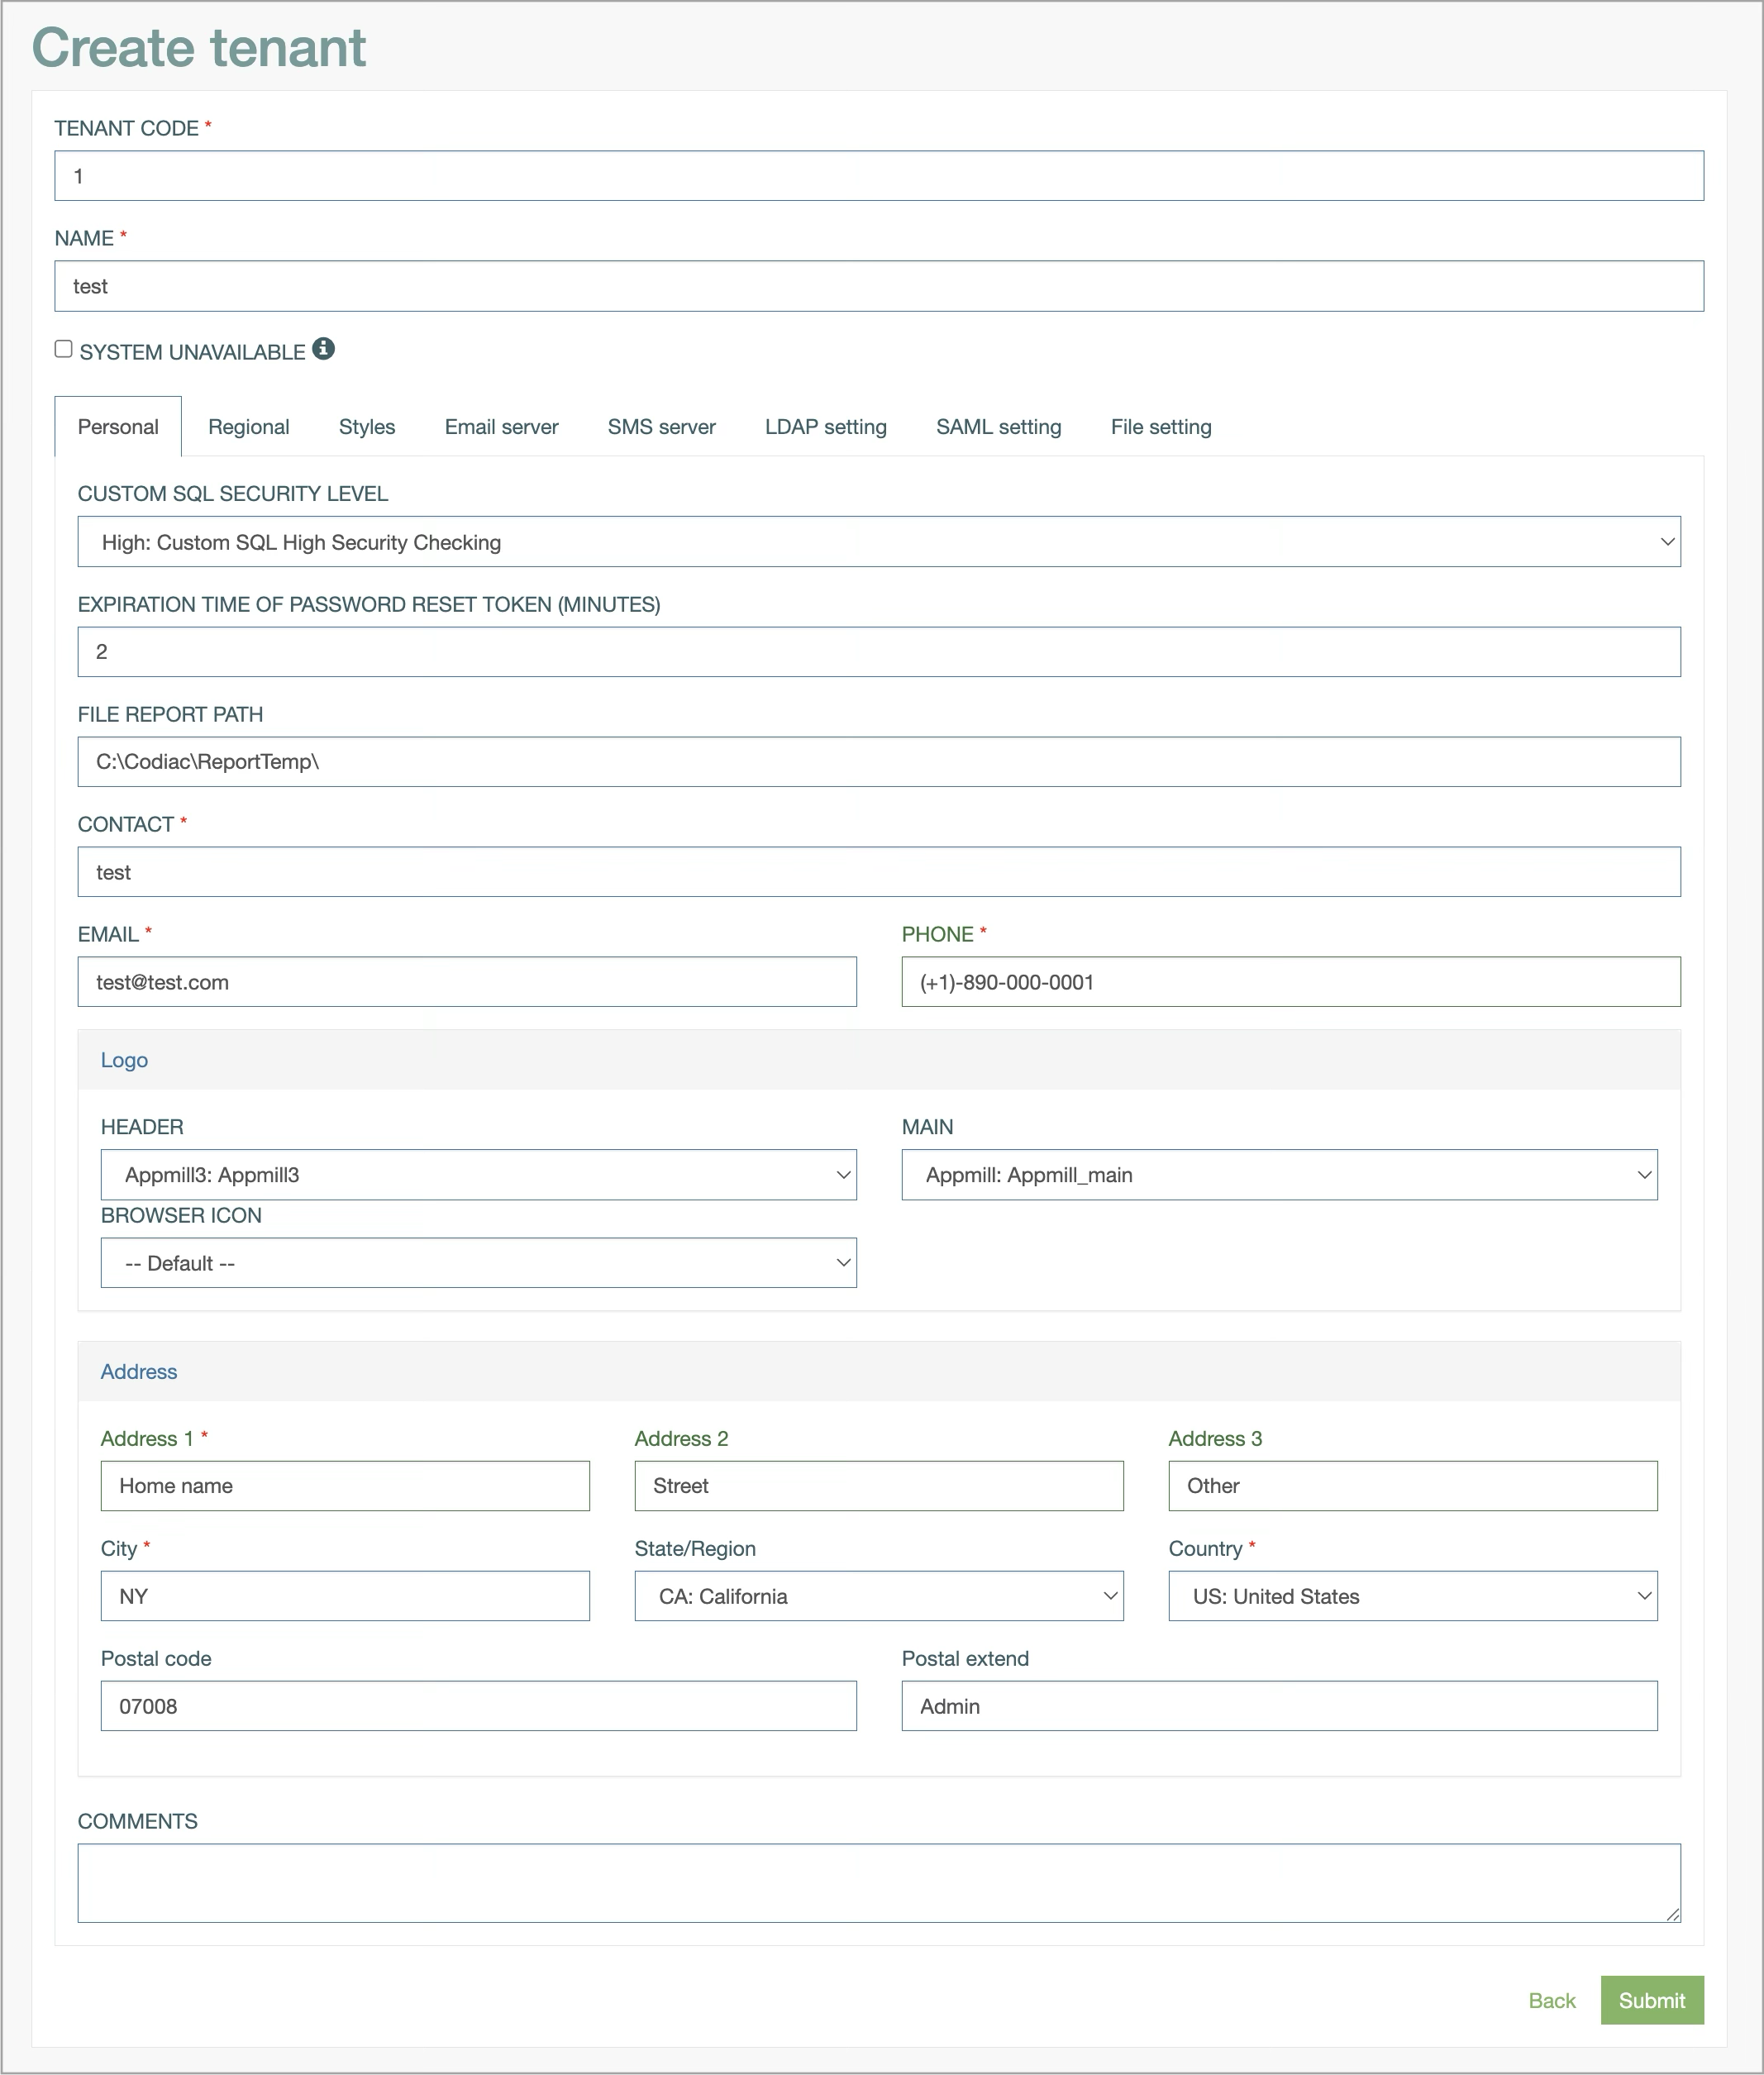
Personal tab
On the Personal tab, you can define personal data for the tenant, contact and address information, logo images etc. Fill in the following fields:
Custom SQL security level - select the level of security checking for the access to the database for the current Tenant:
High Security Checking
Low Security Checking
Expiration time of password reset token (minutes) - set the time (in minutes) to expire the password token that is sent to confirm the password reset. When the specified time is over, the password token will be reset and user will need to repeat the password reset procedure again.
File Report Path - enter the path to the storage where the generated reports should be stored.
Contact - enter the contact name of a tenant. This field is required.
Email - enter a valid email address for the contact information. This field is required.
Phone - enter a phone number. This field is required.
Logo - select the images that will be displayed as logo in the Render application. You can select the image for the following types of logo depending their display in the Render:
Header logo - will be displayed on the header in the main menu.
Main logo - will be displayed on the start page if the other screen is not defined for the start page.
Browser icon - will be displayed as a favicon.
Logo images that are available for selection can be uploaded on the Logo page (Account Settings > Logo). For more detail on how to upload the logo images, refer to the Create Logo section on the Logo page of the User Manual.
Address:
Address 1 - enter a valid address that will be used as a main address. This field is required. You can specify additional alternative addresses in the Address 1 and Address 2 fields, if needed.
Address 2 - enter an additional email address, if needed. The field is optional.
Address 3 - enter an additional email address, if needed. The field is optional.
City - enter a city. This field is required.
State/Region - enter the State or Region.
Country - Enter the country. This field is required.
Postal Code - define the postal code.
Postal Extension - define the postal extension.
Comments - add the commentary and remarks, if needed.
Regional tab
On this tab, you can add information related to the tenant’s location. The entered information will be pre-populated to the details of a new user belonging to the current tenant. User always can change these settings in the Render settings.
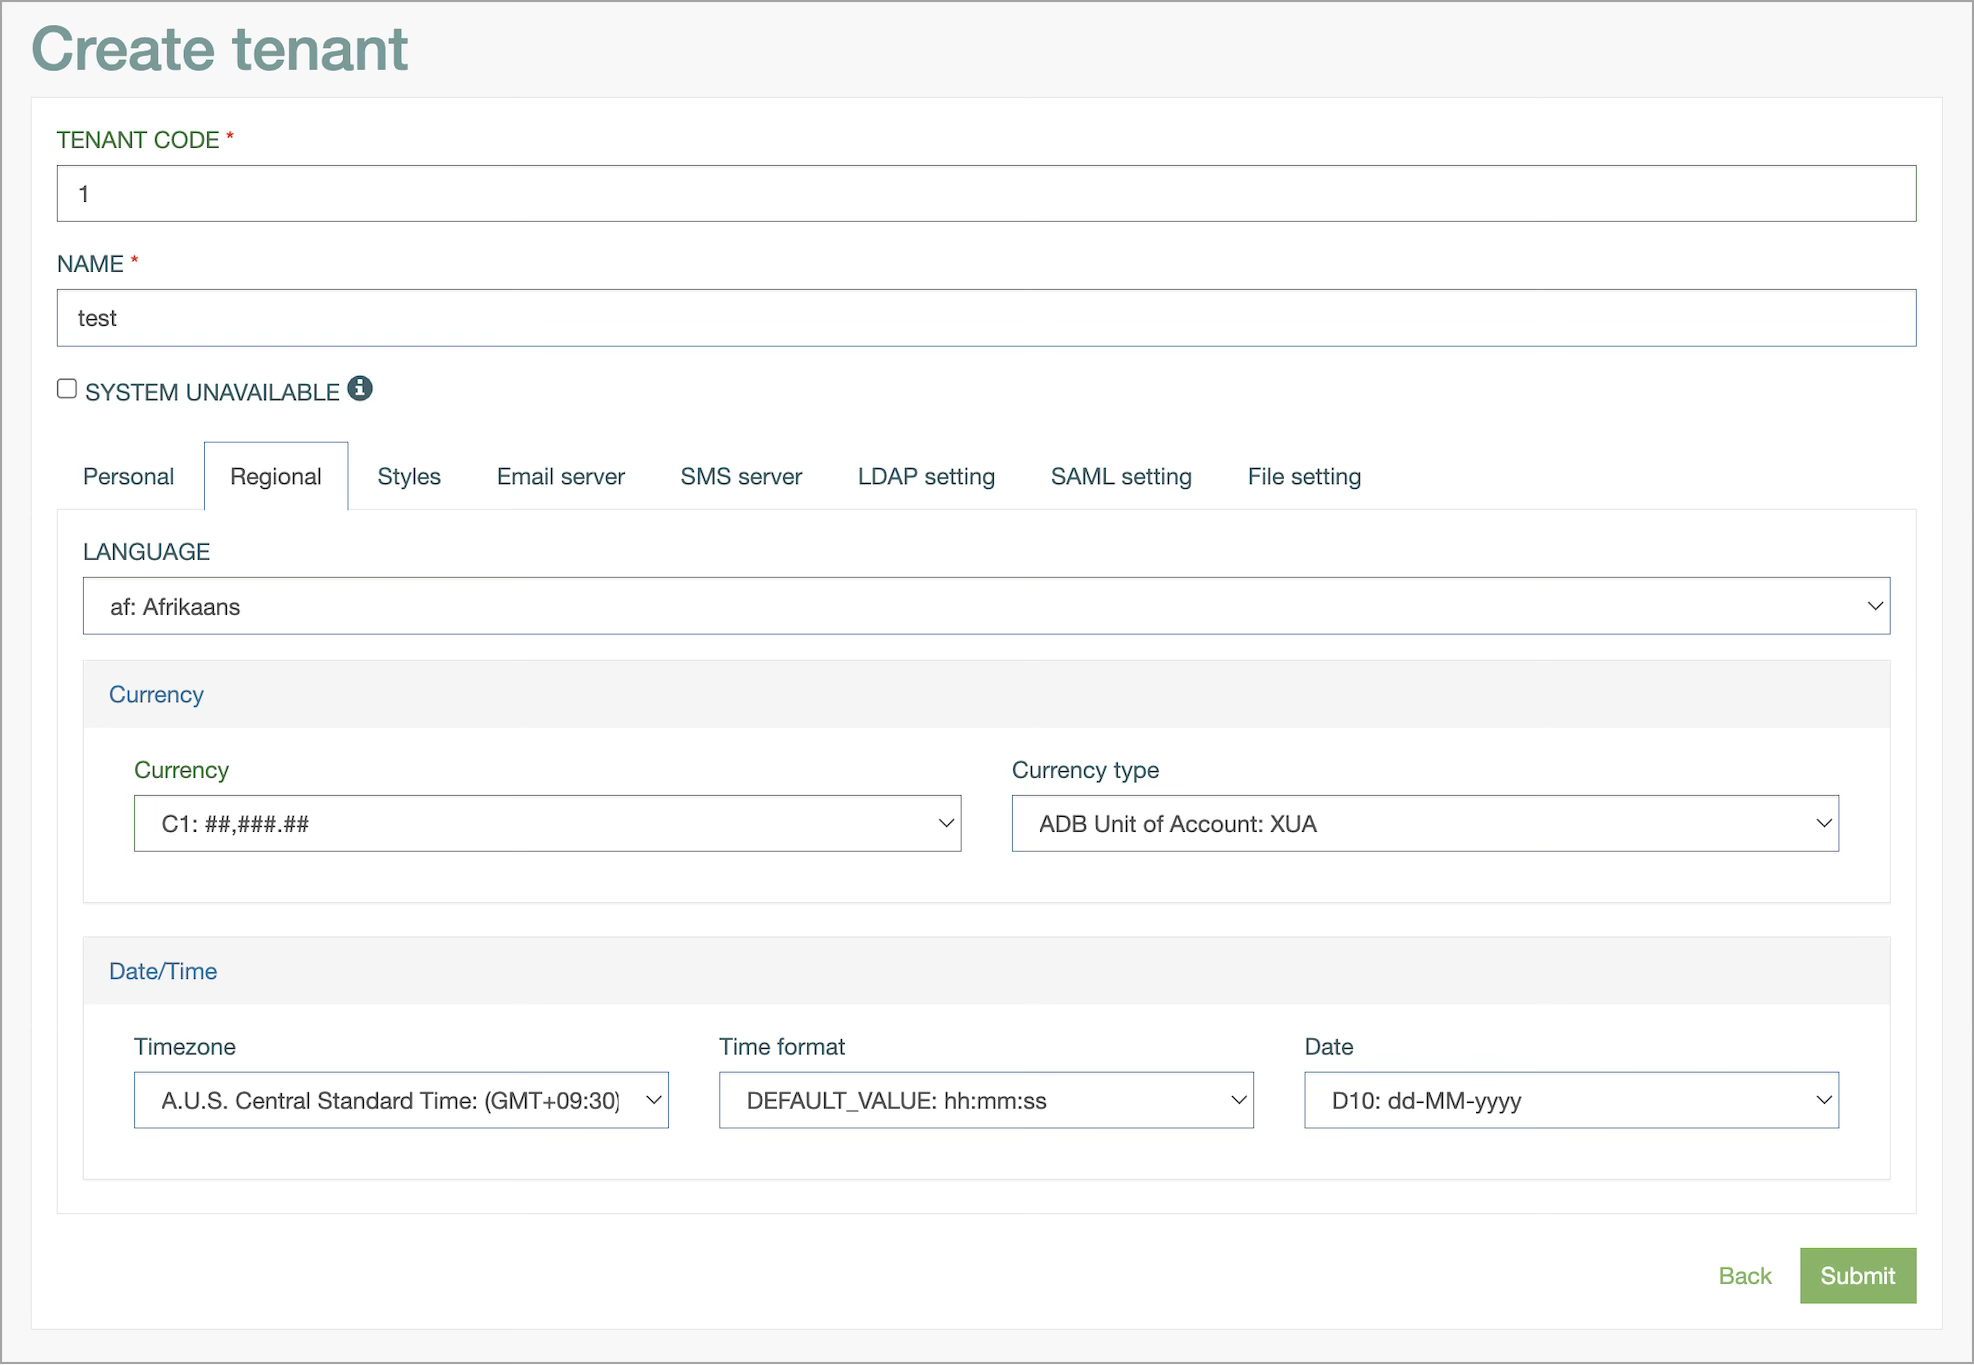
This tab consists of 3 sections where you can enter the following information:
Language:
Language - select the language from the list of available languages. This language will be used in the Render for the users of the current tenant. When you select the language, ensure that the translations for this language exist in the system.
In case there are no translations for the selected language, the default language will be used. Currently, the default language is English.
Please note that the selected language will not be applied to the email notifications. They are configured separately.
Currency:
The section defines the currency related information.
Currency Format - select the format, in which the currency will be displayed in the Render application.
Currency Type - select the currency type from the drop-down list.
Date/Time
The section defines the format of date and time that will be taken for users in the Render into account:
Timezone - select the time zone to apply user’s local time.
In the Render application, the Timezone parameter will be applied to fields with Date and Date/Time format type. The time in these fields will be recalculated based on the user's timezone after saving the record. I.e., each user will see the time for their timezone, and the database will store the time in GMT.
The system supports two timezone standards:static - the time difference is always the same, regardless of winter or summer time. For this type, the time should have the following form: (GMT< + or - >< number_of_hours >:00). For example, (GMT-05:00:00) Eastern Time (US and Canada).
dynamic (php standard) - the change to summer and winter time is automatic, depending on the date. The time description can be as follows: America/New_York.
For example, there are the following records stored in the database: "2024-01-22 17:55:12" and "2024-04-22 17:55:12".
For the user that uses the "(GMT-05:00:00) Eastern Time (US and Canada)" static time standard, the time will be displayed as follows: "22.01.2024 12:55:12" and "22.04.2024 12:55:12".
For the user that uses the "America/New_York" dynamic time standard, the time will be displayed as follows: "22.01.2024 12:55:12" and "22.04.2024 13:55:12".
Time Format - select the time format, in which the time will be displayed in the Render application.
Date Format - select the date format, in which the date will be displayed in the Render application.
The values of Language, Currency and Date/Time are available for the selection from the drop-down lists.
You can manage (create, update, delete) Language, Currency and Date/Time in the Lists functionality (System Data > Lists). For more information on how to manage the above-mentioned parameters, refer to the Create List section on the Lists page of the User Manual.
Styles tab
On the Styles tab, you can customize buttons, menu styles, change colors, sizes and other UI properties. The entered information on the Styles tab will be pre-populated to the details of a new user belonging to the current tenant. User always can change these parameters in the Render settings.
You can create a custom theme for the tenant and customize the following properties:
Buttons - define the style of buttons:
Default Button Style
Menu - define the style for the menu, placement, horizontal or vertical, colors, etc:
Default Menu Type
M1: No Drop Menu – all menu items and sub-items are displayed as equals sections at the top of the page, except the My Account section. The My Account section will be displayed as a drop-down menu with sub-items.
M2: One Level Drop Menu – all menu items are displayed as a drop-down menu with one level of sub-items at the top of the page.
M3: Two Level Drop Menu – all menu items are displayed as a drop-down menu with two levels of sub-items at the top of the page.
M4: One level main menu, two level tab menu – all menu items are displayed as drop-down menus with one main sub-item and two levels of sub-items at the top of the page.
M5: Menu with left navigation bar – all menu items are displayed as the list with drop-down menu on the left of the page, except the My Account section. The My Account section will be placed at the top of the menu list. In this section the Username will appear. The sub-items such as Settings, Change Password and Logout will be shown as the
 ,
,  ,
,  icons, correspondingly.
M6: No Menu – all menu items will not be displayed on the screen in the Render.
M7: No Menu – keep account button – all menu items will be disabled on the screen in the Render, except the My Account section. The My Account section will be displayed as its sub-items such as Settings, Change Password and Logout and will be placed at the top left corner of the page.
Menu background color
Menu text color
Highlight Color selection
Use background linear gradient
Gradient rotation
First color
Second color
Body - define the style of the Render working area where the search results are displayed:
Border size
Border color
Background color
Link color
Text color
Info color
Use background linear gradient
Gradient rotation
First color
Second color
Sections - select the styles for the tab sections:
Section Border Size
Border color
Section header color
Section header background
Section background color
Use background linear gradient
Gradient rotation
First color
Second color
Screen Presentation - define the appearance of the screen UI elements:
Fields View - define the visual style of input fields.
Available options:Flat - a flat style without shadows.
3D (with shadow) - a three-dimensional style with shadow
Buttons View - define the visual style of buttons.
Available options:Flat - flat buttons without shadows.
3D (with shadow) - buttons with a three-dimensional effect and shadow.
Header - define the styles for the headers of the screen:
Header border size
Header color
Header border color
Search Field - define the styles of the search input field:
Search border color
Highlight of selected search
Fields - specify the styles of the fields:
Field borders color
Highlight of selected field
Tab - define the styles of tabs:
Tab selected color
Tab unselected color
Message line - define the styles of message line:
Message line color
Message line background
Chart color - specify the styles of the diagrams and charts:
First charts color
Second charts color
Third charts color
Fourth charts color
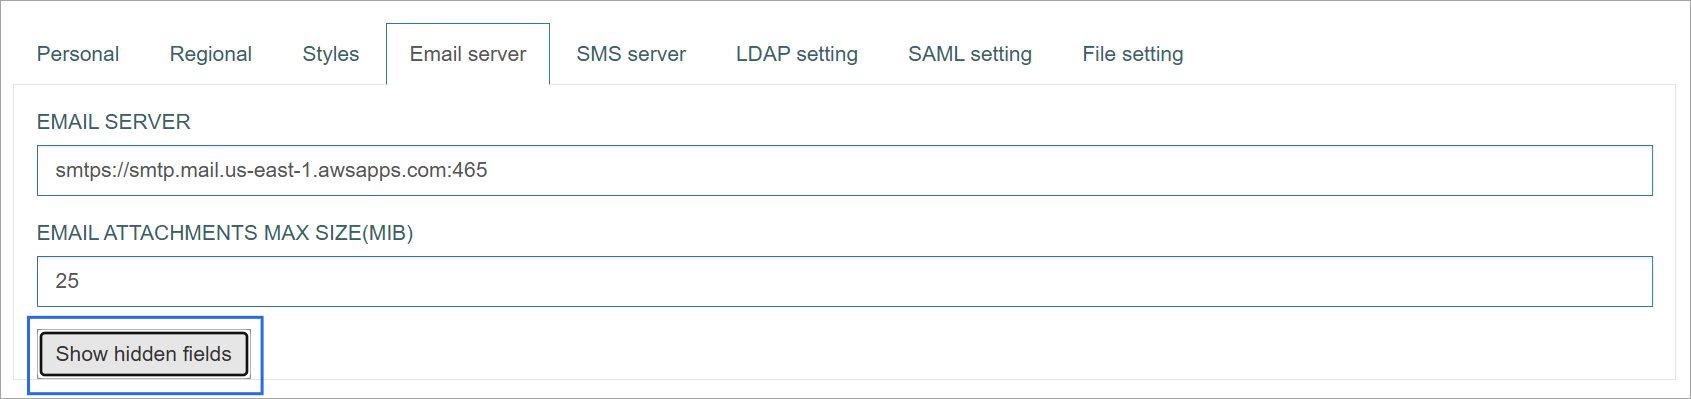
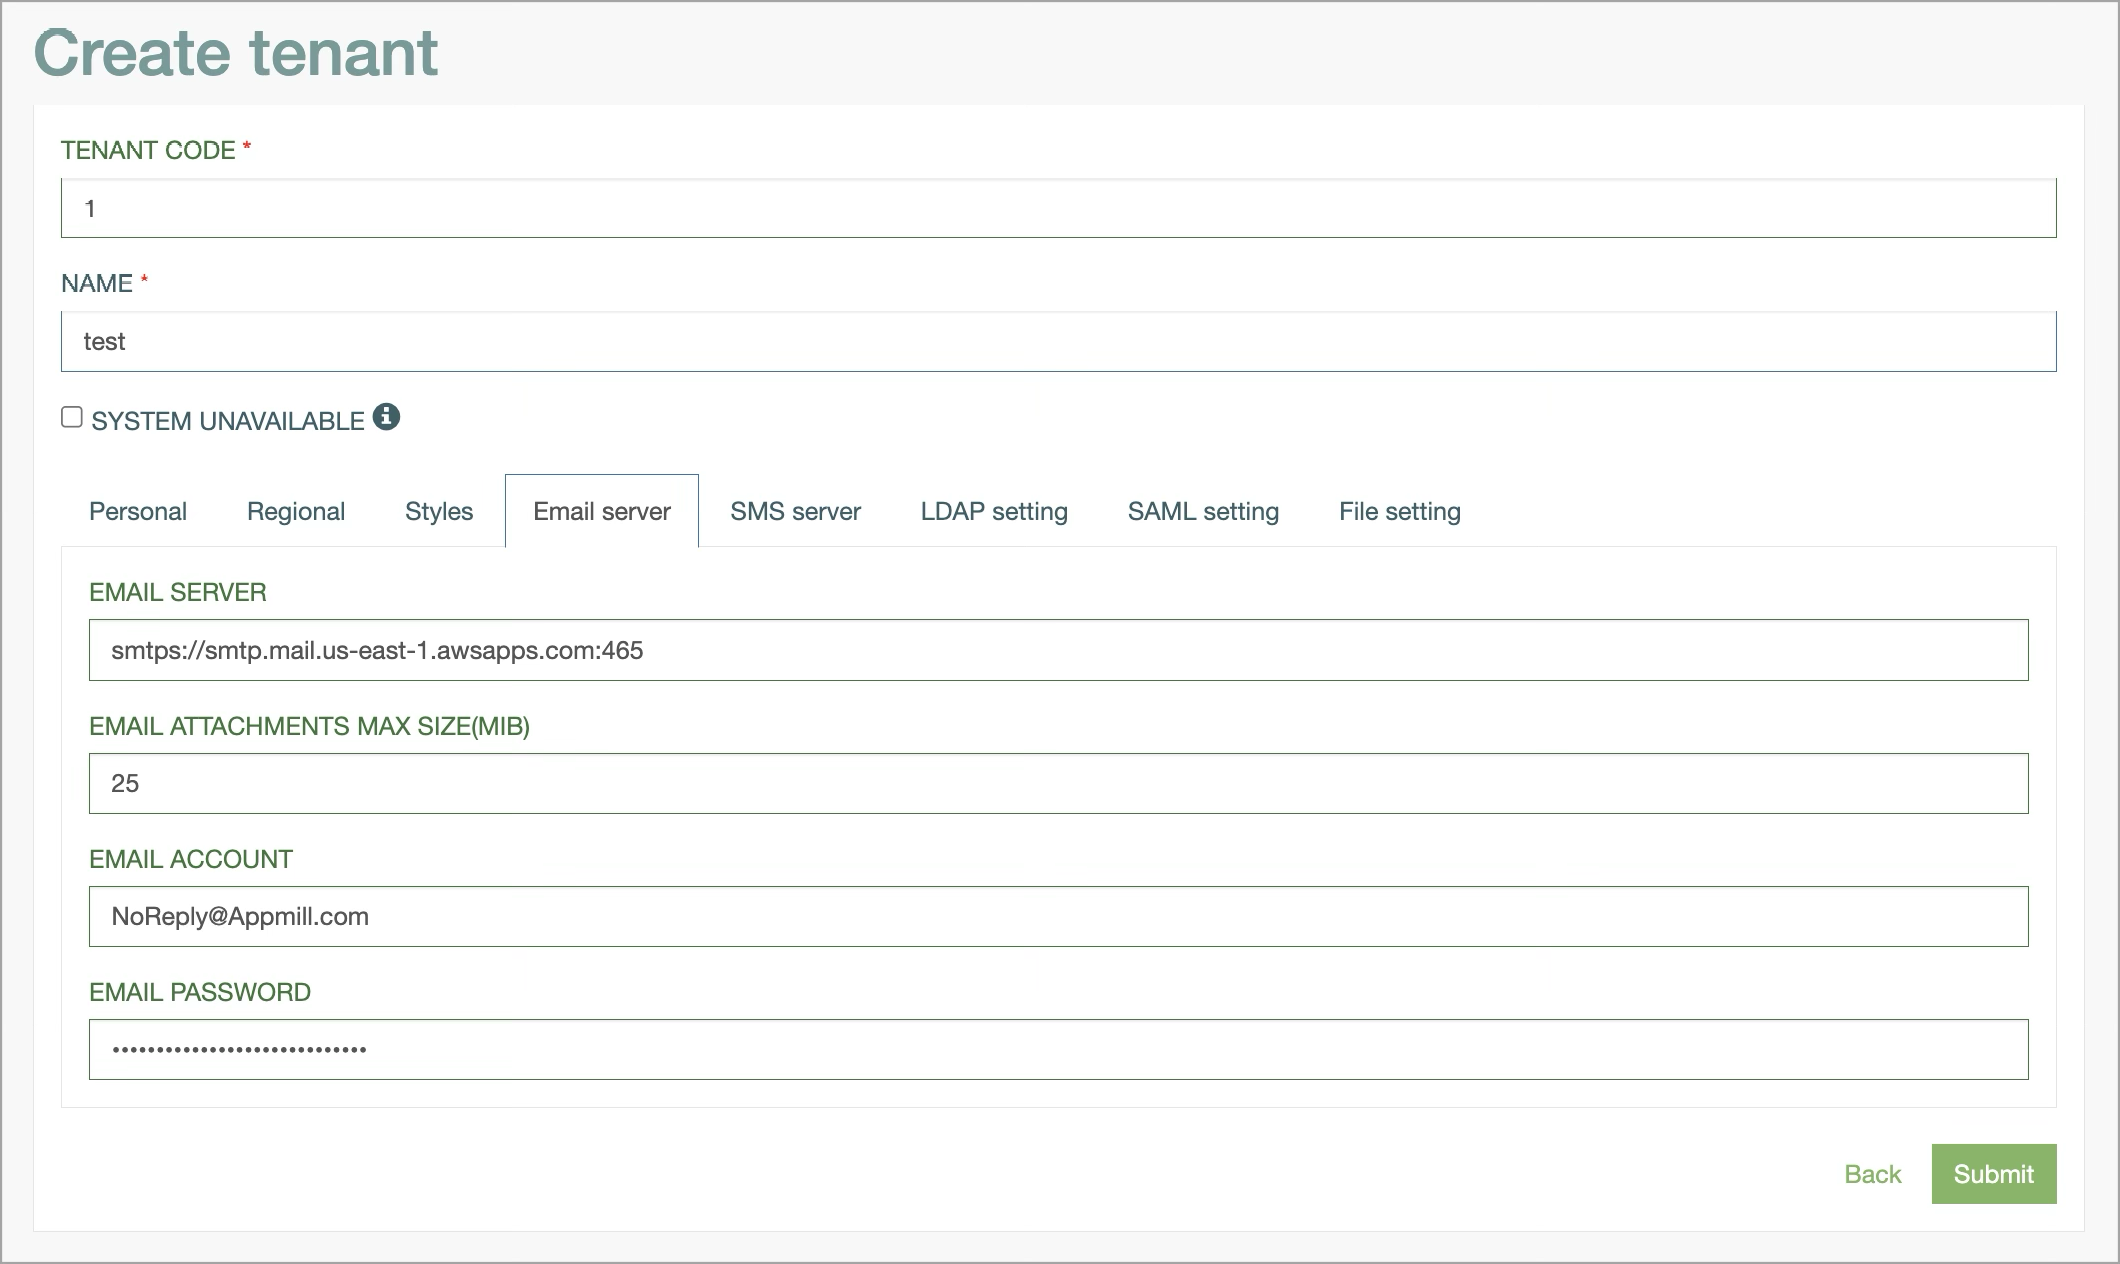
Email Server tab
On this tab, you can set up the Email server settings.
The Email server is used to receive and send email to users. The main point of using the Email server is delivering the notifications in the right direction and ensuring the security of data transmission.
The Email server is commonly used to organize the internal communications for the users in one company.
Please note that the most fields are hidden on UI in the Tenant Update mode. To view and check these fields, you need to click the Show hidden fields button and enter your account password in the opened pop-up window.
Fill in the following fields:
Fill in the following fields:
Email server - enter a mail transfer agent used for receiving incoming and forwarding outgoing email messages. The email server is used to automatically send notifications in email format.
Email Attachments Max Size (MiB) - specify the maximum size of files allowed to be attached to emails. The default value is 25 MiB.
Email account - enter the registered email address from which notifications will be sent by the AppMill service.
Email password - enter the password used to secure the email account. For the security of the database, the password is stored in encrypted form.
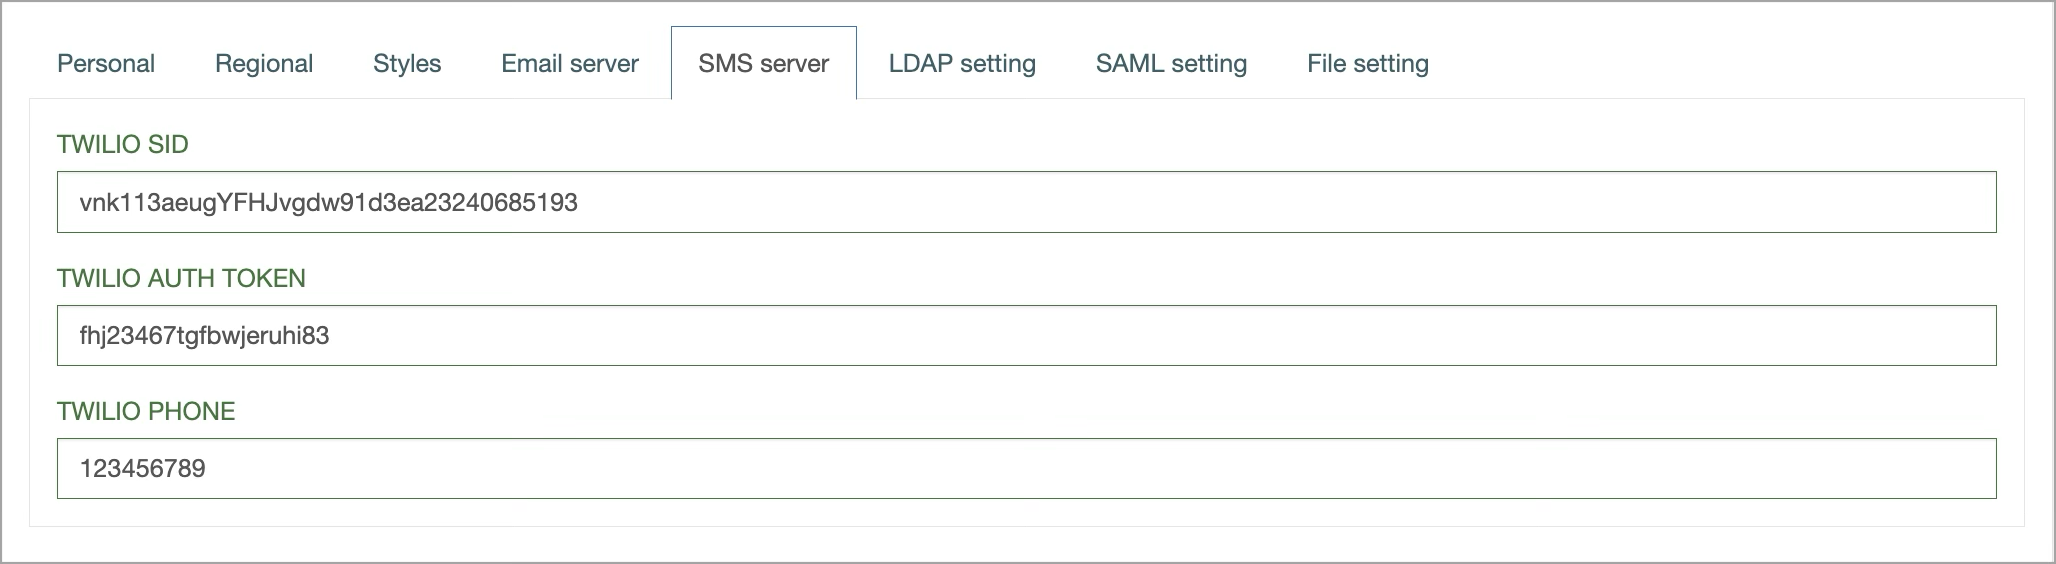
SMS Server tab
You can configure SMS Server settings in order to send or receive text messages in the form of Short Message Service (SMS) transmissions between local and/or international telecommunications networks.
Please note that the most fields are hidden on UI in the Tenant Update mode.
To view and check these fields, you need to click the Show hidden fields button and enter your account password in the opened pop-up window.
Fill in the following fields:
Twilio SID - enter a unique ID for messages created by Twilio’s API. It is a 34 character string that starts with “SM…” for text messages and “MM…” for media messages.
Twilio Auth Token - enter a security Auth token created by Twilio.
The SID and Auth Token values are used to authenticate API requests.
Twilio Phone - enter a phone number.
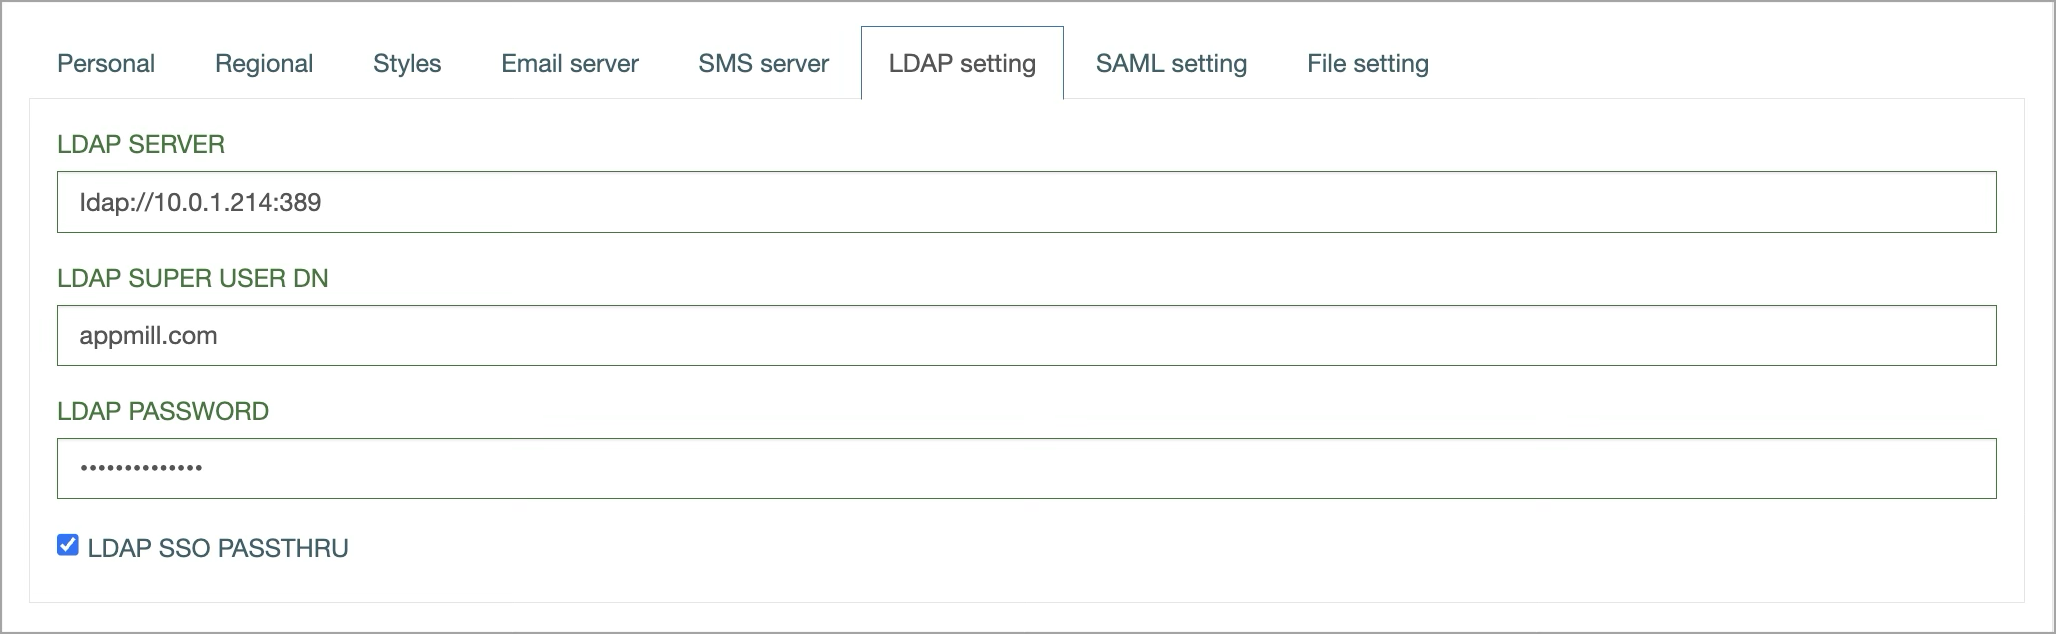
LDAP Setting tab
You can configure LDAP authentication in the LDAP Settings tab.
LDAP is used as the process of verifying usernames and passwords in the Render application. According to the LDAP authentication, the AppMill Clients connects to the AppMill Service, which creates an API request to a special LDAP server. After that, the LDAP server responds to the AppMill service if the user credentials are valid or not.
Please note that the LDAP Super User DN and LDAP Password fields are hidden on UI in the Tenant Update mode.
To view and check these fields, you need to click the Show hidden fields button and enter your account password in the opened pop-up window.
Fill in the following fields:
LDAP Server - enter the LDAP server URL address. The LDAP server provides the possibility to store data in the LDAP database.
LDAP Super User DN - enter a username in the username@domain format. For example, testuser@example.example.
LDAP Password - enter a password.
LDAP SSO Passthru - select the check box to enable the single sign-on functionality. I.e., if users log in to one of the AppMill applications, they do not have to log in to other applications. For example, logging in to the Architect application will access the Render application without any logins for users.
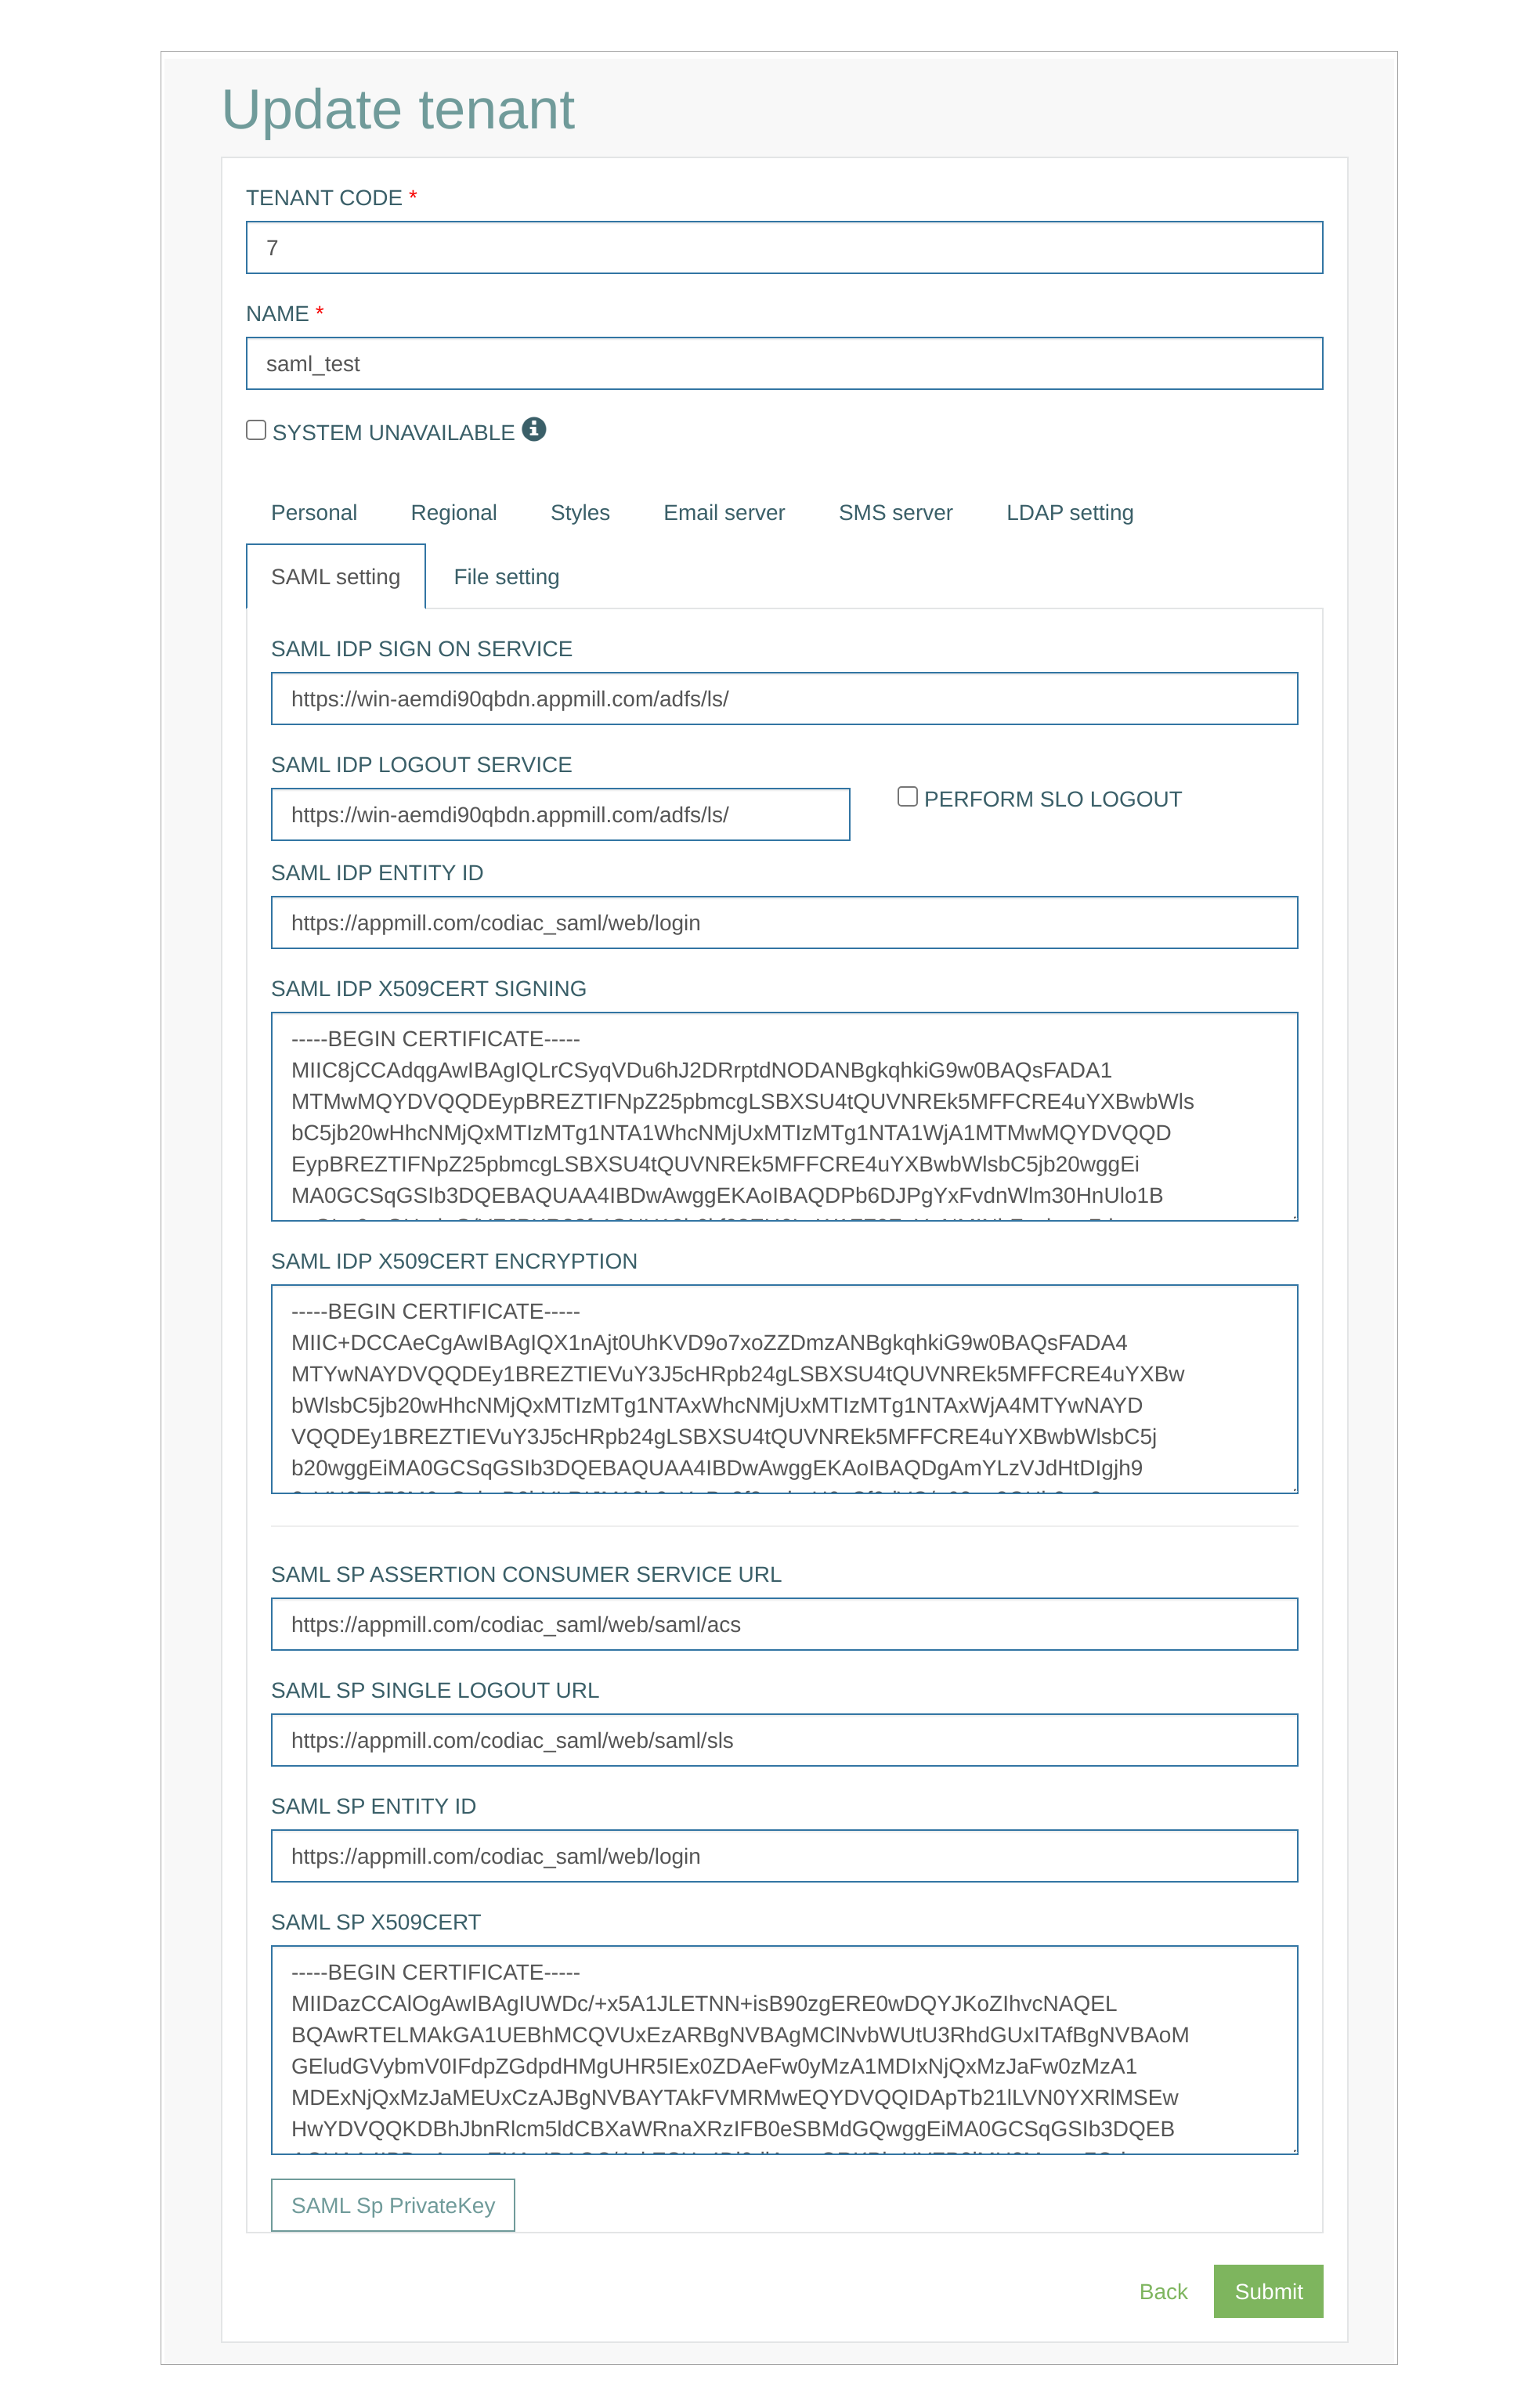
SAML Setting tab
You can configure SAML authenticating method on the SAML Settings tab.
SAML is an XML-based standard for web browser single sign-on functionality. Using SAML allows users authenticate once with their credentials to access multiple services. For example, logging in to the Render application will access the Architect application without any logins for users.
All SAML settings have been moved to the Architect application UI and have a higher priority than the same parameters specified in the <render_app_directory>/config/saml.php file. Fields such as SAML SP Assertion Consumer Service URL and SAML SP Single Logout URL now need to be filled manually. Previously, these paths were automatically populated by the Render application.
Please note that the most fields are hidden on UI in the Tenant Update mode.
To view and check these fields, you need to click the Show hidden fields button and enter your account password in the opened pop-up window.
Fill in the following fields:
SAML IDP Sign On Service - enter a specific endpoint or URL address that will be used for signing on. This specific endpoint or URL address is provided by an Identity Provider (IdP) in a SAML authentication process.
SAML IDP Logout Service - enter a specific endpoint or URL address that will be used for logout. This specific endpoint or URL address is provided by an Identity Provider (IdP) in a SAML authentication process.
Perform SLO Logout – select this checkbox to log out the user from the IdP before redirecting them to the logout page. Deselect the check box to redirect the user to the logout page without logging out from the IdP.
SAML IDP Entity ID – enter the unique identifier for the Identity Provider (IdP) used in SAML authentication. This value is required for establishing trust between the IdP and the Service Provider (SP).
SAML IDP X509cert Signing - enter a SAML signing certificate that is used in the SAML responses to verify the authenticity of the SAML response.
SAML IdP X509cert Encryption - enter a SAML encryption certificate that is used in SAML responses to verify the authenticity of a SAML response. This field is optional.
SAML SP Assertion Consumer Service URL – enter the assertion consumer service URL. This is the URL where the SAML authentication response will be sent after a user successfully logs in. Users must manually input this URL.
SAML SP Single Logout URL – enter the single logout service URL. This parameter is auxiliary and is not passed to the IdP during login or logout of the Render application. It is only used in the Render UI for configuring the IdP redirection URL.
When configuring the IdP, you need to specify the URL to which the redirection will be performed. You can specify the URL you need or use the static Logout page provided in the Render application like <render_url>/web/saml/sls.SAML SP Entity ID – enter the unique identifier for the Service Provider (SP). This value ensures that the IdP recognizes the SP as a valid entity.
SAML SP X509cert - enter a SAML certificate that is used in the SAML responses to allow the Service Provider (SP) to verify the authenticity of a SAML response. This field is optional.
SAML SP PrivateKey - click this button to open a SAML SP PrivateKey modal window where you can enter a cryptographic private key used by the Service Provider (SP) in a SAML authentication process.
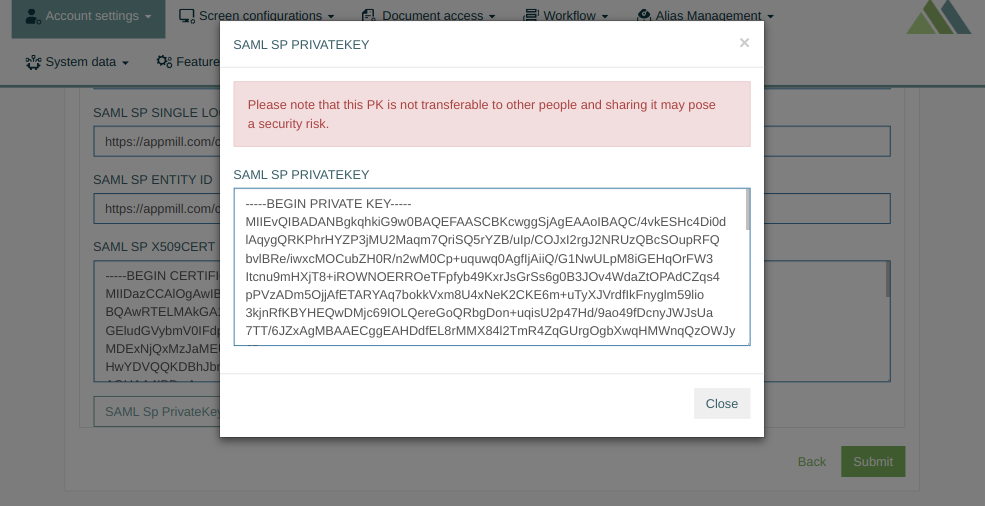
This SAML SP Private Key is used in conjunction with the SP's X.509 certificate to perform several security functions, including decryption and digital signing. This field is optional.
Please note that the SAML SP Private Key is not transferable to other people and sharing it may pose a security risk.
All the parameters and settings described above can be specified in the <render_app_directory>/config/saml.php file. But the parameters set up on this SAML Settings tab of the Tenant have a higher priority than the same parameters specified in the <render_app_directory>/config/saml.php file.
SAML Logout Page
You can modify images and styles for the Logout page by updating the parameters within the loginConfig block in the params-local.php file under the following path: <render_app_directory>/config/params-local.php:
'loginConfig' => [
    'body_background_color' => '#fff',
    'logo' => 'img/favicon.png',
    'header_background_color' => '#f8f8f8',
    'header_menu_color' => '#5ff',
    'header_menu_highlight_color' => '#709B9A',
    'header_menu_hover_color' => '#709B9A',
    'header_menu_bottom_border_color' => '#709B9A',
    'btn_primary_highlight_color' => '#7eb55f',
    'default_menu_image' => 'img/logo.png',
    'login1_background_image' => 'img/login-logo.png',
]
The Logo specified in the Header settings of the Styles tab of the Tenant has a higher priority than default_menu_image parameter. The layout of the current Logout page looks as follows:
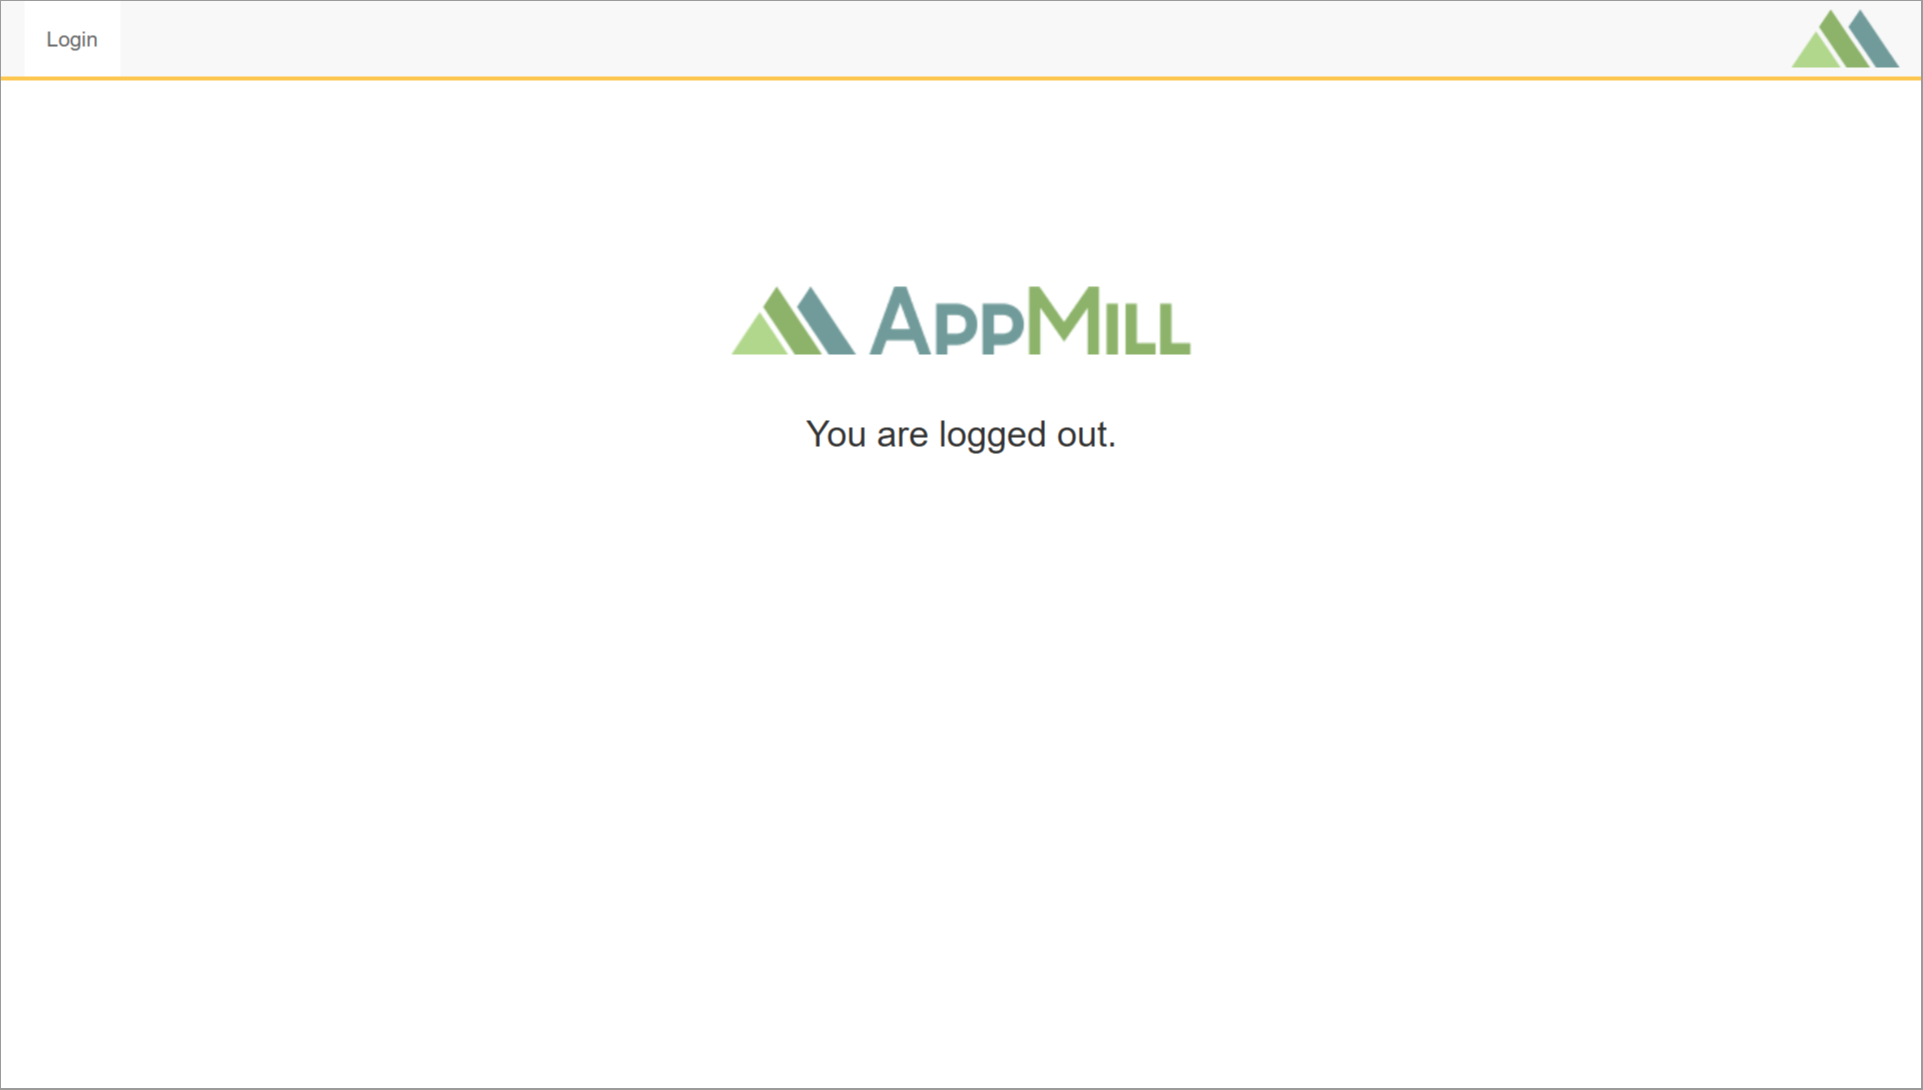
The text "You are logged out." displayed on the Logout page cannot be changed.
File Setting tab
On the File Setting tab, you can specify the size of the files to be downloaded using the TPC Custom Endpoint functionality.

Fill in the following field:
Complete File Download Max Size - enter the value (in MiB) of the file size that is allowed to be downloaded.
If the file size exceeds the specified value, the downloading will not be allowed.
Update Tenant
To edit a Tenant, click the Edit (pencil) icon for the selected tenant entry in the search results table. The Update tenant page opens for editing.
After making the necessary changes, click the Submit button. To return to the Tenants Overview page, click the Back link.
Delete Tenant
To delete a Tenant, click the Delete icon on the Overview page for the selected tenant. The confirmation pop-up will appear where you can confirm or cancel the action.