Access
Click Features > Import Files to access the functionality for uploading the CSV files.
Overview
The Import Files functionality provides the possibility to upload the files with the changes to be applied to the database tables. The uploaded files will be stored first in the API Server and then imported to the database.
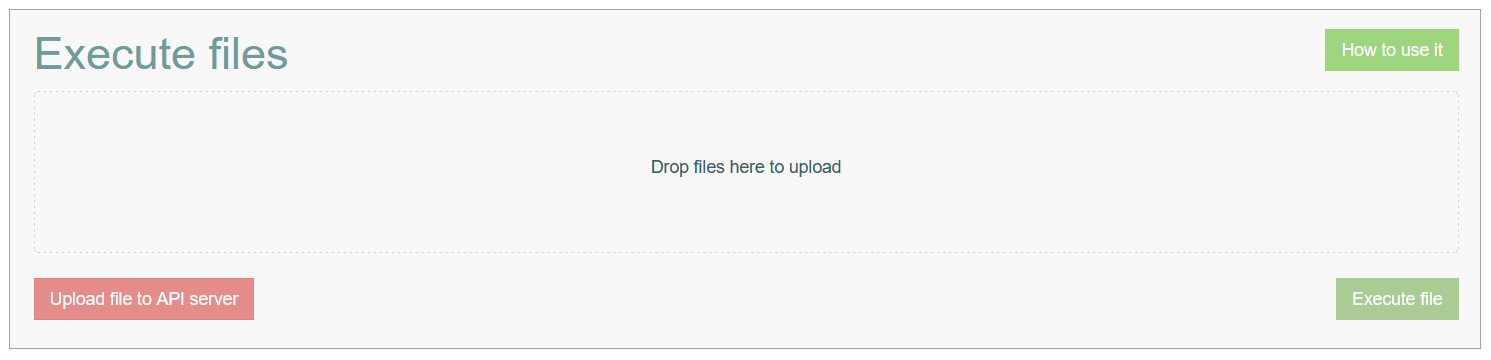
There is a helpful hint with the instructions on how to use the Import Files functionality. To open the instruction, click the How to use it button in the right upper corner. The pop-up window opens:
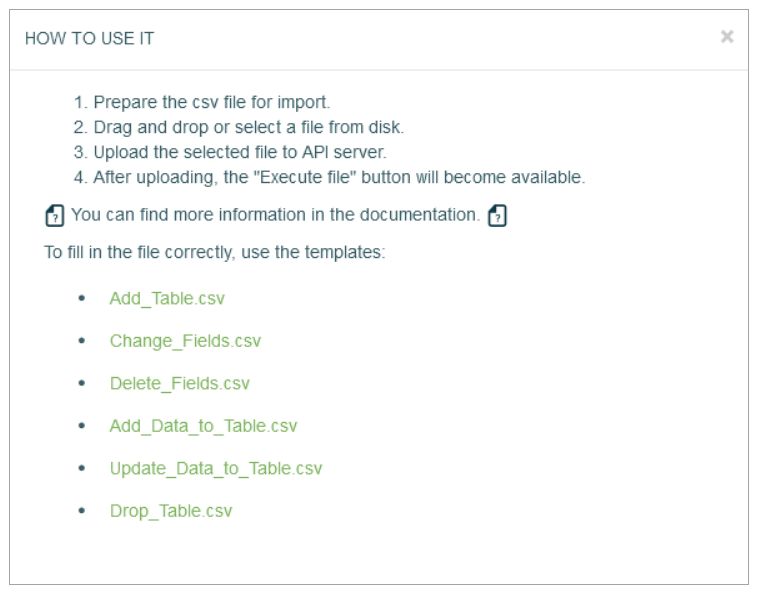
The pop-up describes the steps to import the files and the CSV templates. From this pop-up window, you can open the User Manual page to see more details. You also can download any import template and use it as an example of the Import file.
Let’s have a closer look at the CSV file structure and steps to import the files in sections below.
CSV File Structure
A CSV file is a file in text format that is used to display the table data.
The CSV file has the following structure:
Header section
Data section
Header section
The Header section starts with the Header:Start and ends with the Header:End key words.
The Header section parameters should have a semicolon-separated structure: Parameter:VALUE, where
Parameter - is a parameter name, and
VALUE - is a parameter value.
The Header section contains the following parameters:
Table definition - the parameter that displays settings for the table operations or import process. This parameter should be entered only once in the Header section.
The Table has the following parameters:Table:VALUE, where VALUE is the table name. For example, “Table:Test1”.
Drop:VALUE - the parameter that defines whether the table should be dropped or not. The possible values are Yes or No. For example, “Drop:No”.
UpdateDuplicates:VALUE - the parameter that defines whether the duplicates should be updated or not during the data addition from the data section. The possible values are Yes or No. For example, “UpdateDuplicates:Yes”.
ColumnChangeRun:VALUE - the parameter that defines whether the columns should be changed or not. The possible values are Yes or No. For example, “ColumnChangeRun:Yes”.
Notify:VALUE - the parameter that defines whether the notification of the operation execution result should be sent via email. The possible value is Email. For example, “Notify:Email”.
Skip this parameter if notification is not required.
Column definition - the parameter that displays settings for a column and its operations.
A Column definition should be one per line.
The Column has the following parameters:Column:VALUE, where VALUE is a column name. For example, “Column:DataField”.
Type:VALUE - the column type. The possible values are Alpha, Number, or Document. For example, “Type:Alpha”.
Length:VALUE - the column type length, valid integer value or NA. For example, “Length:10”.
Key:VALUE - the parameter that defines whether the column should be presented in the PK set or not. The possible values are Yes or No. For example, “Key:Yes”.
Change:VALUE - the type of the operation on the column. The possible values are Add, Delete, or Change. For example, “Change:No”.
If the parameter ColumnChangeRun in the table definition section is set to No, the Change:Value parameter will be skipped.
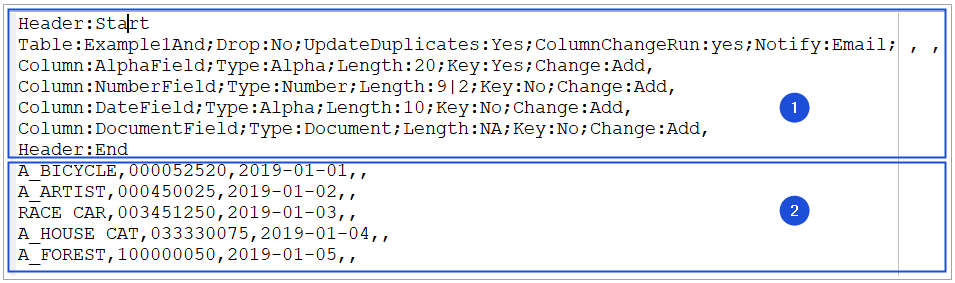
For example, the Header section contains a table and three columns defined as follows:
Header:Start
Table:Test;Drop:No;UpdateDuplicates:Yes;ColumnChangeRun:Yes;Notify:Email,
Column:AlphaField;Type:Alpha;Length:20;Key:Yes;Change:Add,
Column:NumberField;Type:Number;Length:5|2;Key:No;Change:Add,
Column:DataField;Type:Alpha;Length:10;Key:No;Change:Add,
Column:DocumentField;Type:Document;Length:NA;Key:No;Change:Add,
Header:End
Data section
The Data section contains the data below the Header:End key words.
Each column in the Data section must contain valid values and types, which are determined by the column definitions specified in the Header section. This ensures consistency and accuracy in data representation and processing.
For the above-described Header section, the Data section can have the following data display:
Text A,12345.12,2022-01-01,,
Text_ABC,12346,2023-04-05,,
Text_B,98765.4,2024-02-25,,
Separating characters
The characters that can be used in the CSV files to separate data in the table are as follows:
: - is used to separate the parameter name and value.
; - is used to separate parameters in the table or a column.
, - is used to separate the lines or cells.
| - is used to display that the number is non-integral and define the number of decimal places before and after the decimal point. For example, for the column with the “Length:5|2” parameter the data can be as follows “12345.12”.
Import Files Steps
To import files, perform the following steps:
Prepare the CVS file that should be imported. You can use the provided template.
Drag and drop a file into the file area. Or select a file from your computer by clicking the file area and selecting the file on your machine.
When the file is selected, the Upload file to API server will be activated.
Click the Upload file to API server button to first upload the selected file to API server.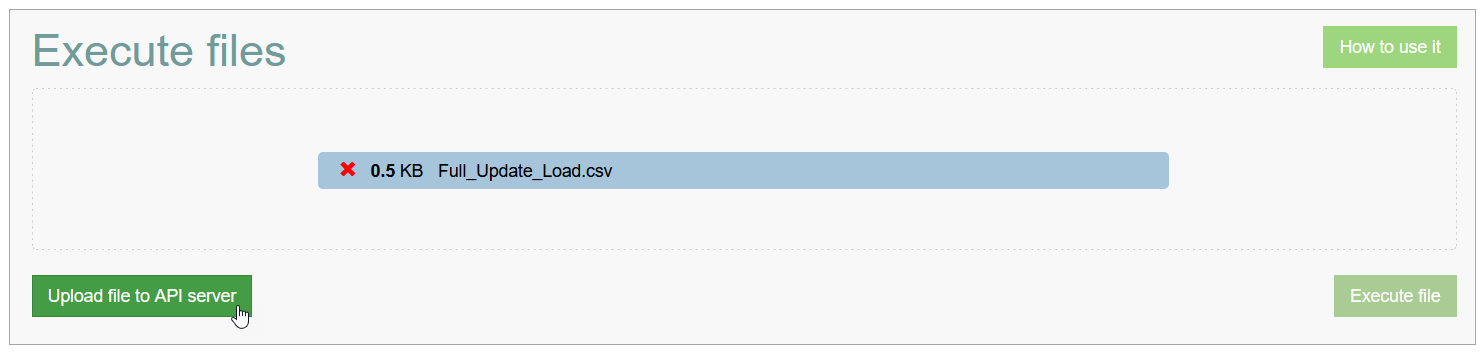
When the file is uploaded, the Execute file button will be activated.
Click the Execute file button to finally import the uploaded file.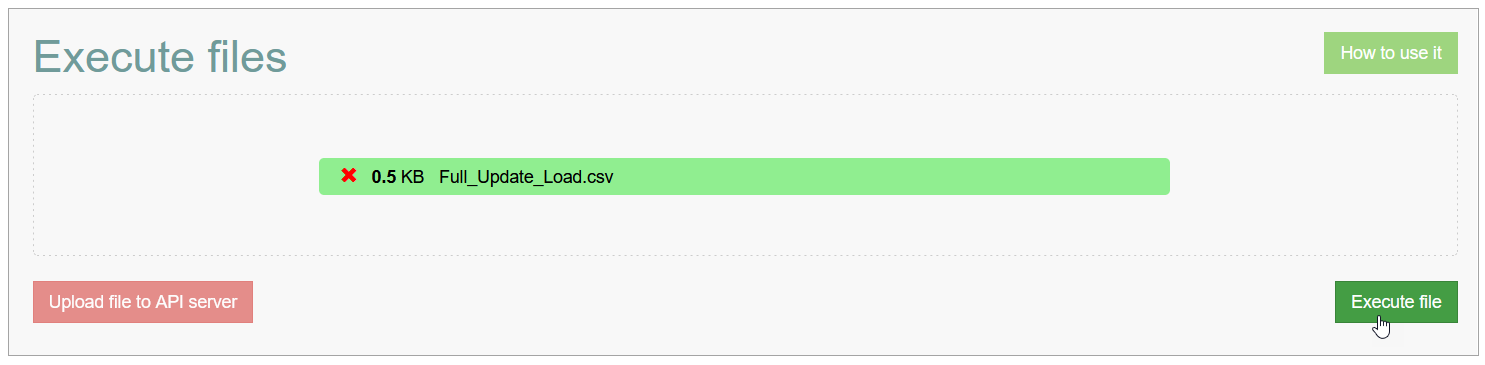
All documents imported here are automatically assigned to the System Document Family.
In order to work with the Import files feature, user must have full rights to work with the "system" document category. To do this, you need to add records to the c_Device, c_document_family, c_document_group tables.
After successful import execution, the corresponding message will be displayed. In case of an error, you will see the error message with the explanation of the reason.