Access
Click System data > Internationalization to support application localization and to handle translations for error, information and GUI messages.
Access
Overview
The Internationalization functionality provides the possibility to make it easier to localize an application without adjusting the source code. You can modify any message in the application UI to support any required locale.
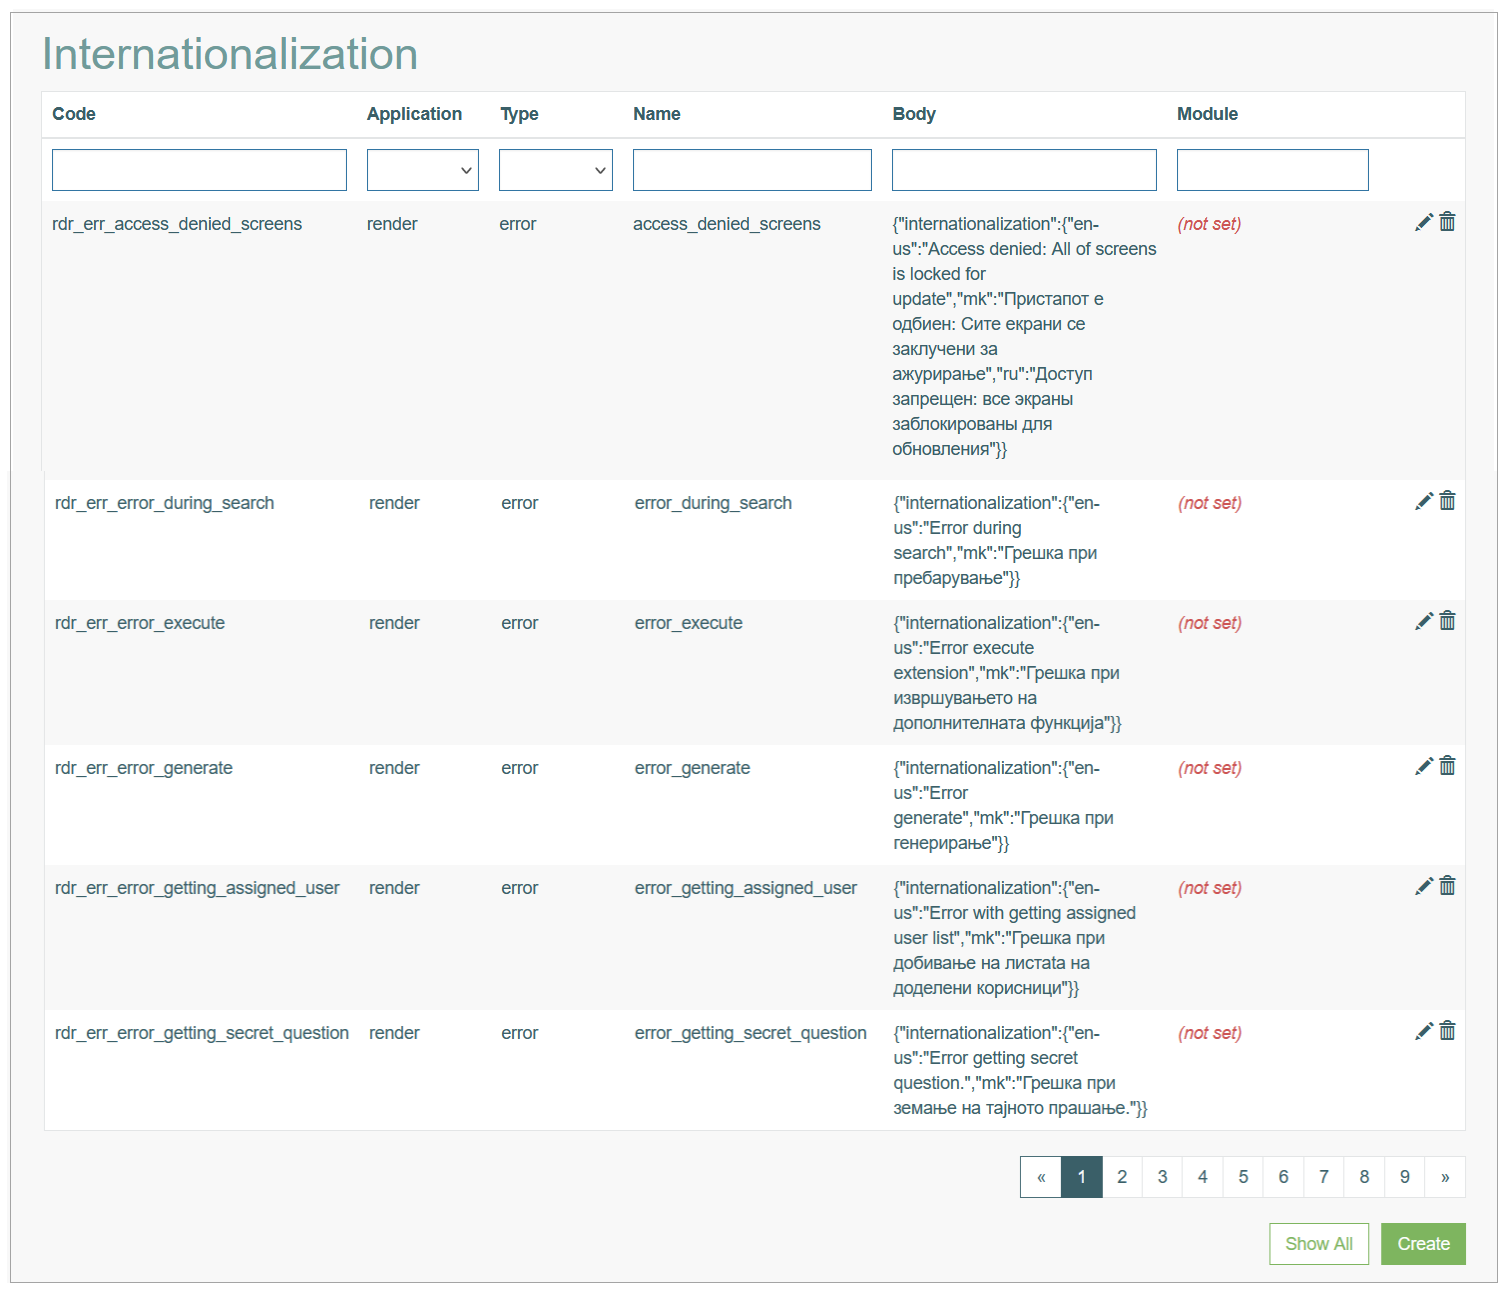
Search
You can search for a error message and to filter the search results. For this, use the search filter and click the Enter key or on any screen place. The screen displays search results if found. To have an overview of all access rules, leave the filter empty and click the Enter key or on any screen place.
Sort Search Results
You can sort search results by the columns in ascending (arranged from the smallest to the largest number and alphabetically for letters) or descending (arranged from the largest to the smallest number and in reverse alphabetical order for letters) order. Columns' names, by which search results can be sorted, are indicated with arrows. Click the appropriate column name to sort search results by it.
Navigate
Use the navigation bar at the bottom of the Overview page to navigate through the pages. Click the appropriate page number to open it. Use the Arrow icons to go to the next page or the previous page of the Search Results list accordingly.
Create Internationalization Entry
Click the Create button on the Overview page to create a new internationalization entry and add required translations. This opens the page in creation mode.
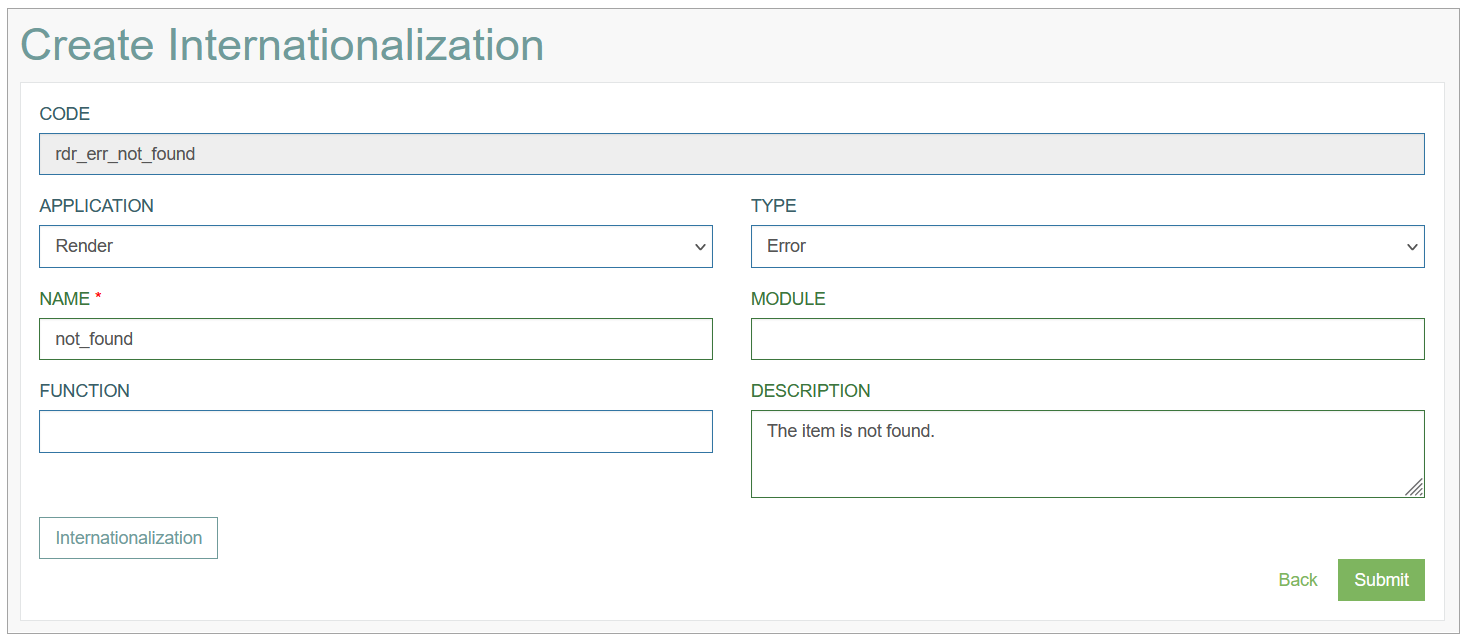
Fill in the following fields for general information:
Code - an identification code, the source translation code that will be generated automatically when you add translations to the entry. The code is built based on application, type and name values.
Application - select the application where the translations should be applied. Currently, we support the internationalization in the following applications:
Service
Builder (Architect)
Render
Desktop
Type - select the type of message:
GUI
Error
Information
Name - specify the name of the message. This name will be used in the generated code. This is required field.
Module - define the module, if needed.
Function - define the function, if needed.
Description - enter the clear and short description.
Internationalization
After filling in the general details, click the Internationalization button.
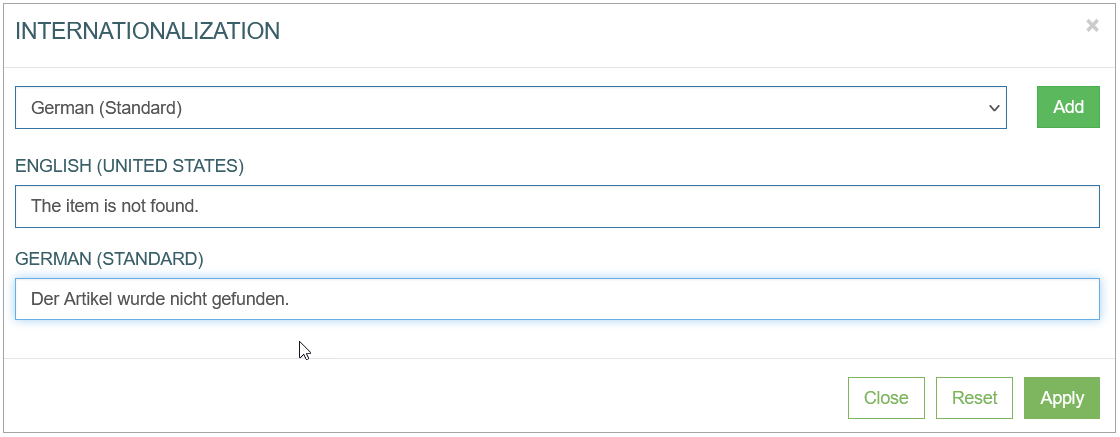
In the opened pop-up window, you can add the required locale and the corresponding translations:
Select the language and click the Add button.
In the added input field, enter the message for the added locale.
Click the Submit button to save the entered data.
Click the Reset button to clear all translations from the Internationalization pop-up.
Click the Close button or Cross icon to close the pop-up window.
The added or updated translations will be applied in the Render not immediately, but only after the next login into the Render application.
After changes are done, click the Submit button to save the entered data. Click the Back button to go back to the Overview page without saving the data.
Update Internationalization Entry
To update the existing translations and an Internationalization entry, click the Edit (pencil) icon for the selected entry on the Overview page. The Update Internationalization page opens for editing.
Make the necessary changes and click the Submit button to save them. To return to the Overview page, click the Back link.
Delete Internationalization Entry
To delete an Internationalization entry, click the Delete icon on the Overview page for the selected entry. The confirmation pop-up will appear where you can confirm or cancel the Delete action.