Access
Click Document Access > Document Group to access the functionality for managing documents access rights.
Table of Contents
Overview
The Document Group functionality provides the possibility to control the access permissions and rights to perform actions on documents (files) uploaded on the Render screens. You can define whether it’s allowed to view, upload, edit, delete documents for the particular category(ies).
Search
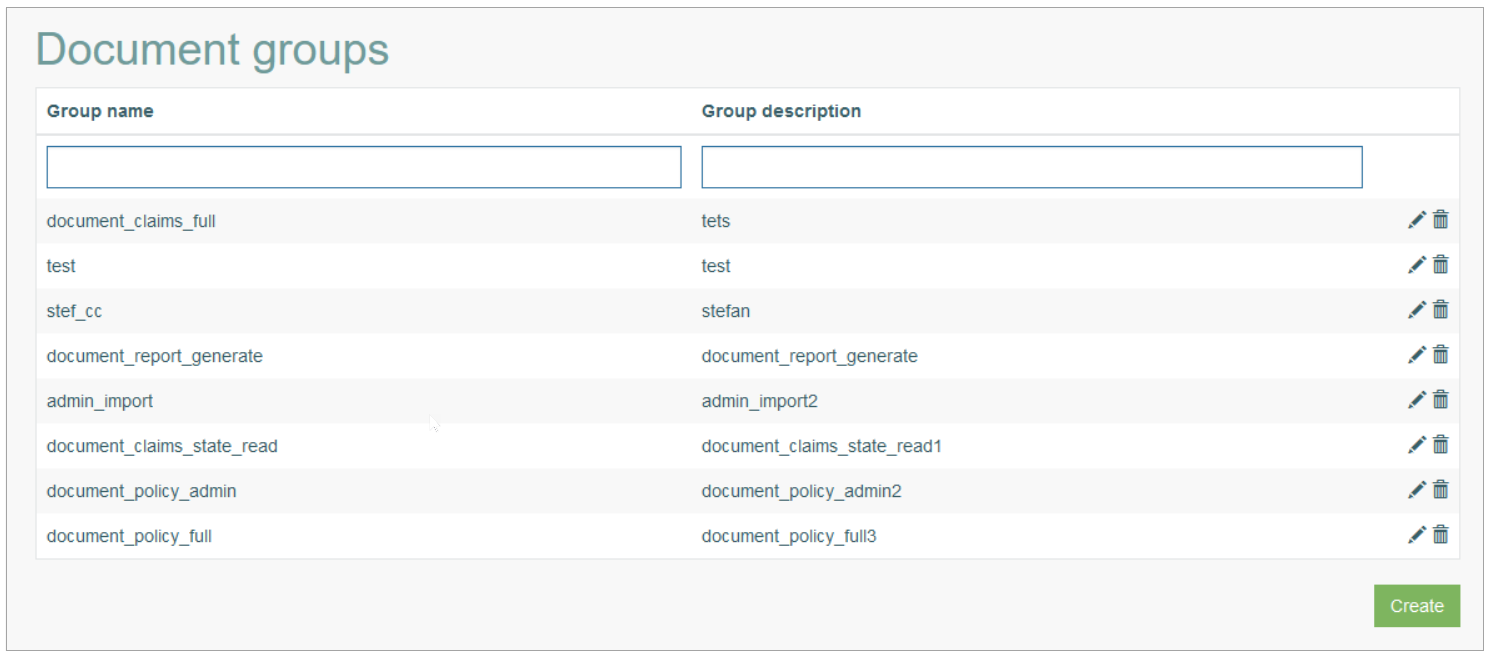
You can search for a particular document group or filter search results. For this, use any of the search filters such as Group Name or Group Description, and click the Enter key or on any screen place. The screen displays search results if found. To have an overview of all document groups existing the system, leave the filters empty.
Navigate
Use the navigation bar at the bottom of the Overview page to navigate through the pages. Click the appropriate page number to open it. Use the Arrow icons to go to the next page or the previous page of the search results list accordingly.
Create Document Group
Click the Create button on the Overview page to create a new Document Group. This opens the page in creation mode.
On the opened page, fill in the following fields:
Group Name – enter a name for a Document Group. The field is required.
Group Description – enter a short and clear description for the Document Group.
Document Family - select a Document Family from the drop-down list of existing document families.
Document Category - in the select box, you can select a category (or multiple categories). The list of available categories is restricted based on the Family you selected in the previous field.
Access Rights - select the corresponding radio-button for the level of access rights you’d like to grant. The following options are available:
Full Access - allows users to perform all the actions (read, write, modify, delete) on documents.
Read Only - allows users to view documents without the ability to edit or delete them.
Access is Denied - restricts the access to documents.
Admin Rights - allows users to perform any possible actions on documents.
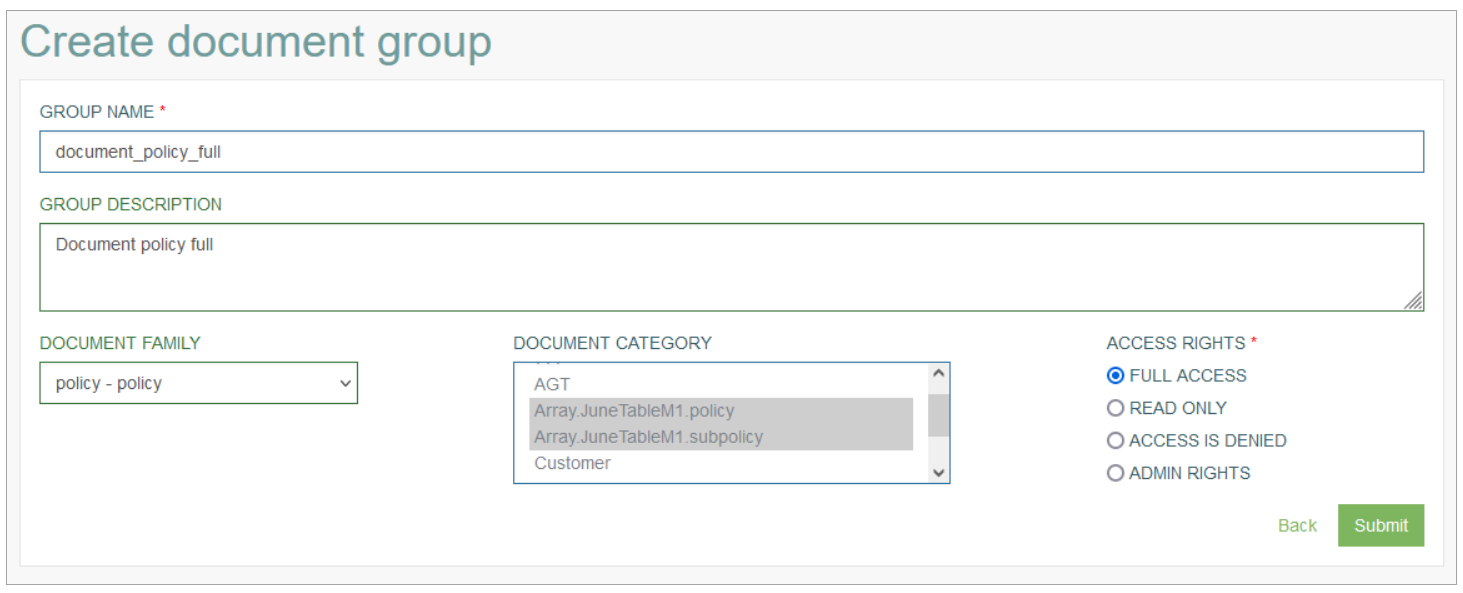
After filling in the required and optional data, click the Submit button to save the Document Group. To return to the Overview page without saving, click the Back link.
Update Document Group
To update a Document Group, click the Edit (pencil) icon for the selected Document Group entry on the Overview page. The Update Document Group page opens for editing.
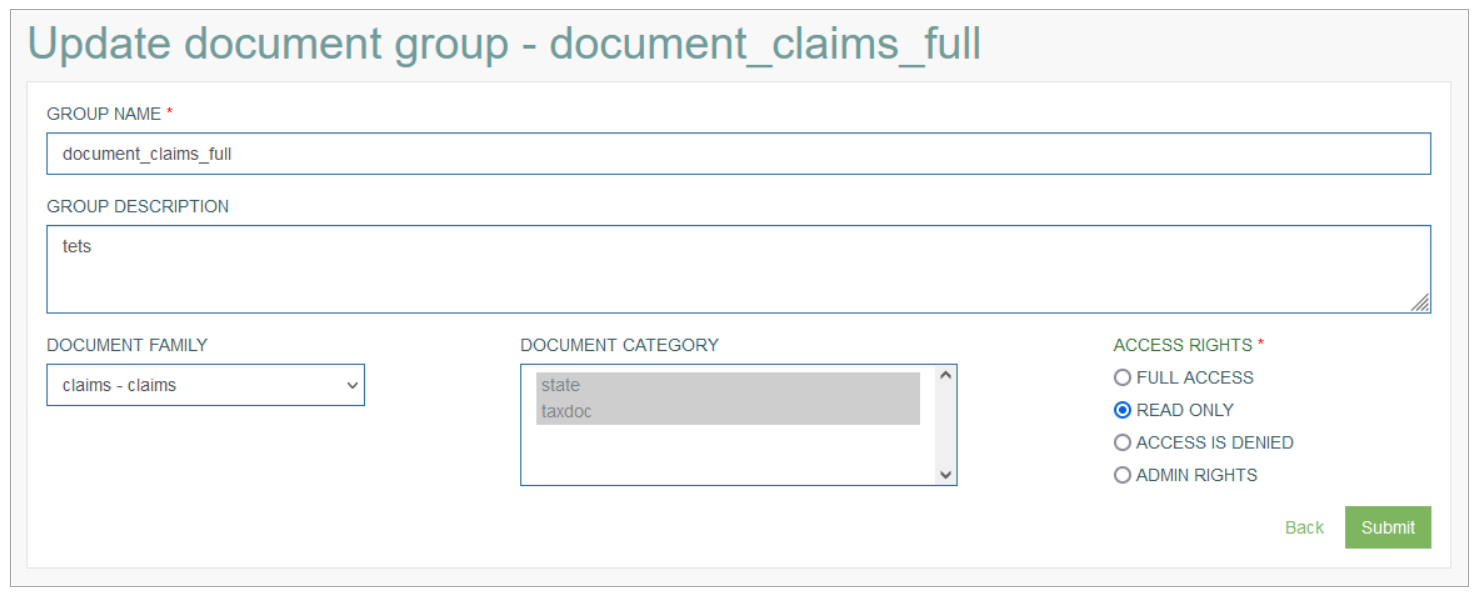
Make the required changes. Click the Submit button to apply the changes. To return to the Overview page, click the Back link.
Delete Document Group
To delete a Document Group, click the Delete icon on the Overview page for the selected entry. The confirmation pop-up will appear where you can confirm or cancel the Delete action.