Access
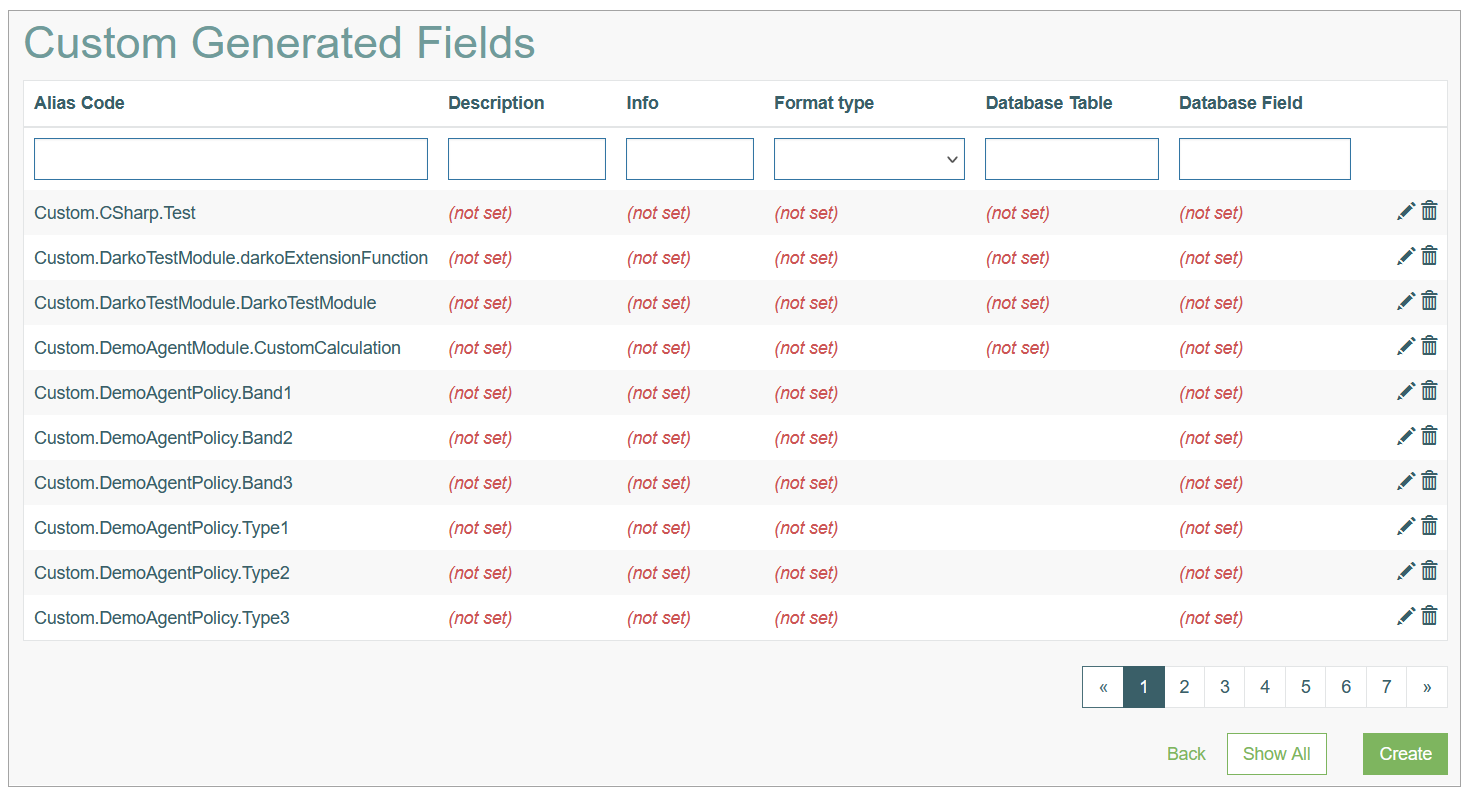
Click Alias Management > Custom Generated to manage custom aliases for single database fields.
Table of Contents
Overview
The Custom Generated Fields Alias functionality is related to single values that can be calculated either with an SQL query or set with Alias Framework using AF Modules.
The custom alias can be dependent on other aliases, for example Database field alias and Array alias can be used to evaluate the Custom Generated alias. In this case, the Custom alias is evaluated only after these two other aliases are evaluated. For more information about the Alias Management open the Alias Management Overview page of the User Manual.
Search
You can search for a particular Database Field Alias or filter search results. For this, use any of the search filters such as Alias Code, Description, Info, Format type, Database Table, Database Field and click the Enter key or on any screen place. The screen displays search results if found. To have an overview of all Database Field alias existing the system, leave the filters empty.
Sort Search Results
You can sort search results by the columns in ascending (arranged from the smallest to the largest number and alphabetically for letters) or descending (arranged from the largest to the smallest number and in reverse alphabetical order for letters) order. Columns' names, by which search results can be sorted, are indicated with arrows. Click the appropriate column name to sort search results by it.
Navigate
Use the navigation bar at the bottom of the Overview page to navigate through the pages. Click the appropriate page number to open it. Use the Arrow icons to go to the next page or the previous page of the search results list accordingly.
Create Custom Generated Alias
Click the Create button on the Overview page to create a new Database Field alias. This opens the page in creation mode.
Alias Details Tab
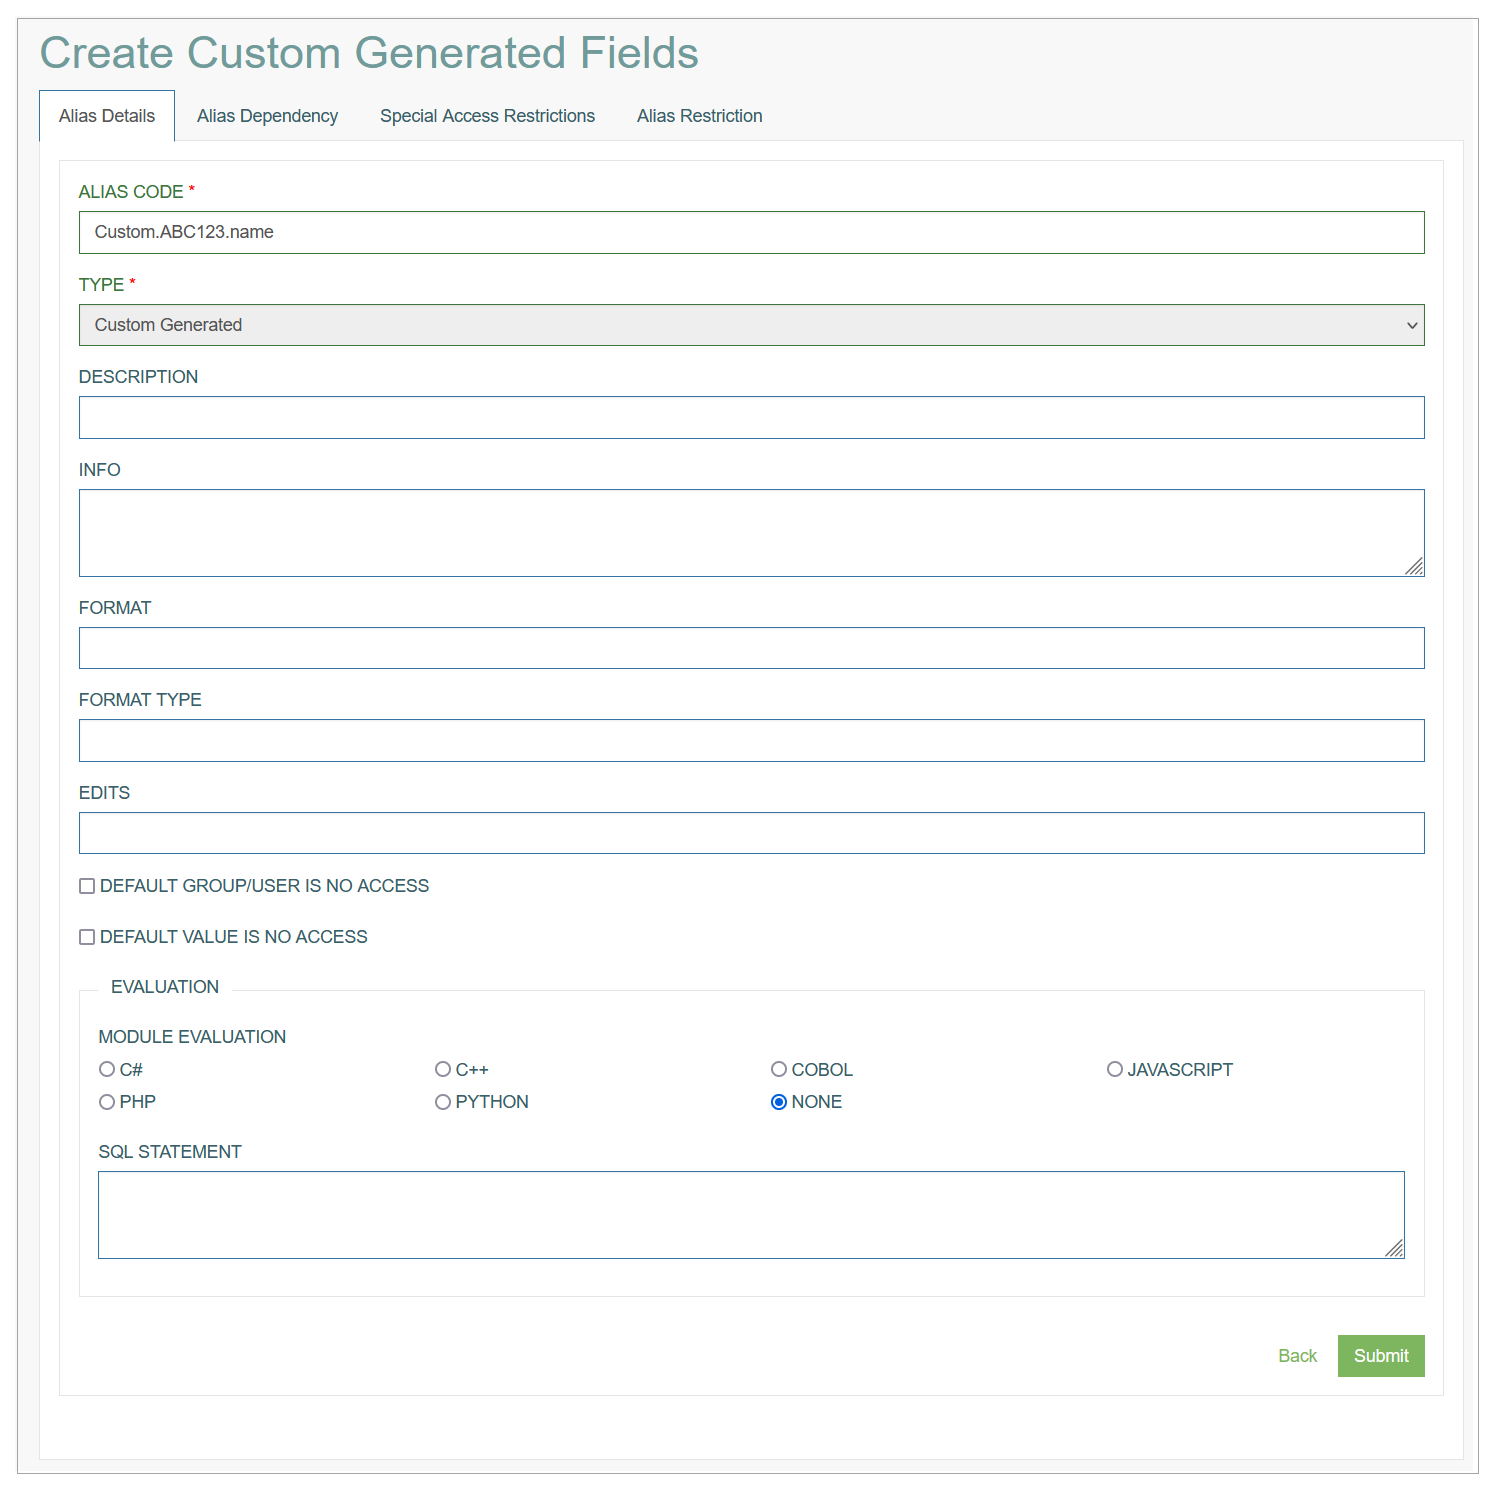
Fill in the following fields:
Alias Code - fill in the Alias Code according to the naming convention: AliasType.TableName.TableColumn format, e.g. Custom.ABC123.name.
AliasType is Custom in this case, and means that the custom alias has only one value (Multi will be used for array or multiple values).
Type - the type is pre-selected with Custom Generate value. More information about other alias types can be found in the Alias Types section of the Alias Management Overview page of the User Manual.
Description - enter a description for the alias you are creating.
Info - add additional helpful information.
Format Type - fill in a data format type (e.g. character, numeric, etc.). It depends on data to be evaluated.
Database Table - select the database table that is used to evaluate the data.
Database Field - after the database table selection, you are able to select the database field from the drop-down list.
Default Group/User is no access - select the check box to define, whether all groups/users are restricted from viewing the data that is stored in this alias. This setting can be overridden using the Special Access Restrictions (see the Special Access Restrictions tab of the current editor).
Default Value is no access - select the check box to specify that all alias data is restricted, no matter what the data (value) for the alias is. This setting can be overridden using the Special Access Restrictions (see the Special Access Restrictions tab of the current editor).
Evaluation
The Evaluation section represents the custom alias evaluation, which refers to how the custom alias will be evaluated. Custom Alias can be calculated either with an SQL query or inside an Alias Framework module.
Depending on the selected module, Alias Framework will invoke the specific language interpreter for Python, PHP, JavaScript, Cobol to execute a script; or execute the C++ or C# module.
Note that if an AF Module is used, the alias name should correspond to the library and function name.
After filling in the required and optional data, click the Submit button to save the Custom Generated Alias. To return to the Overview page without saving, click the Back link.
Alias Dependency Tab
On the Alias Dependencies tab, you can define the dependencies that are needed in order to evaluate the custom alias.
When an SQL query is used to evaluate the custom alias, there is no need to specify dependencies. They will be automatically created from the SQL query.
Pay attention that the dependencies on the alias level are defined only for custom aliases (Custom and Multi).
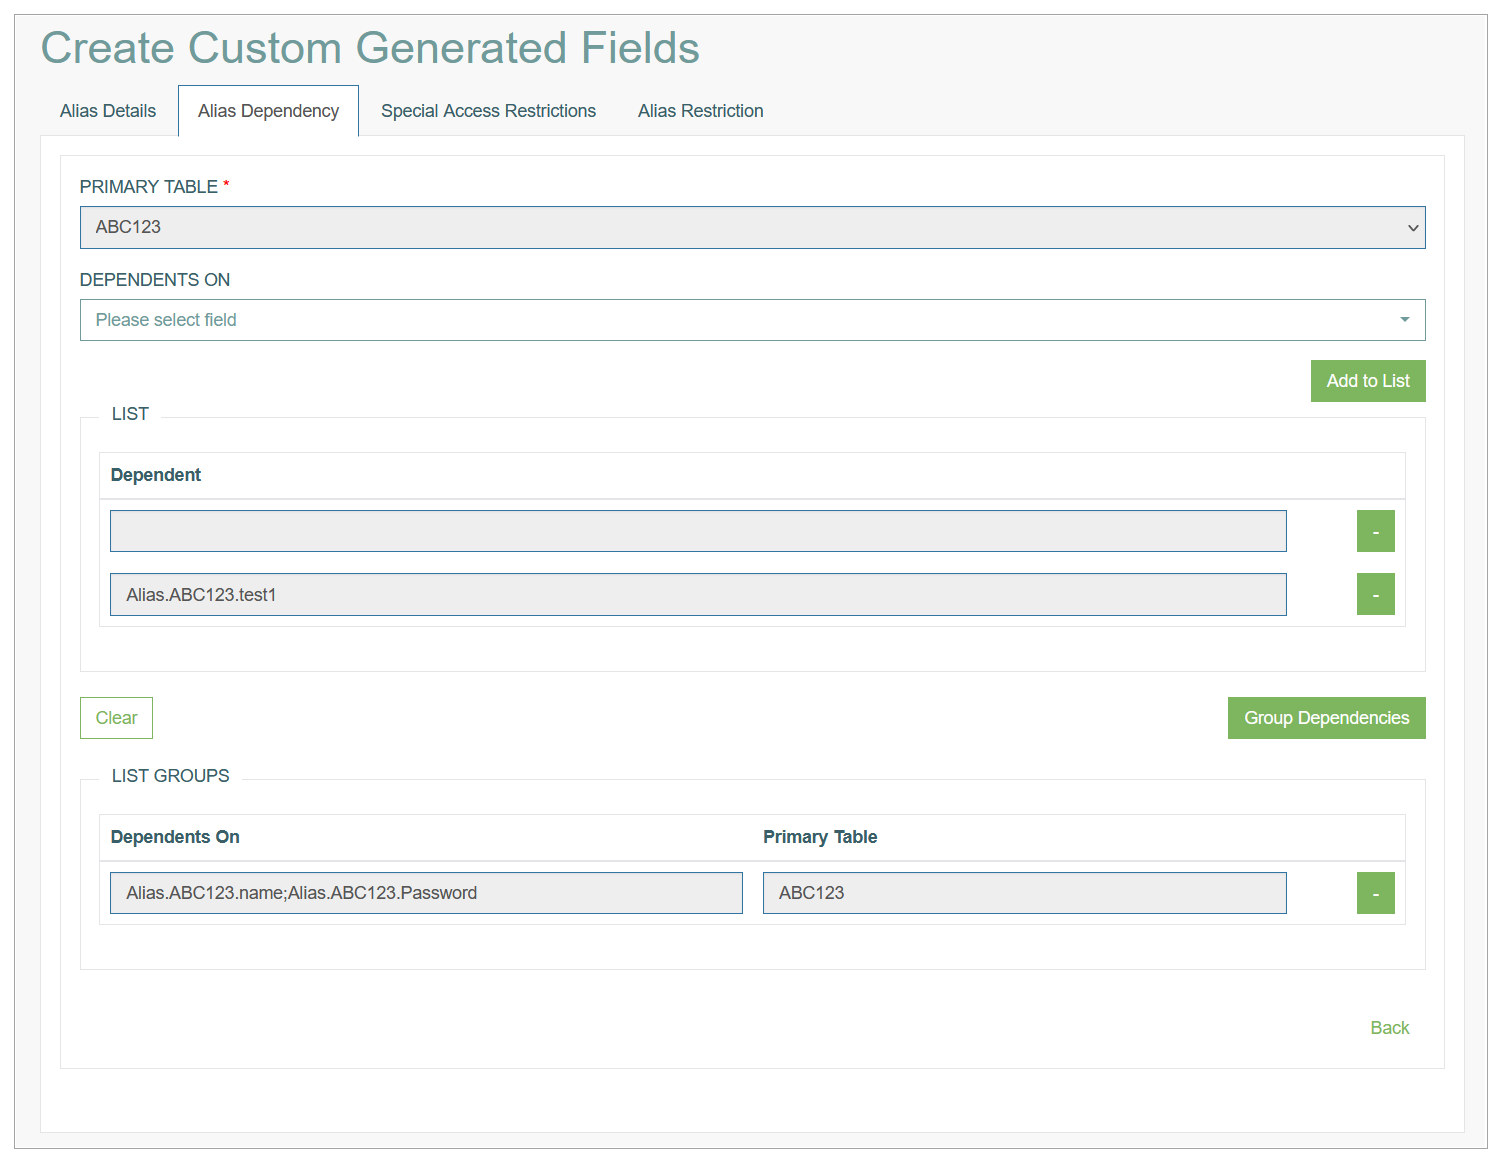
Fill in the following fields to define the dependencies:
Primary Table - select the Primary Table, the value of which will be used to evaluate the custom alias.
Depends On - is used to select an alias, on which the custom alias depends on.
The custom alias cannot be evaluated without the values of the depending alias.
List of Dependencies
After selection, click the Add to List button to add the alias to the Dependencies list. The added dependency will be displayed in the List section.
This setup is usually done in order to call the AF Module after all of the other data is ready.
You need to define the group of values as a dependency, add several values to the List and click the Group Dependencies button.
List Groups - this is the final dependency for a particular primary table.
The selected group of values will be displayed in the table of the List Group section.Depends On - represents the fields which the alias is depending on.
Primary Table - the database table that is selected for dependency.
Special Access Restrictions Tab
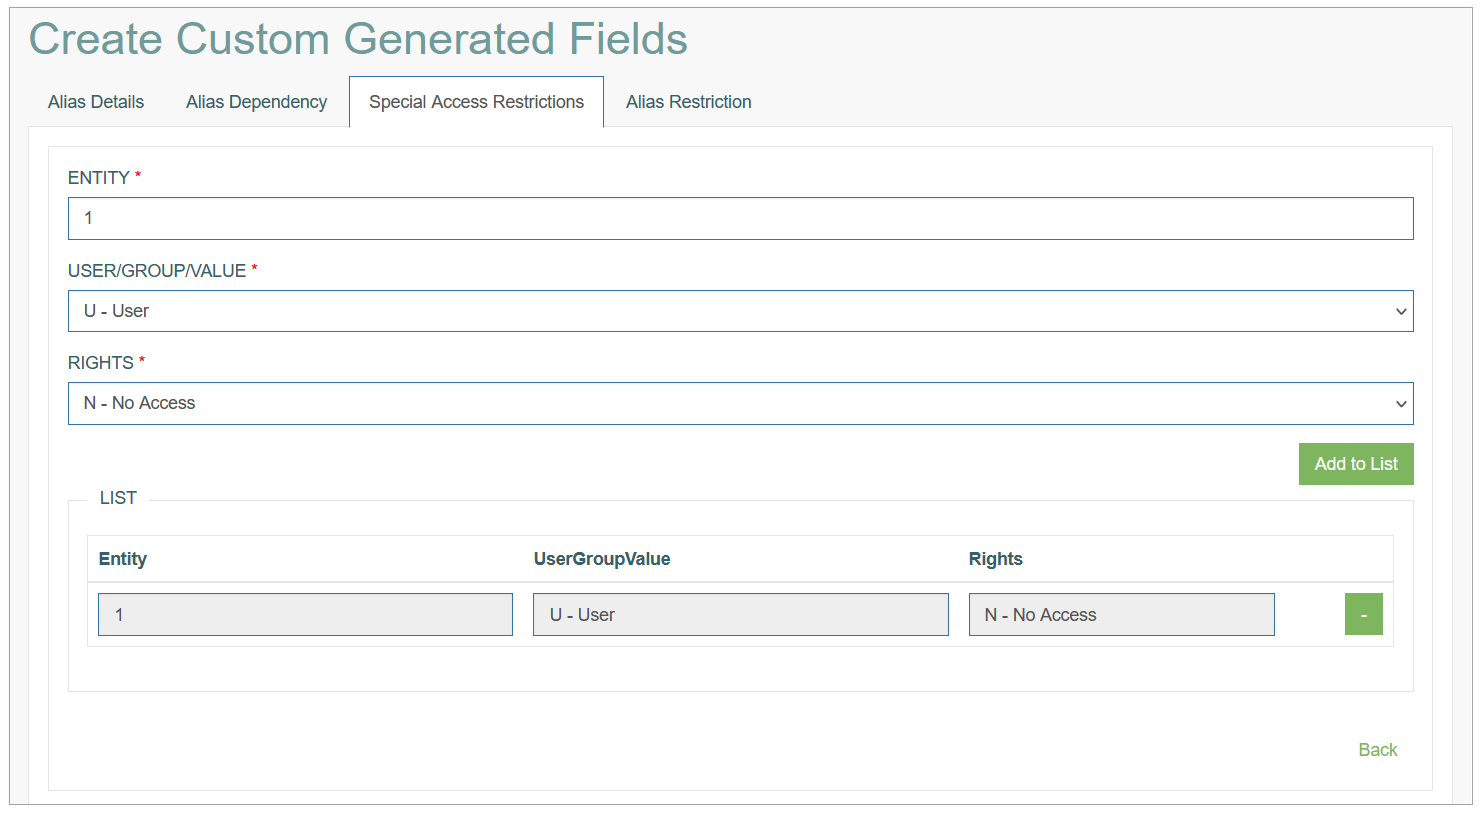
Fill in the following fields:
Entity - define an entity for the special access.
Here, you can specify the name of user/group or the value on which the restriction should be applied.
User/Group/Value - select the area of restriction: User, Group or Value.
Rights - define the level of access:
No Access - the complete restriction to the data evaluated with help of alias.
Read Only - the possibility to view the data without ability of editing.
Update/All - all available actions are allowed.
After filling in the required data, click the Add to List button to save the Access Restrictions. The saved data will be displayed in the List below.
To delete the Added entry, click the Minus button for the corresponding line.
To return to the Overview page without saving, click the Back link.
Alias Restriction
On the Alias Restriction tab, fill in the following fields:
Entity - define an entity for the special access. Specify here the name of user/group restriction should be applied.
User/Group/Value - select the area of restriction: User, Group or Value.
Value - define the value that should be restricted.
Here, you can specify an operator and a value.
For example, the value is defined as “< 10”. That means that if the alias value is less than 10, the selected user/group will have selected access right.
At the moment the supported operators are: ==, !=, <, >, <=, >=.
Rights - define the level of access:
No Access - the complete restriction to the data evaluated with help of alias.
Read Only - the possibility to view the data without ability of editing.
Update/All - all available actions are allowed.
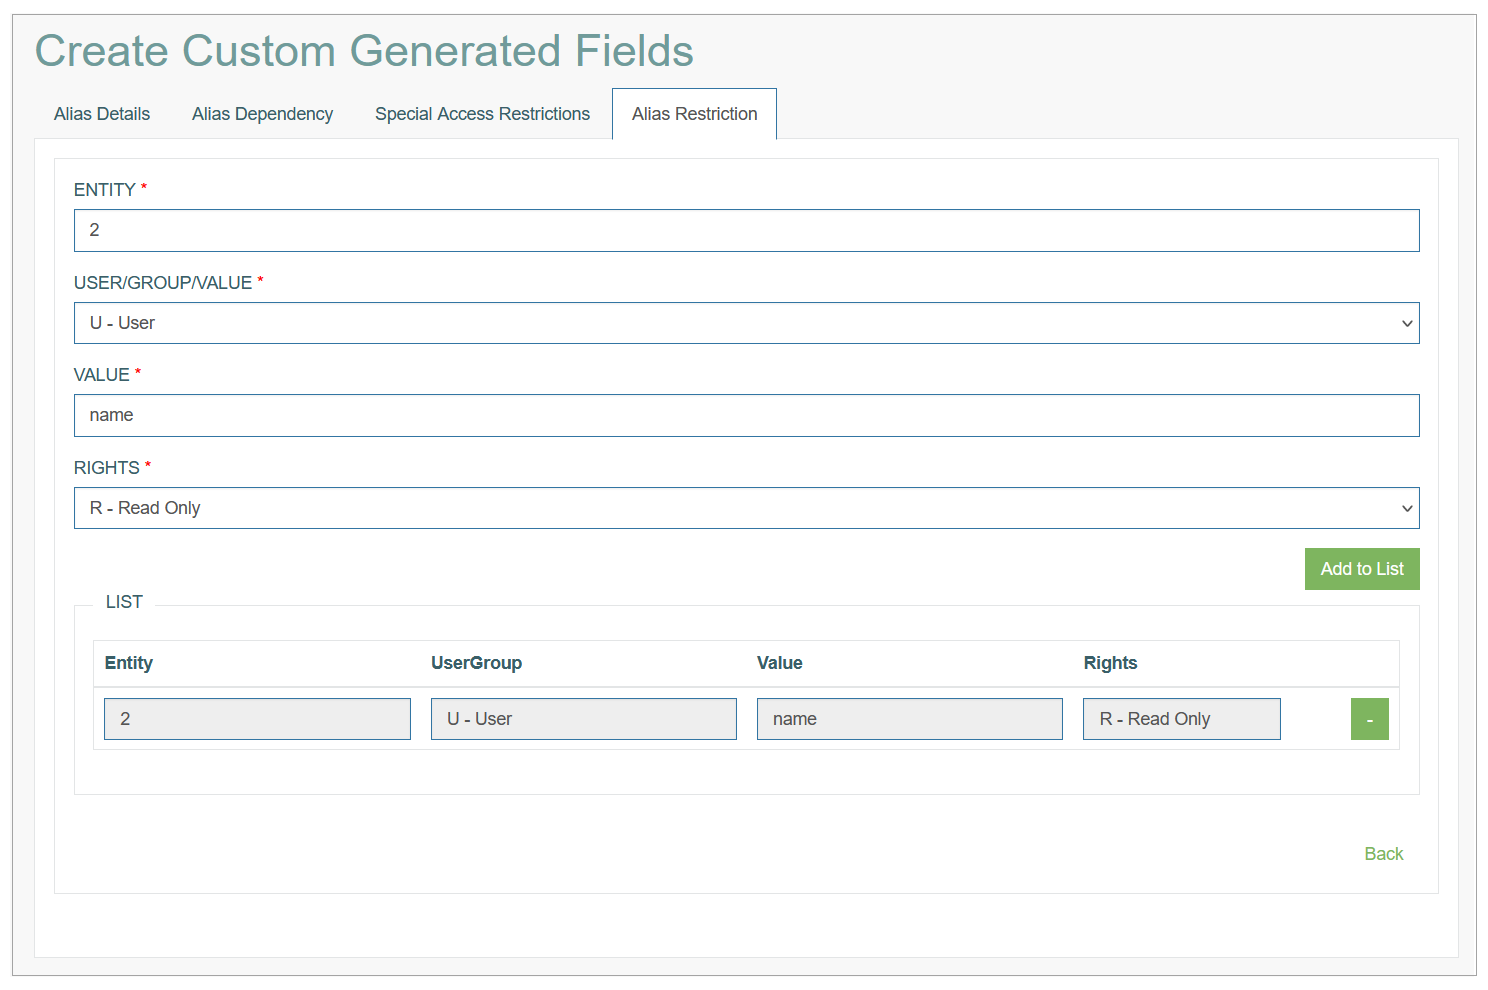
After filling in the required data, click the Add to List button to save the Access Restrictions. The saved data will be displayed in the List below.
To delete the added entry, click the Minus button for the corresponding line.
To return to the Overview page without saving, click the Back link.
After filling in all required and optional data, click the Submit button on the Alias Details tab to save the Database Field alias.
To return to the Overview page without saving, click the Back link.
Update Custom Generated Alias
To update a Custom Generated alias, click the Edit (pencil) icon for the selected Custom Generated alias entry on the Overview page. The Update Custom Generated alias opens for editing.
After making the necessary changes, click the Submit button. To return to the Overview page, click the Back link.
Delete Custom Generated Alias
To delete a Custom Generated alias, click the Delete icon on the Overview page for the selected entry. The confirmation pop-up will appear where you can confirm or cancel the Delete action.