Access
Click Features > Tables to have an overview of existing database tables and manage them.
Table of Contents
Overview
The Tables functionality provides the possibility to review and manage database tables. All database tables (including system tables and tables created via Simple Table Maintenance) are listed on the Table page. You can review any table details (structure, fields, other parameters), create new tables, update the existing tables and their parameters or delete unnecessary data or the entire tables.

Search
To search for a particular table on the Overview page, use the search filter. Enter a table name in the Table Name field and click the Enter key or any screen place. The screen displays search results if found. Please note, that letters or part of the word entered in the search filter fields will be taken into account while searching as well.
By default, service tables (c_<table name>) are not displayed in the search results.
To include them, click the Show Service Tables button located at the bottom left of the search results table. To exclude the service tables from the search results, click the Hide Service Tables button.
Sort Results
You can sort search results in ascending (arranged from the smallest to the largest number and alphabetically for letters) or descending (arranged from the largest to the smallest number and in reverse alphabetical order for letters) order. Click the column name to sort search results.
Navigate
Use the navigation bar at the bottom of the Overview page to navigate through the pages. Click the appropriate page number to open it. Use the Arrow icons to go to the next page of the previous page of the search results list accordingly.
Click the Show All button to display all the results on one page.
Create Table
Click the Create button on the Overview page to create a new table. This opens the Create Table page:
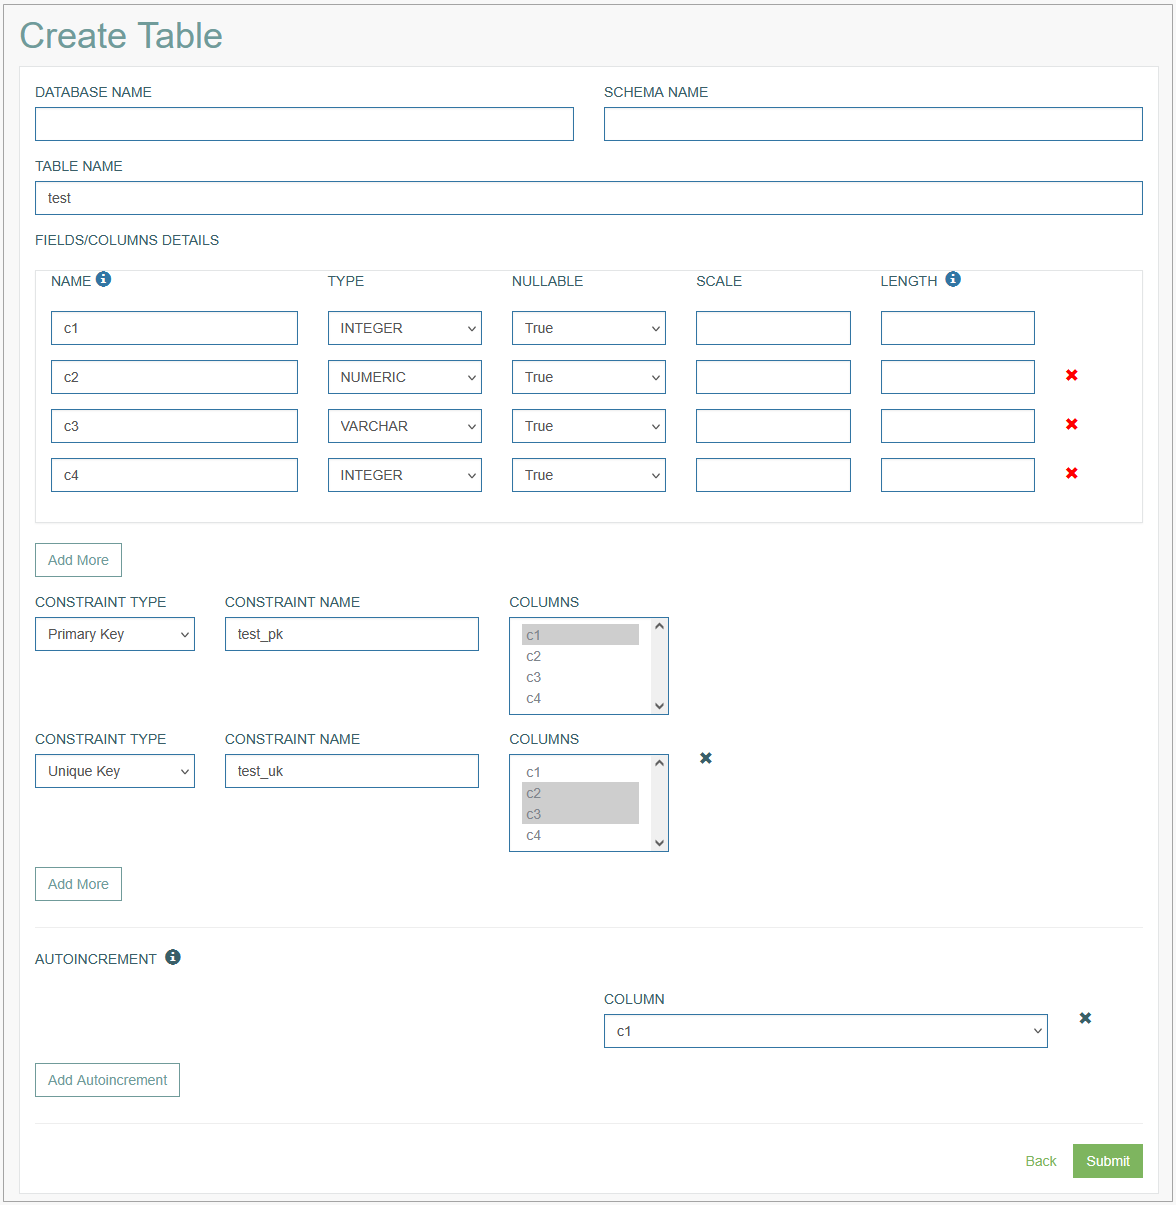
Fill in the following fields:
Database Name – enter the database name. In case you want to use the currently installed and connected database, the field can be empty.
Schema Name - enter the schema name if needed.
Table Name - enter the table name you are creating. Note that the leading and trailing spaces in the Table Name will be removed automatically, and the spaces inside the name will be replaced with the underscore ("_").
Fields/Columns Details - in this section, set up the fields and columns of the table.
Name - enter field/column name.
Please do not use the field name ”id” as a primary key to be searched. This name is used in some internal processes and may result in incorrect behavior. For instance, instead of “id“, you can use “table_name_id”.Type - define the type of data by selecting it from the drop-down list. The list of data types and their naming depend on the database type.
 Please consider the specifics of your database. For example, for Oracle SQL, your table can contain only one field with the type "Text" (LONG).
Nullable - define whether the field can be empty.
Scale - define the number of digits to the right of the decimal point in a number.
Length - define the allowed quantity of characters for the field value.
It is recommended to specify a length for the VARCHAR and CHAR columns as it is required for some database. For example, the default row length for MySQL is 16,383, which can lead to issues when creating tables with multiple VARCHAR columns. For more details, please refer to the MySQL manual.
Constraint - specify rules for the data in a table and the unique
Constraint Type - select the type of constraint from the drop-down list. The following types are supported:
Primary Key - select the Primary Key. Primary Key does not allow NULL value.
Unique Key - select the Unique Key type, that helps to make sure no duplicate values are entered in specific columns that do not participate in a primary key. Unique Key allows one NULL value.
Foreign Key - is currently not supported.
Constraint Name - enter a name for constraint. Please consider that some database
may ignore the Constraint Name value. For example, the MySQL database has predefined values “PRIMARY“ and “UNIQUE“.Columns - select the column(s) that will be defined as Primary or Unique Key. Such columns contain values that uniquely identify each row in the table.
Autoincrement - this parameter can be defined only for fields/columns of the Numeric or Integer type. Click the Add Autoincrement button and select the corresponding field/column name from the drop-down list. For fields/columns with this parameter enabled, the system will automatically assign the next sequential number.
Note that some databases do not support editing autoincrement values.
Please note that the System tables have the name started with “c_”, e.g. c_AliasDependency. Please do not use this “c_” prefix for naming User tables.
Also, the system tables should not be edited as it can cause unexpected problems with the data.
Click the Add More button in the Fields/Columns to add a new field/column or in the Constraints section to add a new rule respectively.
After filling in all mandatory and optional fields click the Submit button to save the created Menu. Click the Back button to go back to the Menu overview page without saving the data.
Update Table
To edit a Table, click the Edit (pencil) icon for the selected Table entry in the search results table. The Update Table page opens for editing.
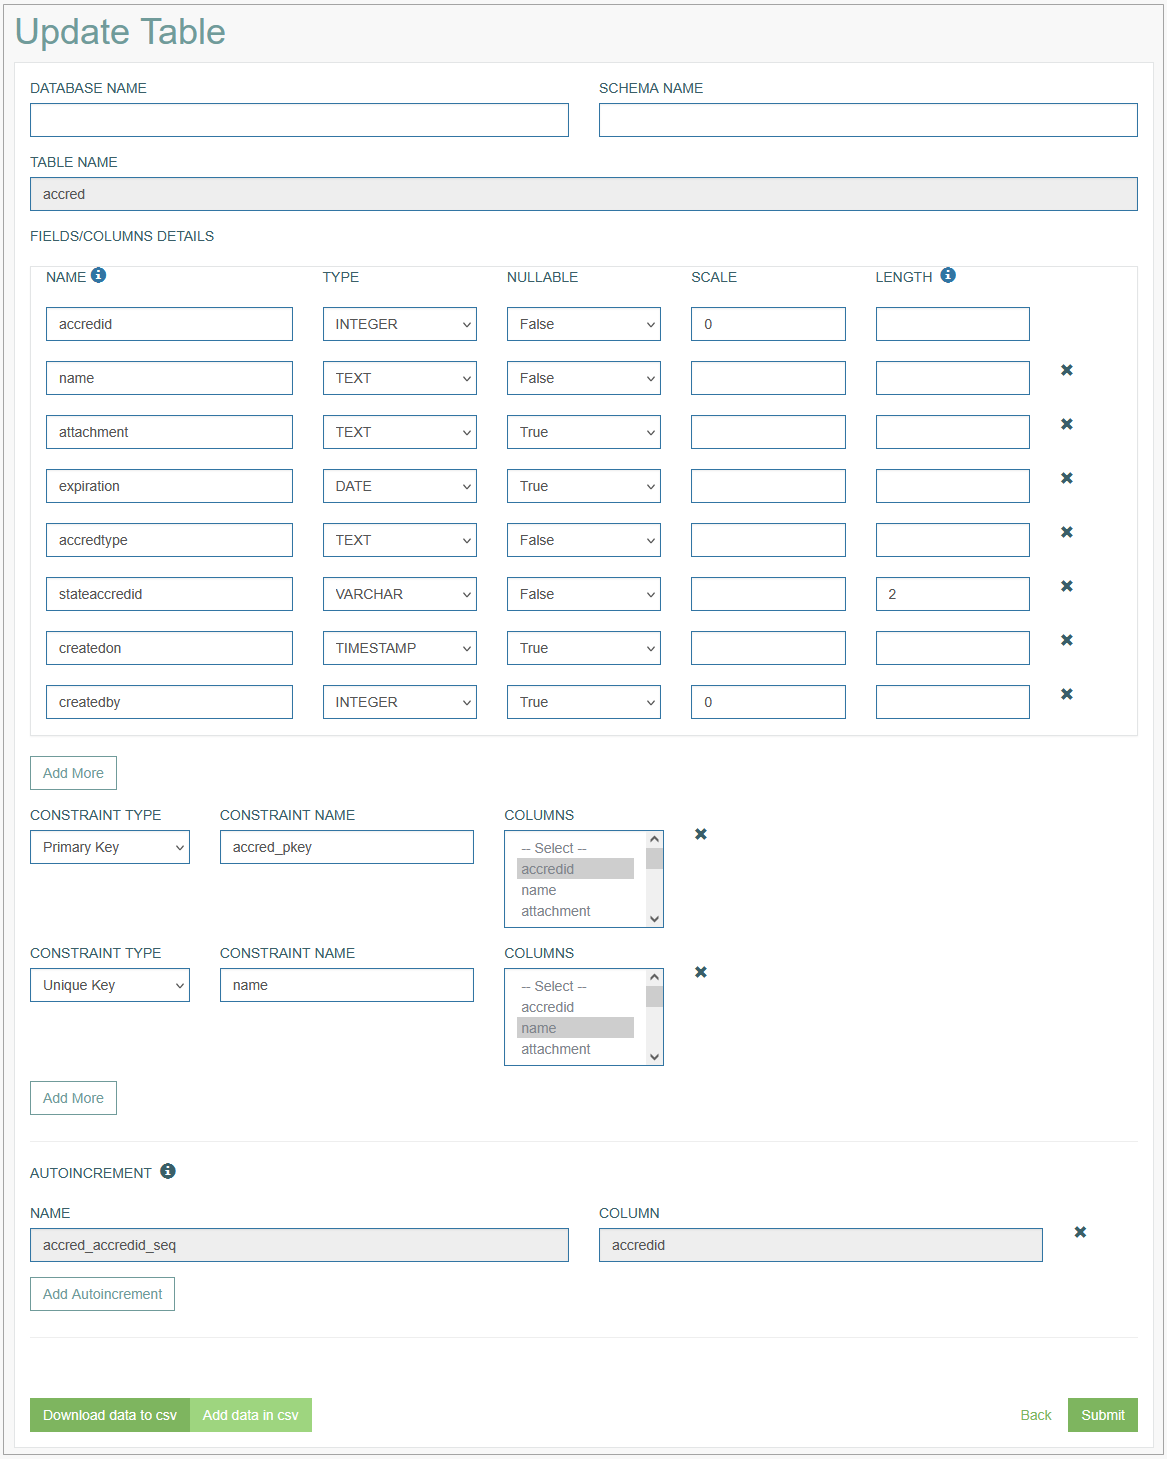
There are 2 new buttons available on the page in the update mode:
Download data to CSV - click to download a CSV file with the current table.
Add data in CSV - click to upload a CSV with the table.
After making the necessary changes, click the Submit button. To return to the Overview page, click the Back link.
Delete Table
To delete a Table, click the Delete icon on the Overview page for the selected table entry. The confirmation pop-up will appear where you can confirm or cancel the action.