Access
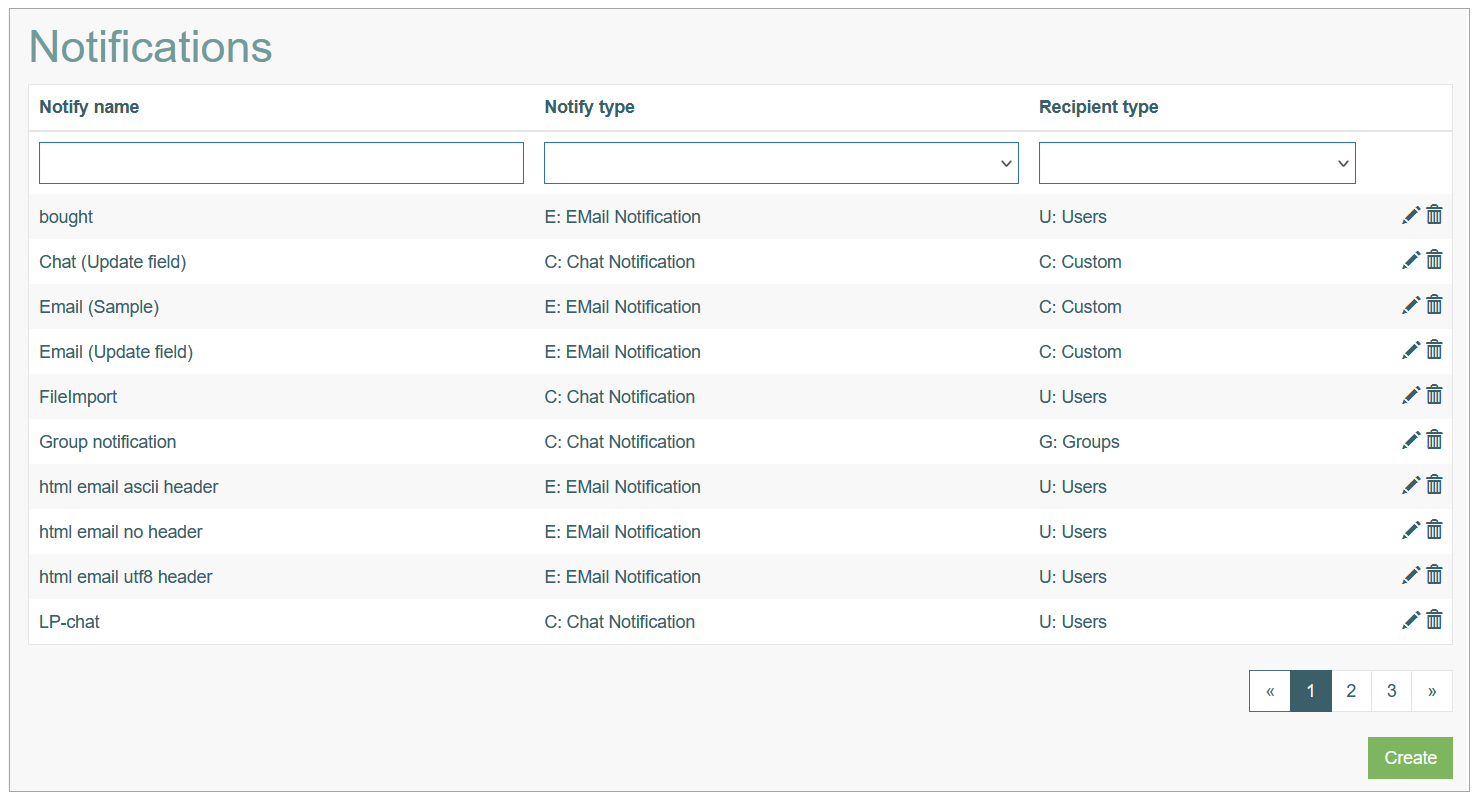
Click System data > Notifications to manage notification templates that will be used for notifying users in the Render application.
Table of Contents
Overview
The Notifications functionality provides the possibility to create and configure templates for notifications that can be sent to users at some points of workflows, processes on the screens in the Render.
Search
You can search for a notification and to filter the search results. For this, use the search filter and click the Enter key or on any screen place.
The screen displays search results if found. To have an overview of all access rules, leave the filter empty and click the Enter key or on any screen place.
Sort Search Results
You can sort search results by the columns in ascending (arranged from the smallest to the largest number and alphabetically for letters) or descending (arranged from the largest to the smallest number and in reverse alphabetical order for letters) order.
Columns' names, by which search results can be sorted, are indicated with arrows. Click the appropriate column name to sort search results by it.
Navigate
Use the navigation bar at the bottom of the Overview page to navigate through the pages. Click the appropriate page number to open it.
Use the Arrow icons to go to the next page or the previous page of the Search Results list accordingly.
Create Notification
Click the Create button on the Overview page to create a new notification template.
This opens the page in creation mode.
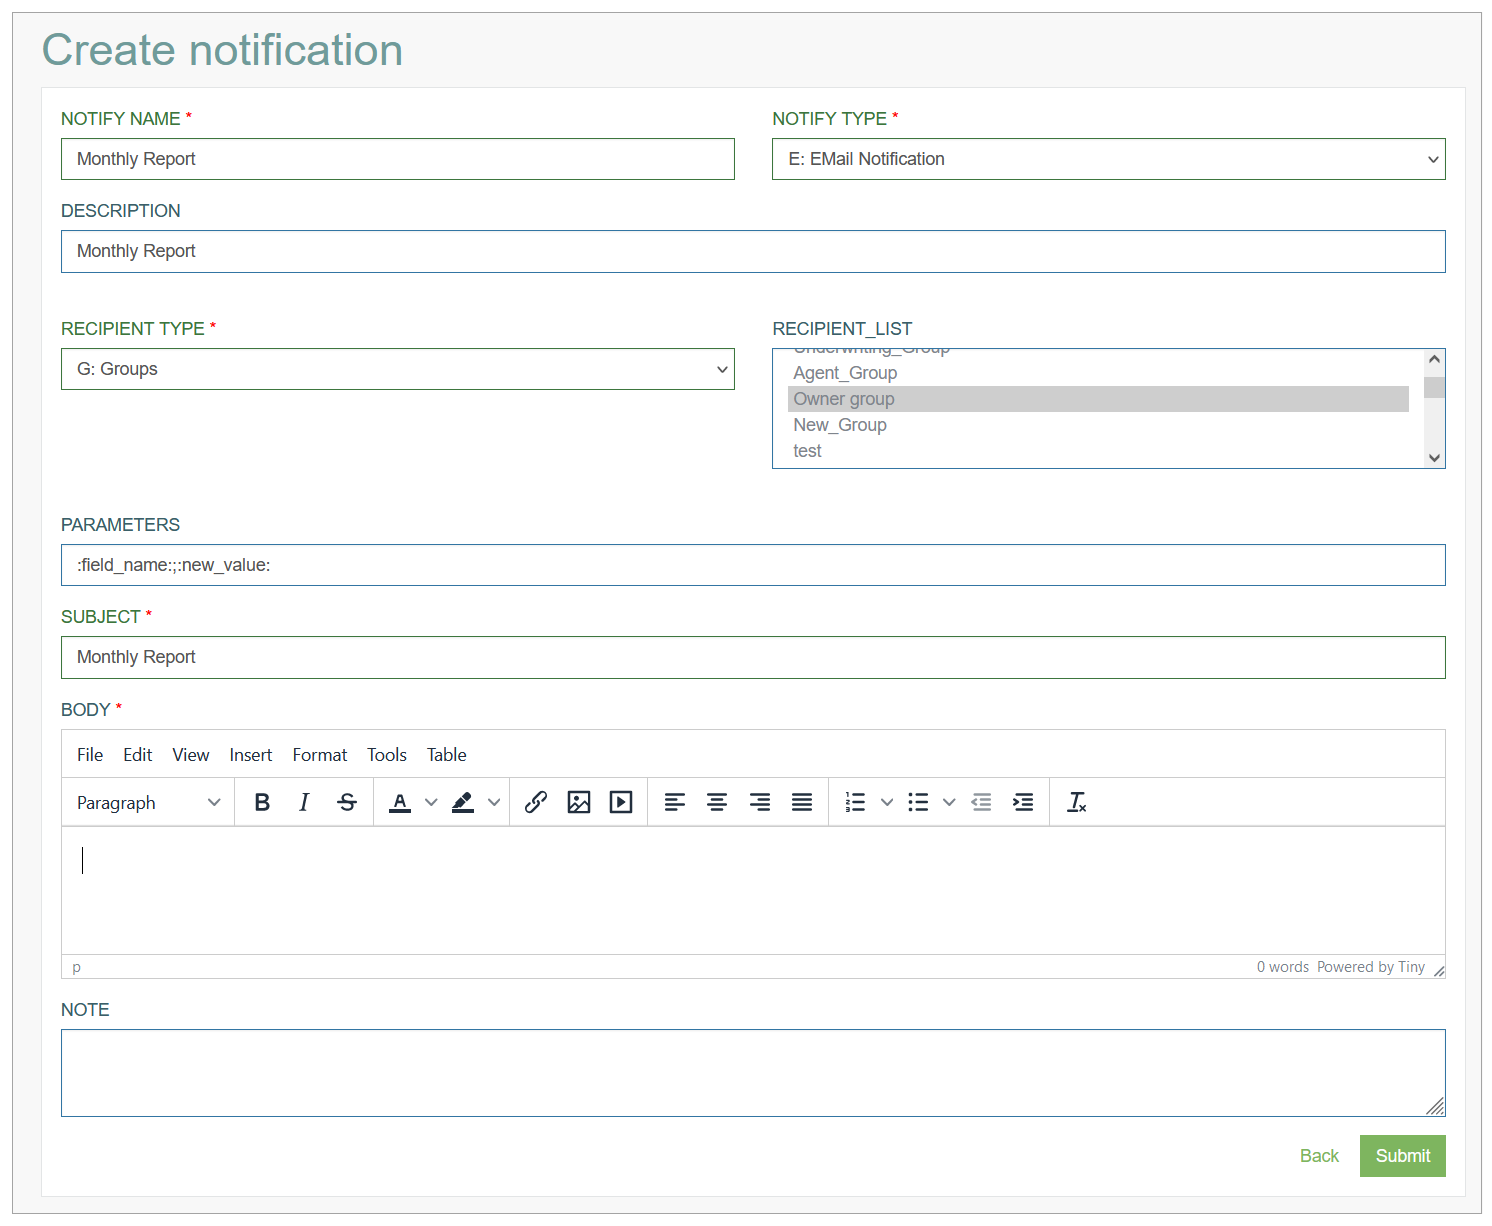
Fill in the following fields:
Notify Name – enter a name for a notification template.
Notify type - select the type of notification. Currently, we support two types:
E: Email Notification
S: SMS Notification
Description - add a short description for the notification.
Recipient type - select the recipient type from the drop-down list. Currently, the following types are supported:
Custom - the notification with the Custom recipient type can be sent to the user only under specific conditions:
the Recipient Field ID in the field Notification tab should be defined. For more details, refer to the Notifications section on the
Field Configuration page.in the Render application, the field with an Email format type should contain an email address. A notification will be sent to this email address informing that the related field value has changed. The notification will be sent each time the value of the related field changes.
Groups - defines that the notification will be sent to user group(s) selected in the Recipient List field.
Users - defines that the notification will be sent to user(s) selected in the Recipient List field.
Recipient_list - select the recipients/ The list of recipients will be restricted by the Recipient Type value.
Parameters - enter the parameters that will be taken into account for sending the notification. These parameters will be available to configure on the Notifications tab in the Screen Builder. More details on how to set up the notifications in the Screen Builder for image, button, and field, can be found in the Notifications section on the Image Configuration, Button Configuration, and Field Configuration pages of the User Manual accordingly.
Subject - enter the subject of the email/message.
Body - use the visual editor to create the body of notification.
Note - add a note with additional details and useful comments.
After data is entered, click the Submit button to save the entered data. Click the Back button to go back to the Overview page without saving the data.
Update Notification
To edit a notification, click the Edit (pencil) icon for the selected entry on the Overview page. The Update notification page opens for editing.
Make the necessary changes and click the Submit button to save them. To return to the Overview page, click the Back link.
Delete Notification
To delete a notification template from the list, click the Delete icon on the Overview page for the selected entry. The confirmation pop-up will appear where you can confirm or cancel the Delete action.