Access
Click Account Settings > OAuth Client to access the functionality for creating and managing OAuth clients.
Table of Contents
Overview
The OAuth Client Management functionality allows the creation and management of OAuth client records used for authentication in third-party (TPC) calls. The system implements the OAuth 2.0 Authorization Code grant type, enabling external clients to obtain access tokens for secure API authentication.
Search
To search for a menu or filter the search results, use the following search filters and enter any or all the search criteria:
Client ID
Code created at
Token created at
Expires in
Passthru user
Active
After filling in the filters, click the Enter key or on any screen place. The screen displays search results if found.
Please note, that letters or part of the word entered in the search filter fields will be taken into account while searching as well.
Sort Results
You can sort search results by the columns in ascending (arranged from the smallest to the largest number and alphabetically for letters) or descending (arranged from the largest to the smallest number and in reverse alphabetical order for letters) order. Columns' names, by which search results can be sorted, are indicated with arrows. Click the appropriate column name to sort search results by it.
Navigate
Use the navigation bar at the bottom of the Overview page to navigate through the pages. Click the appropriate page number to open it. Use the Arrow icons to go to the next page of the previous page of the search results list accordingly.
Click the Show All button to display all the results on one page.
Create OAuth Client
Click the Create button on the Overview page to create an OAuth Client. This opens the Create OAuth Client page.
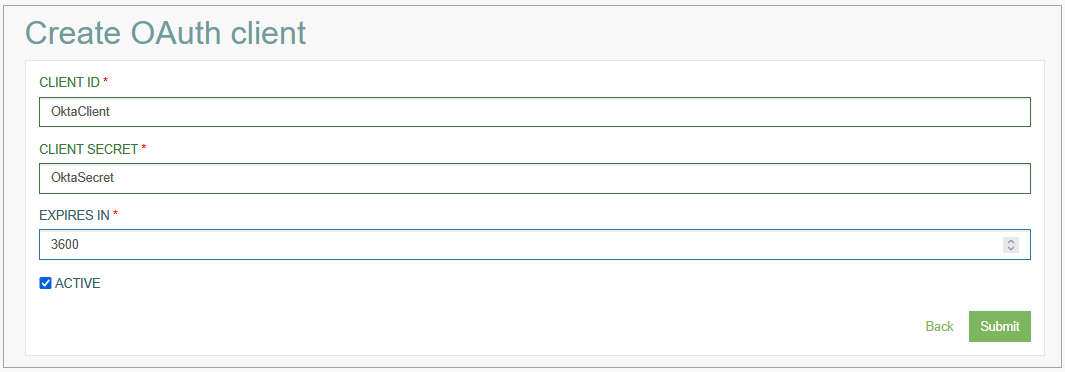
Fill in the following fields:
Client ID – specify a unique identifier for the OAuth client. This field is required.
Client Secret – provide the client's secret key used for authentication. This field is required.
Expires In – define the duration in seconds for which the access token will be valid. The default value is 3600 seconds, i.e. 1 hour.
Active – select this checkbox to activate the client. Only active clients can participate in the OAuth flow and obtain access tokens.
The following fields are read-only and will be populated automatically during the OAuth flow:
Redirect URI – displays the redirect URI provided by the client when calling the authorised endpoint.
Authorization Code – shows the code issued by the authorization endpoint, which can be redeemed for a token via the token endpoint.
Code Created At – displays the Unix timestamp indicating when the authorization code was created.
Access Token – shows the token issued by the token endpoint.
Token Created At – displays the Unix timestamp indicating when the token was created.
Passthru User – shows the user used to log in during the authorization phase.
After filling in all mandatory fields click the Submit button to save the created OAuth Client. Click the Back button to go back to the Overview page without saving the data.
Steps to Configure OAuth Token
To set up secure token-based authentication for accessing protected endpoints, follow these steps:
Create OAuth Client
First, create an OAuth Client record using the Create OAuth Client functionality described above. Save your client_id and client_secret.
User Authorization
Direct users to the authorization URL:
https://<host>:<port>/osoc/api/oauthcontroller/authorize
Required parameters:
response_type=code
client_id (your client ID)
redirect_url (your callback URL)
state (security token)
After a successful login, users will be redirected to your callback URL with an authorization code.
Get Access Token
Exchange the authorization code for an access token by sending a POST request to:
https://<host>:<port>/osoc/api/oauthcontroller/token
Required parameters:
grant_type=authorization_code
code (the authorization code)
client_id
redirect_uri
For authentication include client credentials either as Basic Auth header or in HTTP POST body. Users will receive an access_token to use for any custom API endpoints.
Update OAuth Client
To edit an OAuth Client, click the Edit (pencil) icon for the selected entry in the search results table. The Update OAuth Client page opens for editing.
Note that read-only fields cannot be modified through the update interface, as they are managed automatically by the OAuth flow.
After making the necessary changes, click the Submit button. To return to the Overview page, click the Back link.
Delete OAuth Client
To delete an OAuth Client, click the Delete icon on the Overview page for the selected entry. The confirmation pop-up window will appear where users can confirm or cancel the action.
Deleting an OAuth Client will invalidate all associated tokens and prevent the client from accessing the system until a new client record is created.
Deleting an OAuth Client will invalidate all associated tokens and prevent the client from accessing the system until a new client record is created.