Access
Click Features > Job Scheduler to manage, schedule and monitor jobs in the system.
Table of Contents
Overview
The Job Scheduler functionality allows users to create, manage, schedule and keep track of jobs running in the system.
The configuration and Quartz jobs are managed using it. It allows users to review all currently being executed jobs and to deactivate/activate them. It also displays the Quartz setting parameters.
It’s also possible to manually schedule jobs for the execution at any point of time later defining
Search
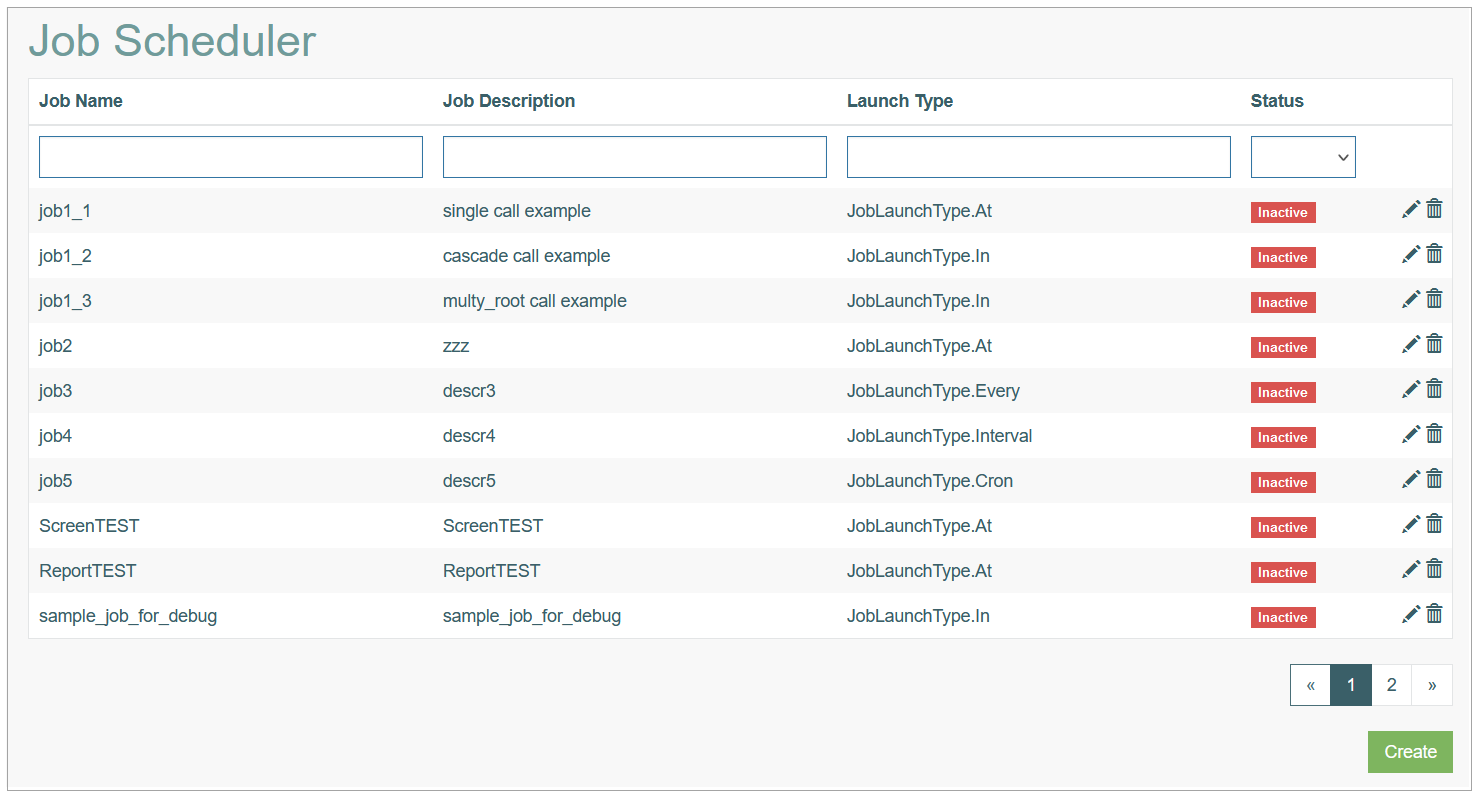
To search for a menu or filter the search results, use the following search filters and enter any or all the search criteria:
Job Name
Job Description
Launch Type
Status
After filling in the filters, click the Enter key or any screen place. The screen displays search results if found. Please note, that letters or part of the word entered in the search filter fields will be taken into account while searching as well.
Sort Results
You can sort search results by the columns in ascending (arranged from the smallest to the largest number and alphabetically for letters) or descending (arranged from the largest to the smallest number and in reverse alphabetical order for letters) order. Columns' names, by which search results can be sorted, are indicated with arrows. Click the appropriate column name to sort search results by it.
Navigate
Use the navigation bar at the bottom of the Jobs Overview page to navigate through the pages. Click the appropriate page number to open it. Use the Arrow icons to go to the next page of the previous page of the search results list accordingly.
Click the Show All button to display all the results on one page.
Create Job
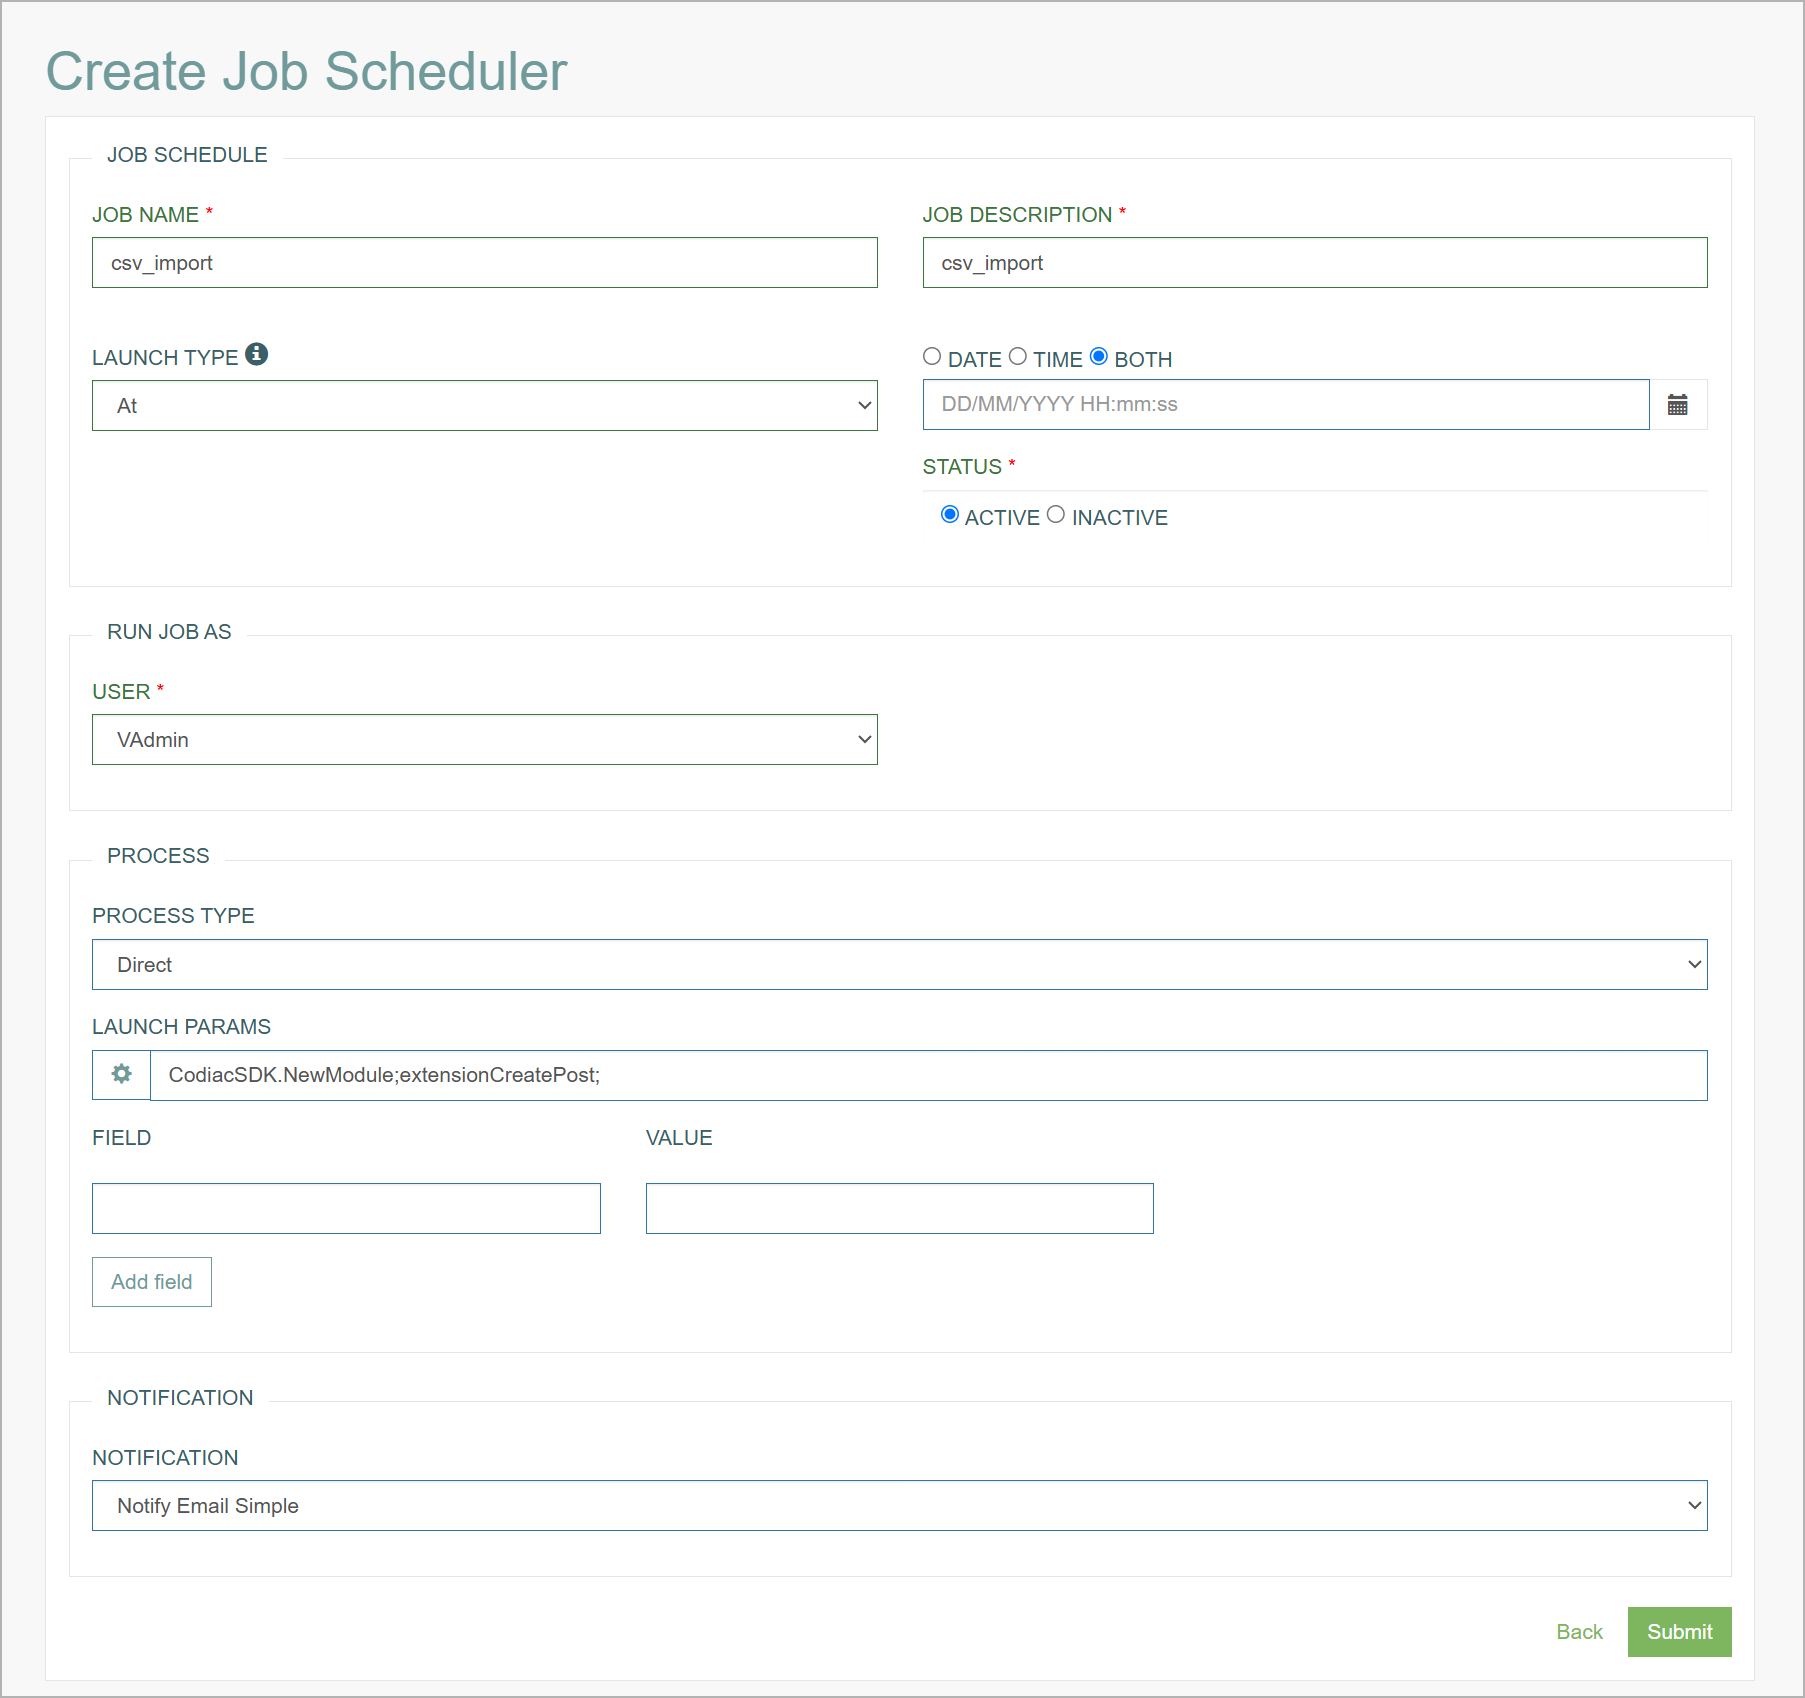
Click the Create button on the Overview page to create a new job. This opens the Create Job Scheduler page.
Fill in the parameters in the following sections:
Job Schedule
Job Name – enter a name for a job. The field is required.
Job Description - provide an informative description for a new menu. This field is required.
Launch Type - the way of job execution:
At - the one time job execution at the particular specified date/time
Cron - this is the tool that helps you to schedule the job execution using the standard cron-expressions. A cron expression is a string that describe individual details of the schedule:
Cron Type - define the interval of the repeated job execution:
Every Day
Every Week Day
Every Weekend
Every month
Custom
Cron Settings - click the gear icon to open the Cron Settings and set up the required schedule for the job.
Every - defines the interval (in seconds) for the job execution. The job will run every defined seconds.
In - specifies that the job will run over the specified time period (in seconds).
Interval - specifies that the job will run with the specified interval.
External - this launch type is special as this launch type. See the details in the section below.
Take your time zone and the difference into account when filling the launch type for the job conditions.
Launch Condition - define the job launch conditions. The options are displayed based on the selected Launch Type.
Status
Active
Inactive
External Launch Type
The External launch type makes it possible for an external command-line application (provided by AppMill) to execute a specific job that is already set up in the AppMill system.
Pay attention that the External launch type has specific attributes and settings:
Launch Condition is always set to “0“. This means that the job will be execute immediately after calling it.
Status is set to “inactive“. This means that job set as External will never be executed by the AppMill service, it can be executed with the provided command-line application only.
When the External launch type is selected, the View Parameters button is available at the bottom of the page. Click the View Parameters to generate the JSON parameters for calling the specific job. Later, these parameters can be used as argument for the command-line application.
Command-line Application (Job Scheduler)
The command-line application that is included in the AppMill service installation is located in the top-level directory of the service, on the Windows operating system the executable file is named “JobsScheduler.exe”.
The application depends on a configuration file that is also located in the top-level directory of the service, the configuration file name is “JobsScheduler.config”. This file must contain the correct information for the command-line application to work correctly.
The purpose of the “JobsScheduler.exe” is to allow the user to immediately execute the External launch type job through the command line. The job is configured and saved in the AppMill system but instead of using the AppMill service the command-line application can execute the job with the command-line arguments as parameters for the job. This tool is mainly intended for users that already have a job scheduler tool and are not ready to completely migrate to AppMill’s Job Scheduler.
Configuration File
The “JobsScheduler.config” configuration file must contain the following information:
“service_address” – The address of the service where the command-line application should connect to. This would usually be the same address as the one in the “Codiac.HTTPService.config” configuration file.
“service_port” – The port of the service where the command-line application should connect to. This would usually be the same port as the one in the “Codiac.HTTPService.config” configuration file.
“user” – The user which will be used to login to the service, meaning the user that will execute the job.
“password” – The password for the user (hashed).
All of the items listed above are XML attributes located in the “config.scheduler” XML element:
Run Job As
User - select the user name from the drop-down list. The job will be executed with the permissions and access rights of the selected user.
Process
Process Type - define, which type of process will be started when job is executed. Currently, we support the following process types:
Screen - the job can be linked to the particular screen and the value selected on the screen. Important Considerations:
The selected screen must have an execution function configured.
If the screen has multiple execution functions, only the first execution function will be saved and used for the job.
If the screen includes a field of type "List With Extension Function", the action associated with this field will be ignored during execution.
Ensure that the screen meets these requirements before scheduling the job to prevent unexpected behavior.
Report - defines that upon execution of this job will trigger the report creation.
Report - select the report template from the list of available reports.
Report Type - define the way of report generating:
Search - based on the selected search result record,
Batch - several report in a one report.
Direct - means that when job is triggered, any extension function can be executed based on the defined field (alias) and value parameters.
File Import - defines that the CSV file can be imported on the job execution.
Directory - specify the directory where the file will be stored.
File to Process - input the file names to be imported.
SMB File Transfer – defines that upon execution of this job, a file transfer will be initiated using the SMB (Server Message Block) protocol. This allows transferring files between systems within a network. The following parameters are required for successful configuration:
SMB Server – specify the server address hosting the shared folder. This is a mandatory field.
Shared Folder – input the name of the shared folder on the SMB server where the file will be transferred. This field is required.
User – enter the username with appropriate access rights to the shared folder. This field is required.
Password – input the password associated with the user account. This field is required.
This option (SMB File Transfer) will transfer all files from the specified shared folder. The files must follow the defined naming convention and must not exceed 2GB in size. After the transfer is complete, all transferred files and any empty folders will be removed from the shared folder.
The required naming convention is:FileName__DocumentFamily__DocumentCategory__KP1__KP2__KP3__KP4__KP5
Each key part (KP1 to KP5) can vary in length and is separated by two underscores (__).
For example: Test_File__Documents__main__5.pdf
Notification
Notification - select the notification that will be sent when job is executed.
After filling in all mandatory and optional fields click the Submit button to save the created Job parameters. Click the Back button to go back to the Overview page without saving the data.
Update Job
To update a job, click the Edit (pencil) icon for the selected Job Scheduler entry in the search results table. The Update Job Scheduler page opens for editing.
After making the necessary changes, click the Submit button. To return to the Jobs Overview page, click the Back link.
Delete Job
To delete a job, click the Delete icon on the Jobs Overview page for the selected Job Scheduler entry. The confirmation pop-up will appear where you can confirm or cancel the action.