Access
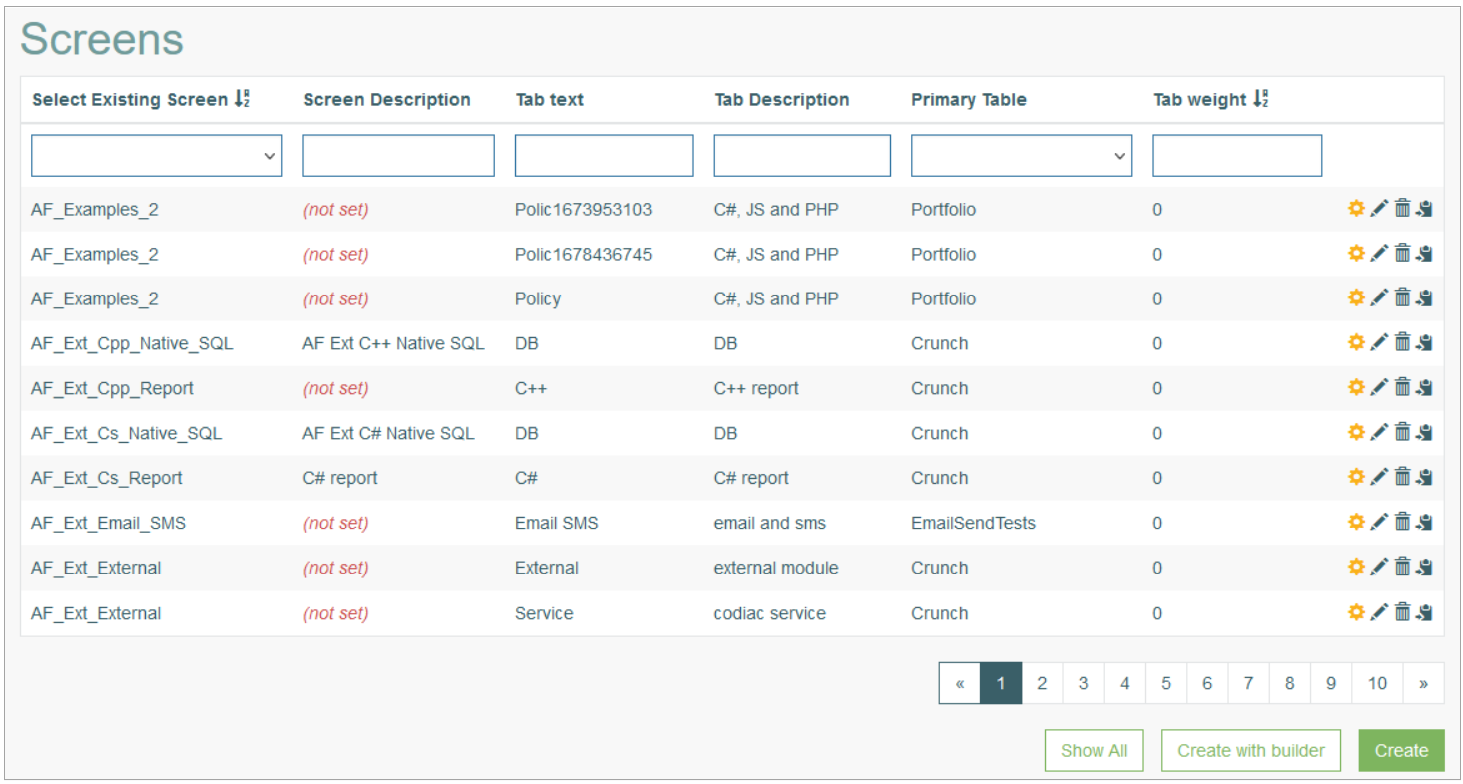
Click Screen Configurations > Screens to have an overview of all screens existing in the system, manage them and create new screens.
Table of Contents
Overview
The Screen functionality provides an ability to create and manage screens, tabs, content displayed there. You can configure all possible operations and actions and set up data that build and cover the required business processes in the Render application.
By screens created in the Architect we mean the tabs assigned to the menu item in the Render application. Several screens can be assigned to one menu item and consequently in the Render they will be represented by several tabs assigned to one screen.
Search
To search for a user or filter the search results, use the following search filters:
Select Existing Screen
Screen Description
Tab Text
Tab Description
Primary Table
Tab Weight
After filling in the filters, click the Enter key or any screen place. The screen displays search results if found. Please note, that letters or part of the word entered in the search filter fields will be considered while searching as well.
Sort Results
You can sort search results by the columns in ascending (arranged from the smallest to the largest number and alphabetically for letters) or descending (arranged from the largest to the smallest number and in reverse alphabetical order for letters) order. Columns' names, by which search results can be sorted, are indicated with arrows. Click the appropriate column name to sort search results by it.
Navigate
Use the navigation bar at the bottom of the Search Result page to navigate through the pages. Click the appropriate page number to open it. Use the Arrow icons to go to the next page or the previous page of the search results list accordingly.
Click the Show All button to display all the results on one page.
Create Screen
There are two possibilities in creating a screen:
Create screen (using JSON template) - this is another way to create a screen. This way could be simpler in case you know the structure of the template very well and can adjust JSON template. All necessary details are filled in on a single page. This option may be useful, but not in most cases.
Create screen with builder - this is an advanced version of a screen creation process. The process includes several steps and guides the user through several pages to configure required settings. This is a preferred approach as it provides more possibilities for a screen configuration.
Let’s review these two ways and methods of the screen creation in detail further.
Create screen (using JSON template)
Click the Create button on the Screens Overview page to create a new screen. The screen creation editor page will open where you have the option to fill in the screen template as JSON.
Please note that to create a new screen using this option, you need to know the structure of the template very well.
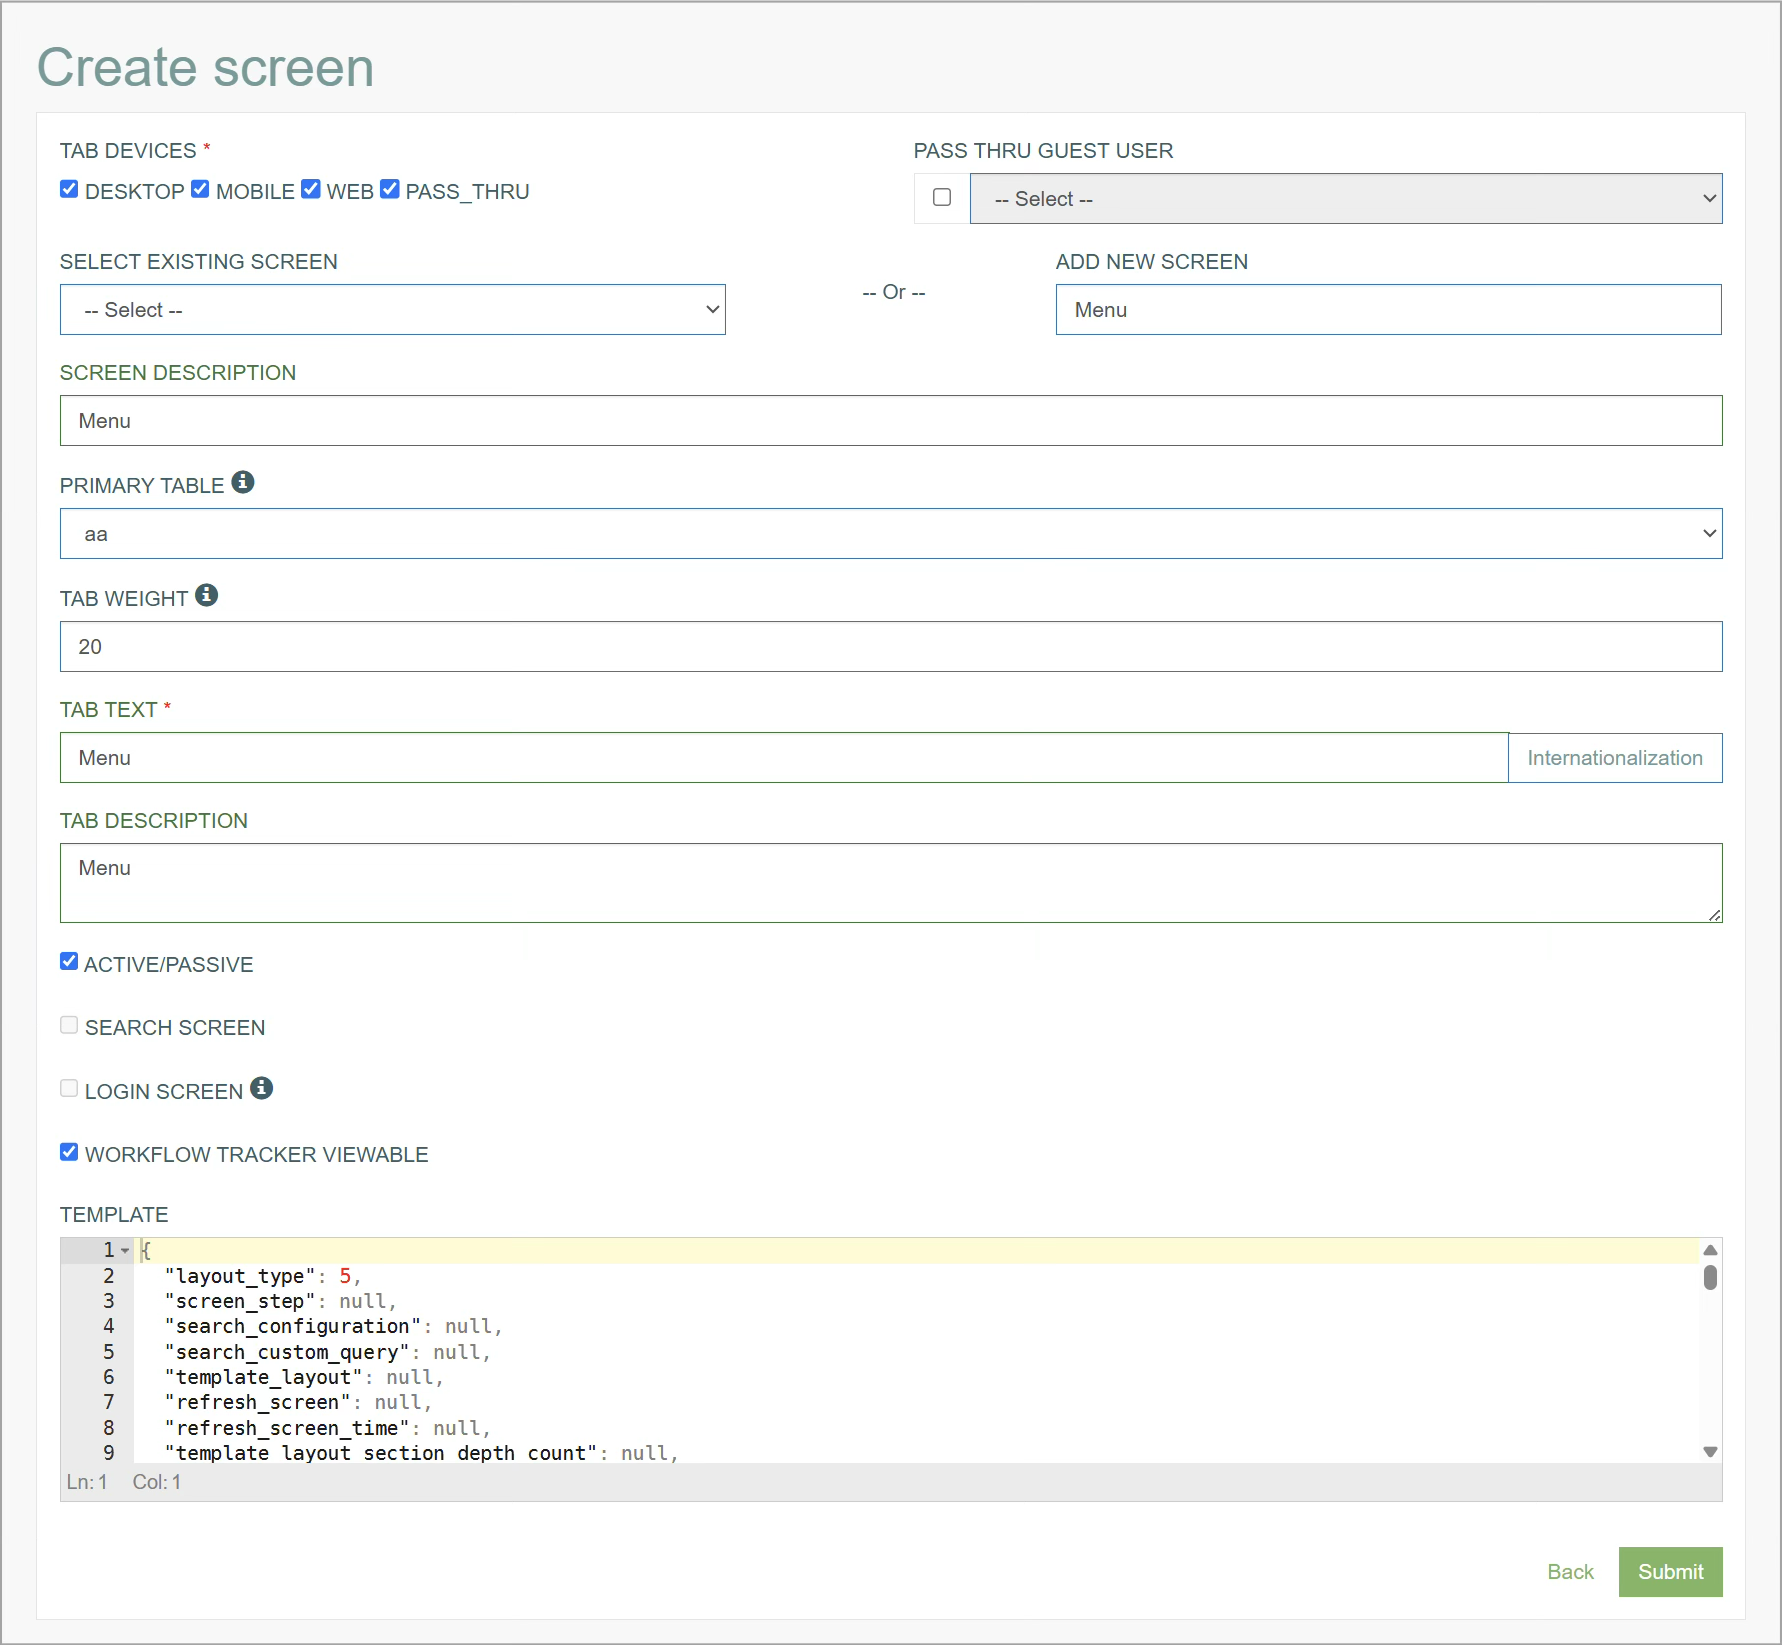
You can fill in the following fields:
Tab Devices - specifies which applications should receive data for this screen. As this feature is still in progress and has not been not completed yet, it cannot work as expected. Please wait for a feature completion to fully benefit from it.
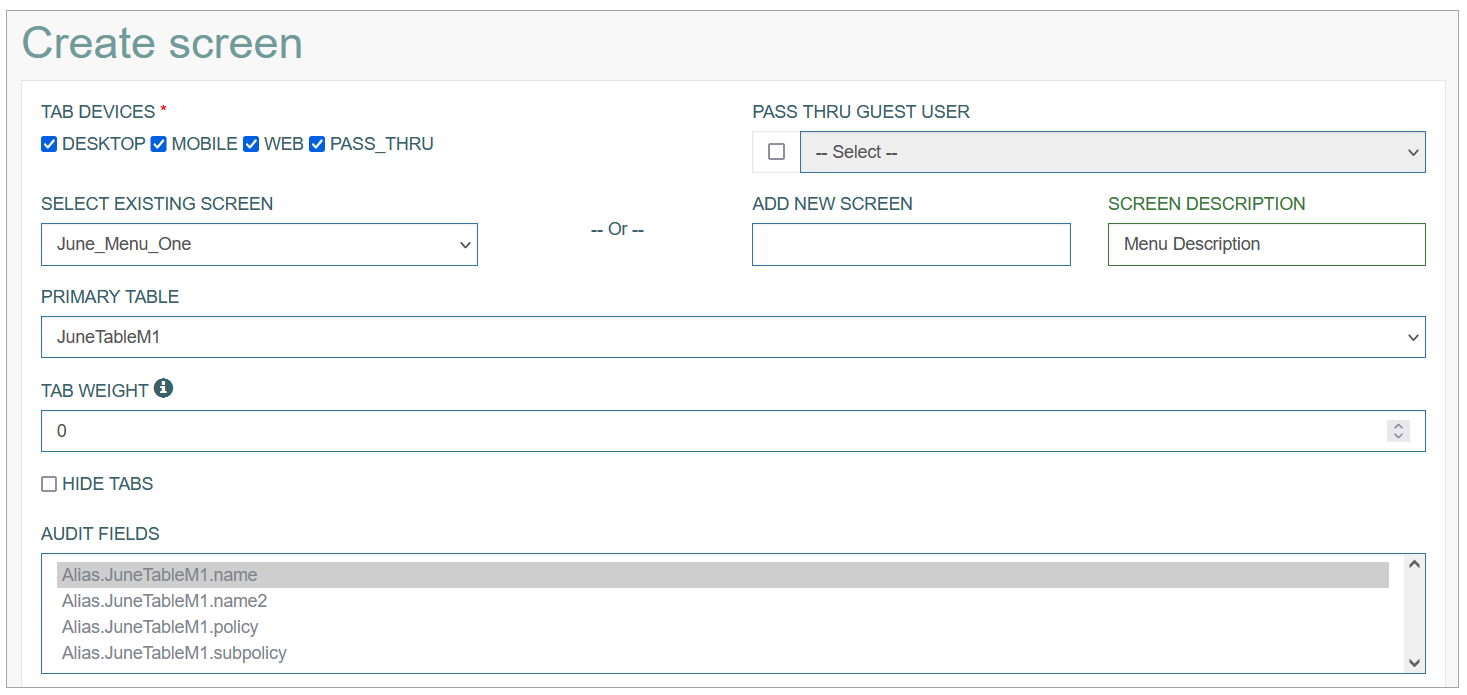
Screen Name - you can select an existing screen OR add a new screen:
For creation a screen (shown as a screen tab in the Render) on the existing screen:
Select existing screen - select the name of an existing screen from the drop-down list.
Please note that a new screen will be created with the same already existing screen name. When you select the existing screen, please ensure that:the selected screen must have a weight of 0 or 99
the search should be configured, so the search field options will be applied to the new screen (its weight is not 0 or 99).
You can use an alternative option and create a completely new screen:
Add new screen - enter the name for a new screen.
Screen description - provide a short informative description for a screen.
Primary Table - this field specifies the database table that will be used as a primary table. The data from this table will be used and displayed on the screens in the render.
The list of all tables can be found on the Table page (Features > Tables). For more details about tables, refer to the Tables page of the User Manual.
Be careful, this value takes precedence over the value in the TEMPLATE field (alias_framework.request_primary_table) and will override it on save.
Tab Weight - enter the number, the so called global key, which controls the place of a tab on the screen in the Render application.
The “0” value allows you to fully customize the screen (search field, audit fields, select extensions). The “99” value - for the screen in the popup, otherwise this screen will not be displayed.
The screens with the 0 or 99 weight contain their own search field. For the screens with other weight value, the search of the main screen is used.
Hide Tabs - select the check box to define that this tab should be hidden on UI by default.
This can be useful for the tabs that should be displayed only under certain conditions, e.g. during Workflow etc.
The Hide Tabs check box is displayed in case the Tab Weight value equals to “0“.Hide Search Bar - select the check box to define that the search bar should be hidden on UI by default.
Tab text - enter the text for the tab that will be displayed as a tab title in the Render.
Tab Description - provide a short informative description for a tab.
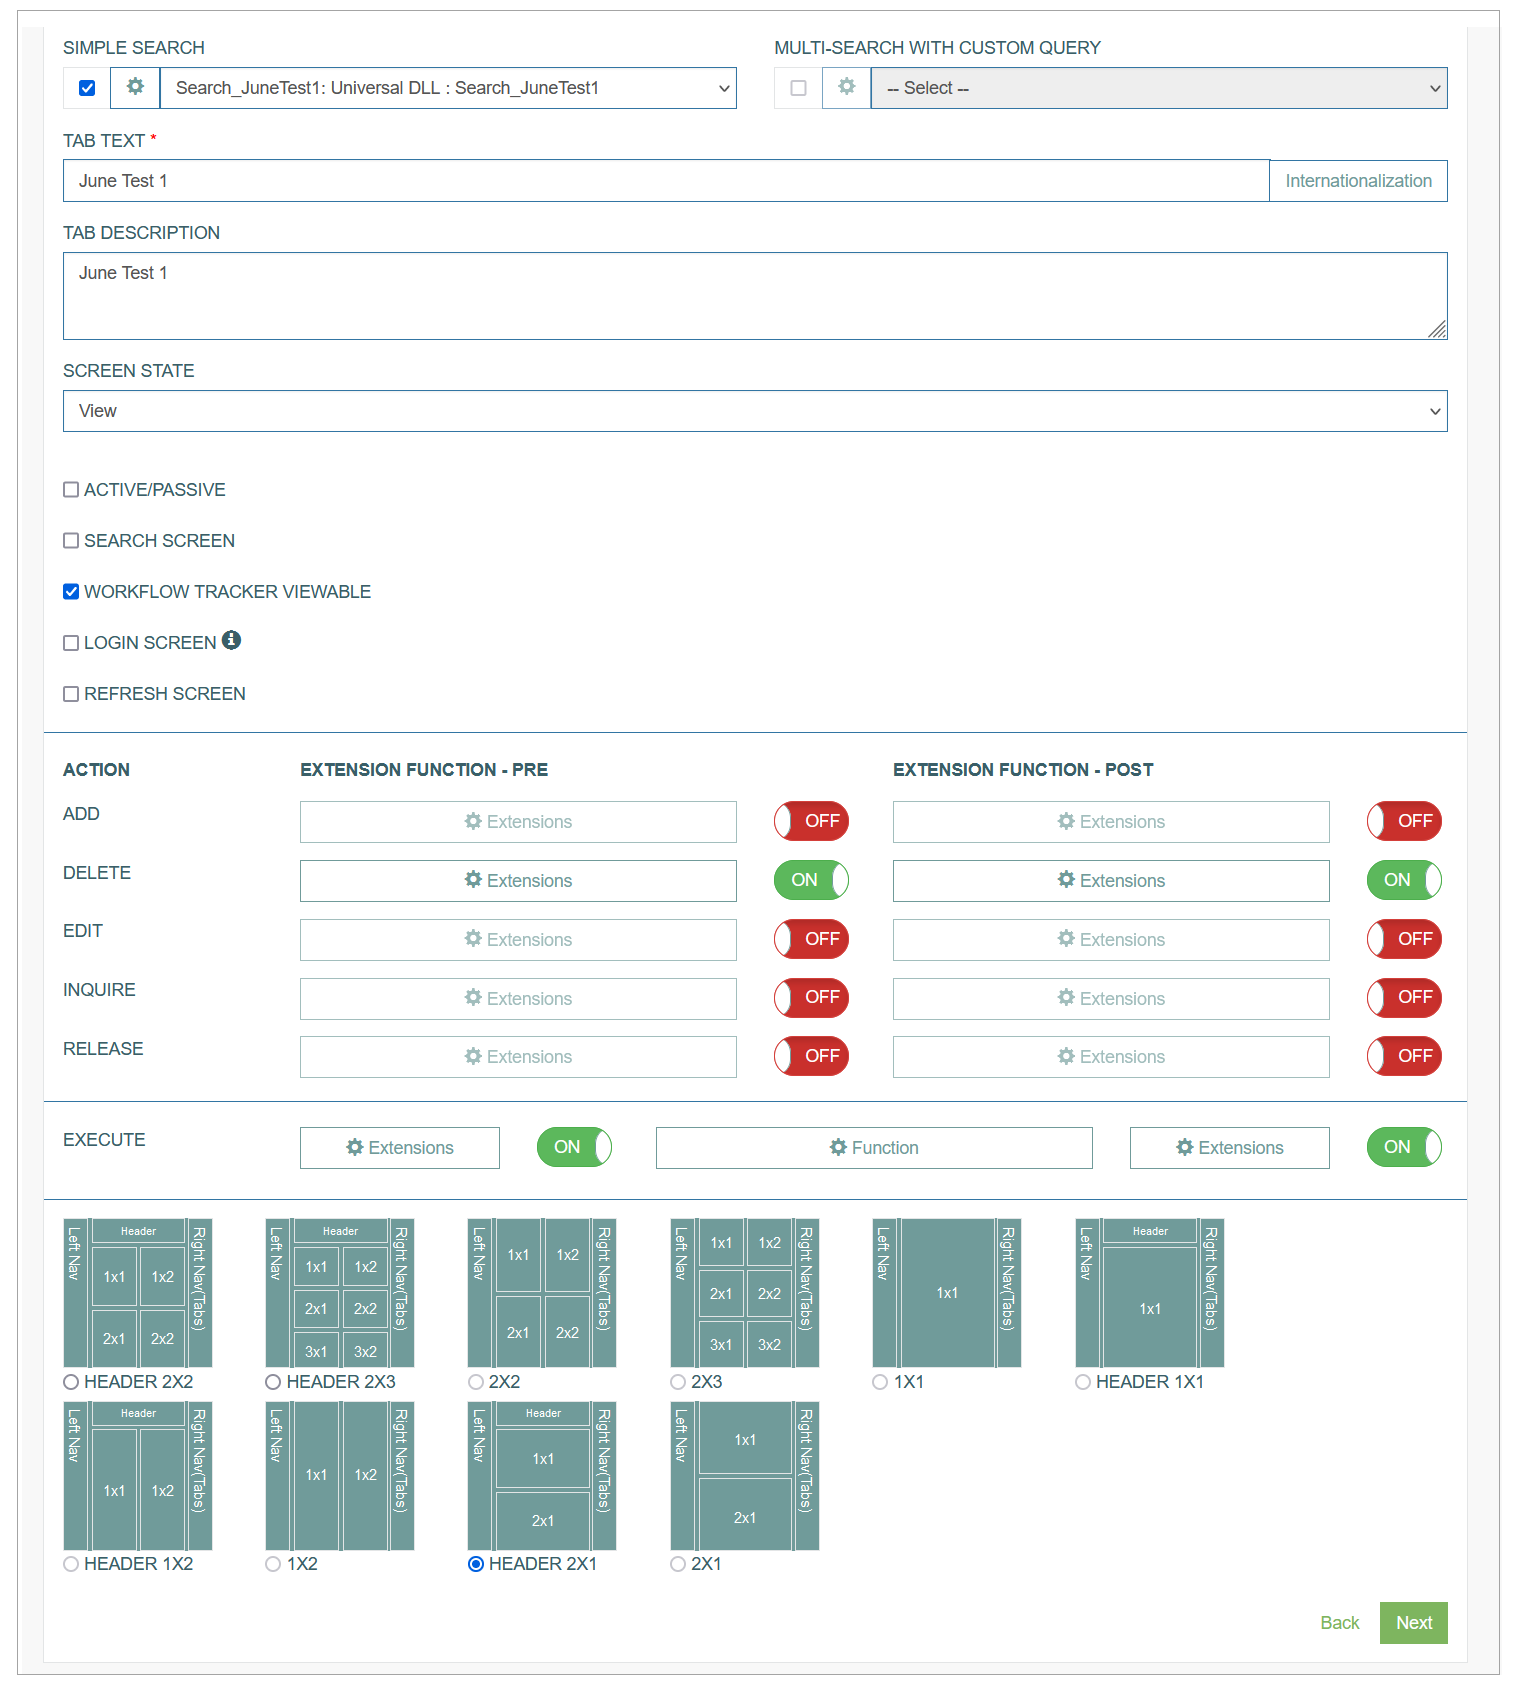
Active/Passive – select the checkbox to configure the screen for displaying and editing data from related third-level tables. This option restricts layout selection to 1x1 and requires the screen state to be "view." More information about the Active/Passive Screen can be found on the Active/Passive Screen Configuration page of the User Manual.
Search Screen – select the checkbox to create a screen for searching data using key fields. Works with the "inquire" or "search submit" actions and limits layout selection to 1x1. The screen state must be "view." More information about the Search Screen Configuration can be found on the Search Screen Configuration page of the User Manual.
Login Screen – select the checkbox to define this screen as a login page. Activating this option restricts layout selection to 1x1. Please refer to the Configure Login Screen section on the Login Screen Configuration page of the User Manual for more details.
Workflow Tracker Viewable - select the checkbox to define that the Workflow Tracker will be displayed on UI. If this option is disabled, the Workflow Tracker will be hidden for that screen. For more details about Workflow, refer to the
Workflow page of the User Manual.Template - this is a screen template in JSON format. It contains all the options (screen display type, aliases, field types, styles, search options, etc.).
In case of the Screen Builder, this template is filled in graphically.
Create screen with builder
Click the Create with Builder button on the Screens Overview page to create a new screen.
This opens the Create Screen editor page where you get an advanced functionality for the screen creation.
The main parts of the screen builder first page:
General Information (screen/tab name and description, tab order, fields that should be tracked)
Search fields settings
Tab label and description
Screen state
Screen types
Extension functions
Header and Sections layout
For the detailed explanations and instructions about the screen configuration, open the Screen Builder page of the User Manual.
Update Screen
Similarly to the Create Screen options, you have 2 options for editing the Screen:
Update screen with builder - this is an advanced version of a screen update. To update screen with builder, click the Gear wheel icon for the selected Screen entry in the search results table. The Screen editor page will be opened.
Update screen (using JSON template) - this is another way to update a screen. This way could be simpler in case you know the structure of the template very well and can adjust JSON template. To update screen using the JSON template, click the Edit (pencil) icon for the selected Screen entry in the search results table. The Update Screen page opens for editing.
After making the necessary changes, click the Submit button. To return to the Screen Overview page, click the Back link.
Delete Screen
To delete a Screen, click the Delete icon on the Overview page for the selected Screen entry. The confirmation pop-up will appear where you can confirm or cancel the action.