Table of Contents
Overview
The Edit type of the Section provides the possibility to add and manage images that will be displayed and used on the screen in the Render application.
The action to configure images as well as buttons, labels and fields is displayed next to the Settings icon in the upper right corner of the section.
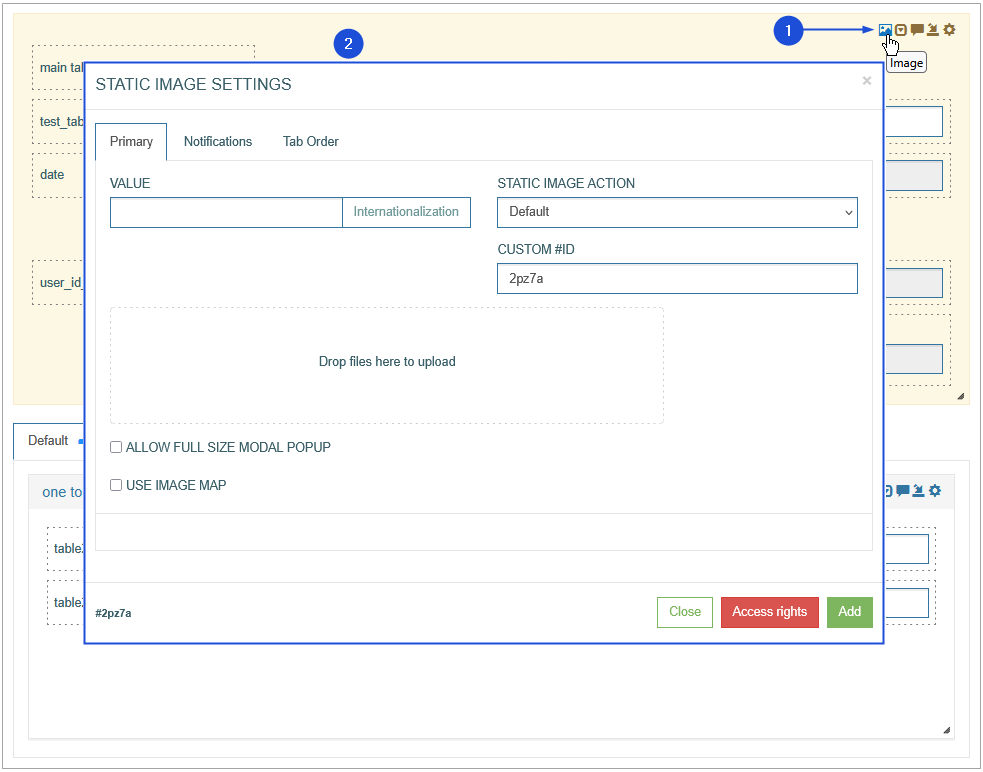
To upload an image and configure its displaying on the screen in the Render application, click the Image icon in the right corner of the Header section.
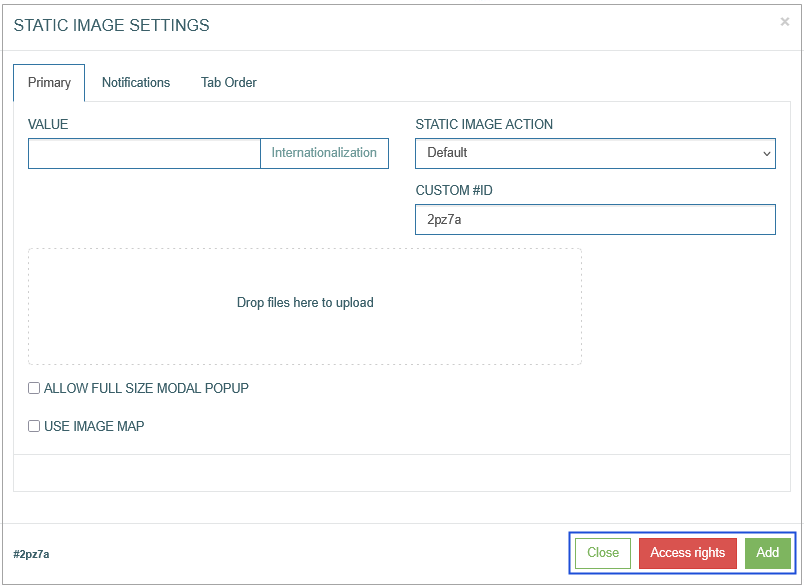
The Static Image Settings pop-up opens to configure the image.
Configure and edit the parameters of Static Image Settings by switching across the following available tabs:
Primary
Notifications
Tab Order
See the Common Operations section for the description of the buttons available at the bottom of the pop-up window.
Primary
On the Primary tab, configure the main parameters. The description of the parameters is provided below.
Value
Enter the values that will be used as the title of the image and will be shown on hover.
To add the translations for new labels perform the following operations:
Click the Internationalization button next to the Value field. The Internationalization pop-up window will be opened.
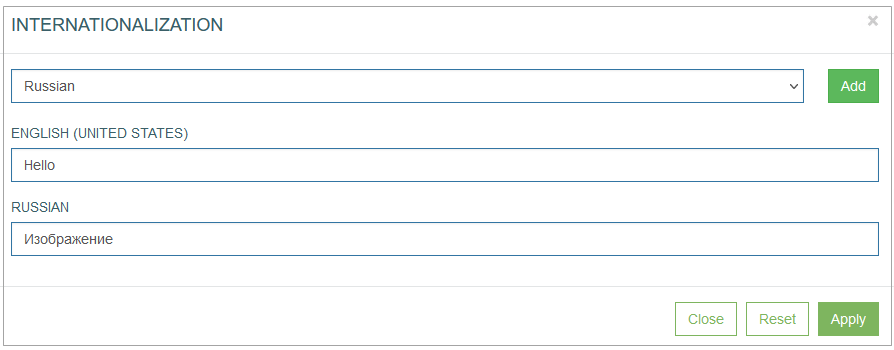
In the opened pop-up window, select the language from the drop-down list and click the Add button. The field with added language will be displayed.
Enter the translation for the selected language.
Click the Apply button to save the changes.
Click the Reset button to delete all changes without closing the pop-up window.
Click the Close button to return to the Image Settings pop-up window without saving changes.
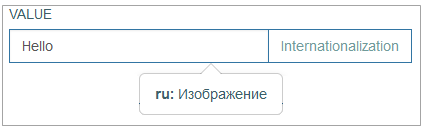
In case there is the translation for the value, move the cursor over a field and the translation will be displayed.
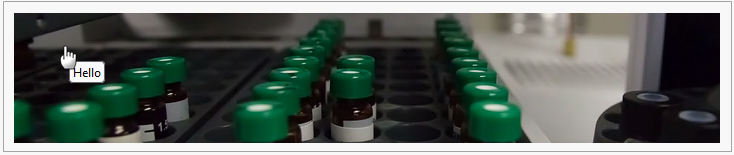
In case the user changes the display language in the Render application, the translated image title will be shown. For more details about language changing, refer to the Language page of the User Manual.
In the Render application, the image title can be displayed on hover as follows:
Custom #ID
This is ID of UI element. It can be used in the scripts, to adjust UI element style. The value is generated automatically when you open the image configuration pop-up.

Upload area
Click the area to open your local file manager and select an image to be uploaded. Or using drag and drop action, add the selected image to this Upload area. The image preview will be displayed to the right side of the upload area.

Allow full size modal pop-up
You can define whether the image can be opened as a pop-up window on the screen in the Render.

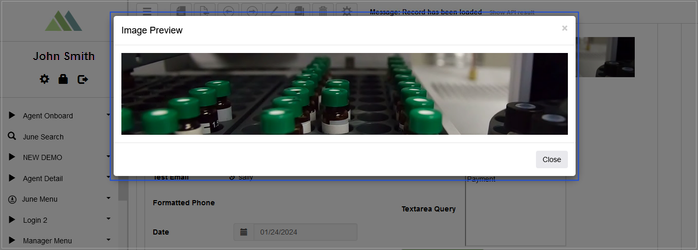
In the Render application, the opened in pop-up window image can be displayed as follows:
Use Image Map
The Use Image Map option provides a possibility to use the image as a map with clickable sectors. In the Render, users can perform different actions depending on which image sector they clicked.
The image map functionality is available only for static images in header and section(s) with the Edit type section type and a Default static image action.
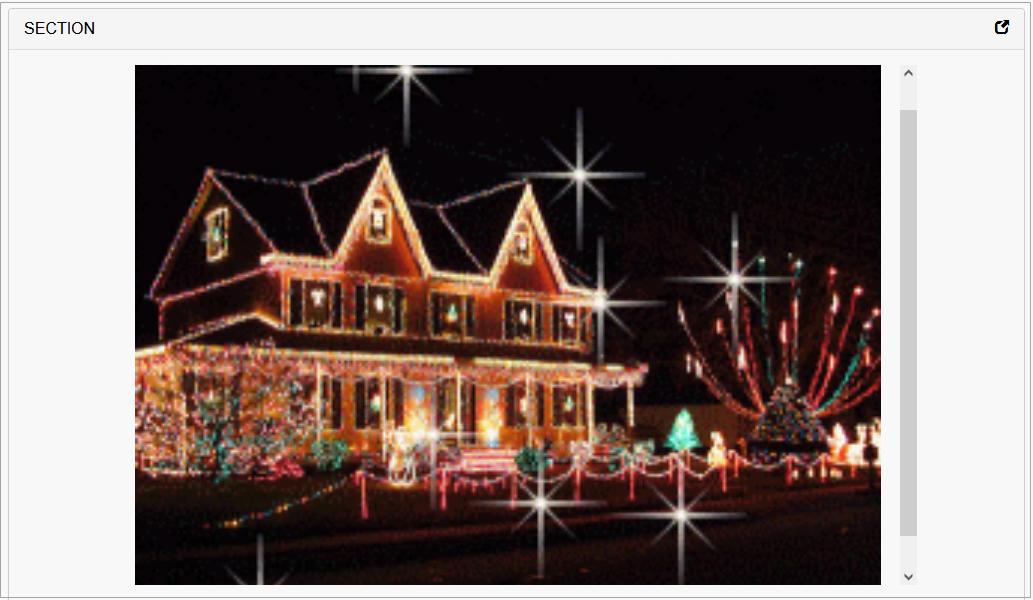
In the Render application, the image map and sectors are invisible elements and can be displayed as a regular image as follows:
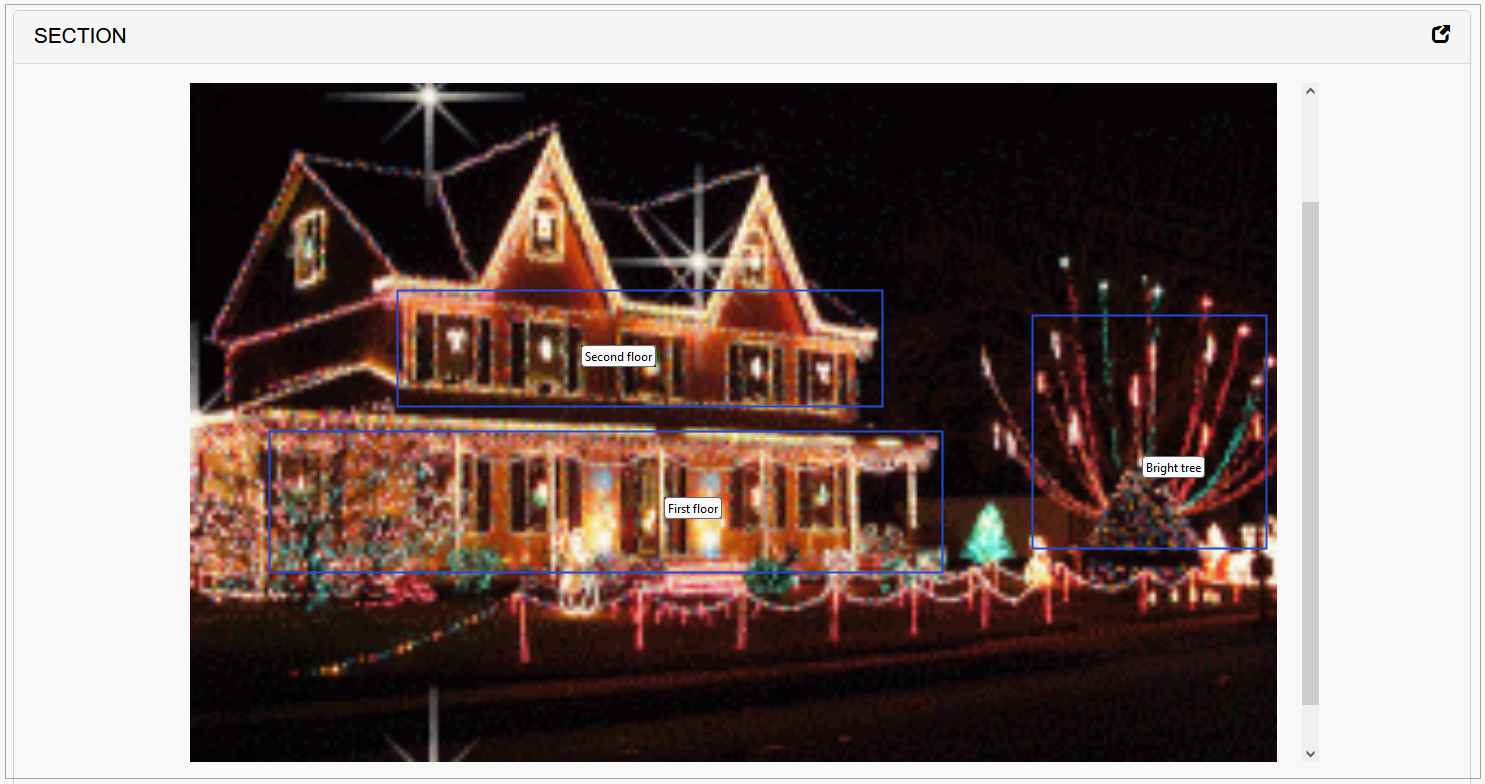
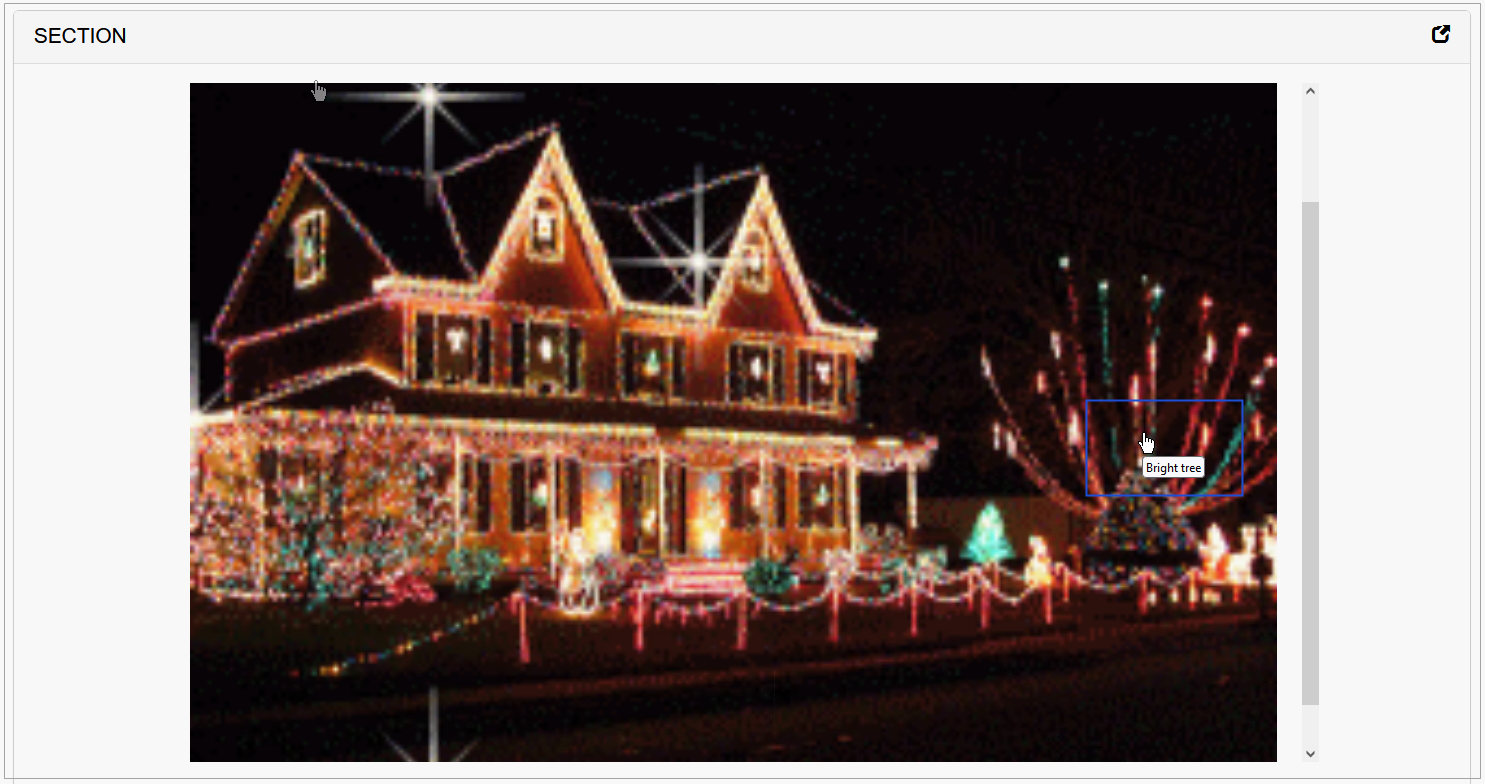
But hovering over image map sectors with the mouse will display sector titles as follows:
The main differences between the regular image and the image map are:
Clicking the regular image you can perform just one action. For example, clicking any place of the regular image can open the image in a modal window, open a link or perform the insert action, etc. For more details about image actions, refer to the Static Image Action section.
While, the image map is a map with sectors. Each image sector can perform an action. For example, clicking the image right top corner opens an internal data in a modal window, clicking the image center can lead to the external data opened in a new tab, etc. For more details on how to define image map parameters, see the descriptions below.
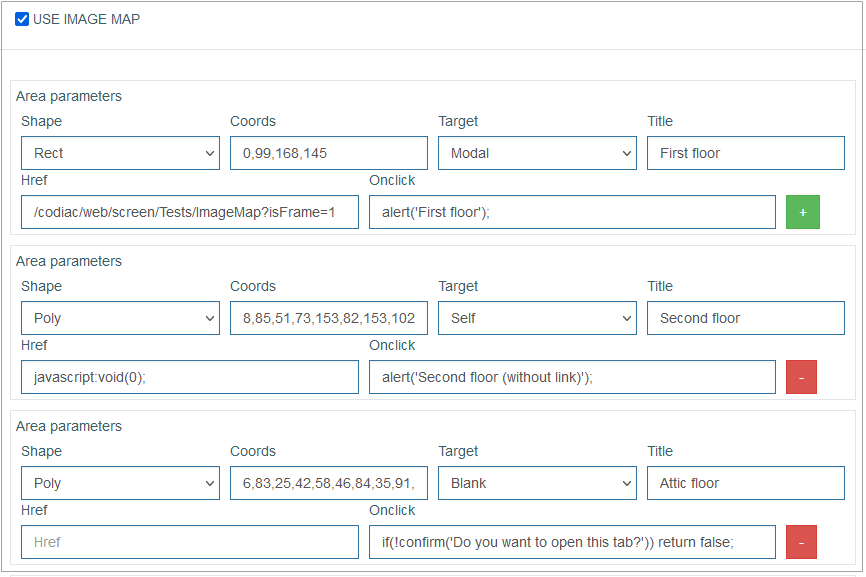
Select the Use Image Map check box to activate this option. The additional fields to set up are displayed in an Area parameters section:
Shape - select the shape of the clickable sector from the drop-down list:
Rect - a rectangular region.
Poly - a polygonal region.
Circle - a circular region.
Coords - enter the sector coordinates on the image map.
Note that the coordinates for map sectors must be entered based on the original image size. In case the original image size is different from the image size on the screen, the sector size will be recalculated.Target - select the display mode for the sector linked page from the drop-down list:
Blank - to open a linked page in a new tab.
Self - to open a linked page in the current tab.
Modal - to open a linked page in a modal window.
Title - enter the sector name. In case there is a sector name, in the Render application move the cursor over a sector and the sector name will be shown as follows:
Href - enter the link to the internal or external data to be opened by clicking the sector in the Render.
Note that in case this parameter is empty, in the Render application by clicking this sector the current page will be opened in a new tab. To cancel this, enter the javascript:void(0); to the Href parameter as the link and select the Self mode of the Target parameter.Onclick - enter the JavaScript that will be performed by clicking the sector.
Note that in case this parameter is empty, in the Render application by clicking this sector, the link will be opened without any additional action or confirmation.
For example, the parameter should be set as described below, to display:The ordinary warning message should have the following format: alert('text');
The confirmation pop-up window with actions should have the following format: if(!confirm('text')) return false;
Click the plus icon to add a new row to define new criteria for the image section.
Click the minus icon to delete the row with the added criteria of the image section.
Static Image Action
Click the Static Image Action drop-down list to apply the corresponding actions to the screen when the image is activated (clicked on). Depending on the selected action type, you need to fill in the additional parameters related to the selected action.
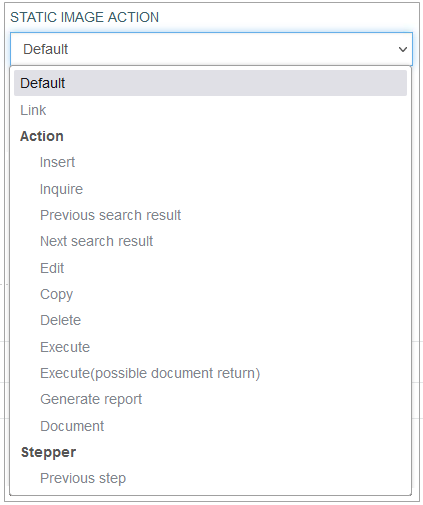
Currently, the following actions are available:
Default
Select the Default value to leave the image just as an image without any linked action. No action will be applied in case the Default value is selected.
Link
Select the Link value to add a link to the image.
When you select the Link action for the image, the additional parameters appear in the Static Image Settings pop-up window:
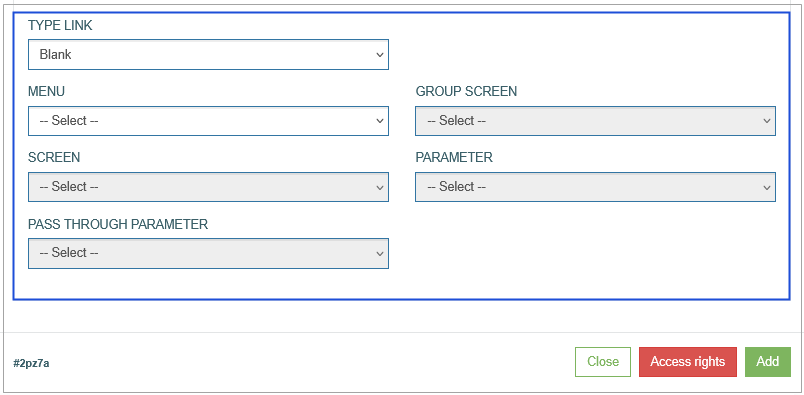
Define the following parameters for the link:
Type link
Blank - to open link in a new browser tab.
Self - to open link in the current tab.
Modal - to open link in a modal window.
Blank Bypass - to open link in a new tab and to pass the additional parameter specified in the Pass Through Parameter field.
Modal Bypass - to open link in a modal window and to pass the additional parameter specified in the Pass Through Parameter field.
Menu - to select the menu that the required screen assigned to.
Group screen - to select the group screen that the required screen assigned to.
Screen - to select the required screen that will be opened by link.
Parameter - to specify the required parameter that will be used for searching on the screen.
Pass Through Parameter - this parameter will be passed by link to the defined screen.
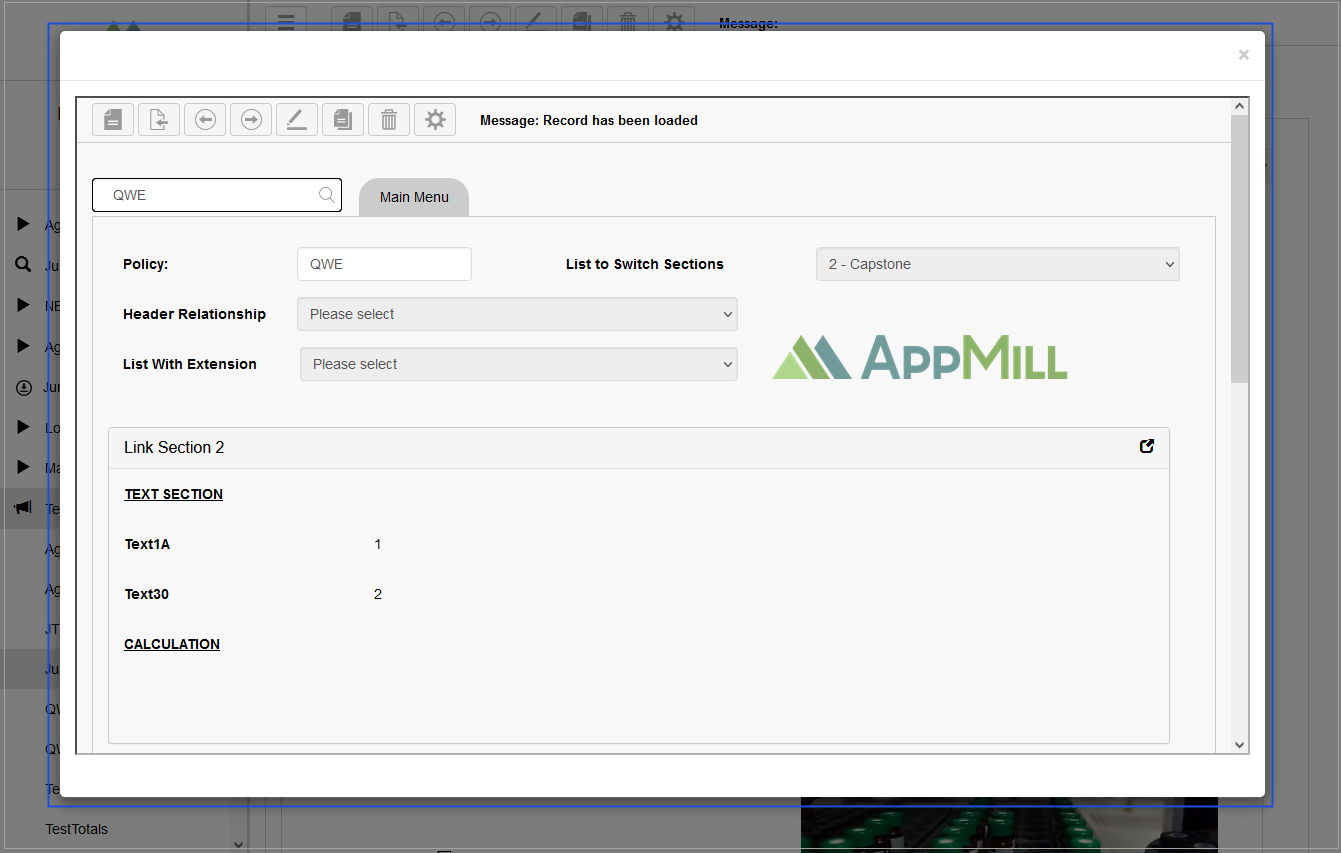
Clicking the image on the screen in the Render application will redirect user to another tab, screen or modal window on the same screen. For example, clicking the image with modal link type opens the link in a modal window, and it is displayed as follows:
Insert
The Insert action replicates the Insert action that is available in the main menu actions in the Render. When you select the Insert action for the static image, the additional parameters appear in the Static Image Settings pop-up window:
You can select the following options:
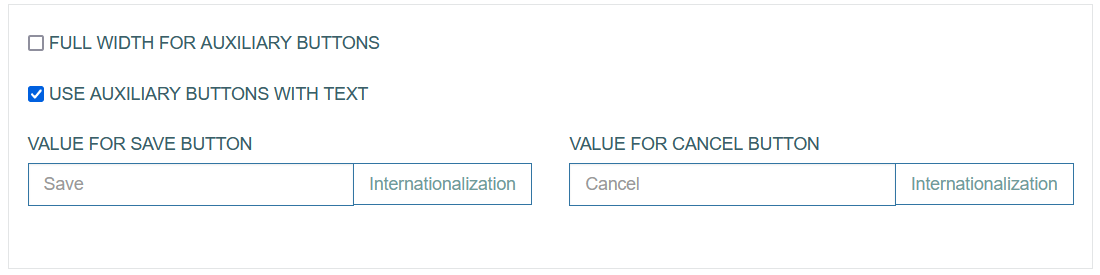
Full width for auxiliary buttons - select this option to display the Save and Cancel buttons in full width.
Use auxiliary buttons with text - select this option to add specific text instead of the standard Save and Cancel labels.
Value for Save button - enter the text that will be displayed as Save button label.
Value for Cancel button - enter the text that will be displayed as Cancel button label.
To add the translations for new labels, click the Internationalization button. In the opened pop-up window, select and add the language, enter the translation for the selected language. Click the Apply button to save the changes.
Inquire
The Inquire action serves as a Search action.
Clicking the UI element representing the Inquire action will initiate the search on the screen.
In this case the search will be performed exactly according to the entered search parameter without taking the autocomplete option into account.
The Inquire functionality can work without the Search functionality configured on the first page of the Screen Builder. For more details about the Search functionality, refer to the Search Configuration section on the Screen Master Data Settings page of the User Manual.
Previous search result
The Previous search result action will show the previous search result if any available.
Next search result
The Next search result action will show the next search result if any available.
Edit
The Edit action gives the possibility to update the parameters and values on the screen. When you select the Edit action for the static image, the additional parameters appear in the Static Image Settings pop-up window:
You can select the following options:
Full width for auxiliary buttons - select this option to display the Save and Cancel buttons in full width.
Use auxiliary buttons with text - select this option to add specific text instead of the standard Save and Cancel labels.
Value for Save button - enter the text that will be displayed as Save button label.
Value for Cancel button - enter the text that will be displayed as Cancel button label.
To add the translations for new labels, click the Internationalization button. In the opened pop-up window, select and add the language, enter the translation for the selected language. Click the Apply button to save the changes.
Copy
The Copy action will copy all the content from the current screen except the Primary key field.
Delete
The Delete action will delete all the content on the current screen. In other words, the database table row will be deleted with the primary key and the whole information.
Execute
In contrast to the extension function configured in the previous step using the basic or master data, this extension function is performed only for the screen (tab) on which it is located.
When the button is pressed, only the function configured for the button will be executed, the functions from the first setting step will not be executed.
The functions configured in the first step will be executed when you click the Execute button in the action menu.

Refresh after execute - When the check box is selected, that means that in case the extension function has been successfully executed, the whole screen will be refreshed to display the actual data.
Use the Pre and Post Functions to configure the Extension function for the needed fields and values. They are optional and can be switched on/off.
Note that the extension function is available only if the Search functionality was set up on the first page of the Screen Builder. In case the Search functionality was not configured and the Inquire functionality is used instead of it, the Execute action will not work correctly as for the buttons with extension functions the work is based on the data found from the database.
Please consider this information and use the buttons with extension functions with the set Search functionality only.
Execute (possible document return)
The Execute (possible document return) action represents the combination of the previous Execute functionality and the additional possibility for the case when a special command is used in the function for creating or copying the files/documents.
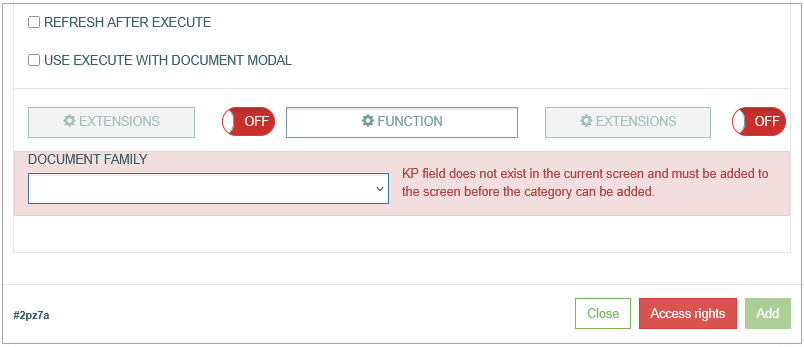
In this case after successful function execution, the modal window with the list of documents available for download will appear.
Refresh after execute - When the check box is selected, that means that in case the extension function has been successfully executed, the whole screen will be refreshed to display the actual data.
Use execute with document modal - select the check box to open the list of files/documents in a modal window where you can select the files and download them. In case the check box is not activated, the files/documents will be downloaded automatically.
Document Family - used when copying or creating files in the plugin when processing the Execute (possible document return) action, as well as when processing the Document action.
In case the Key Part field does not exist on the current screen, it must be added to the screen before the Document category can be added.
Generate report
The Generate report action provides the possibility to build the report based on the selected Report Template. The templates are configured to use the linked aliases. When executing the Generate Report action, the template is filled in by the values, and the report is available for download. Fill in the following fields:
Report Template - select the Template of the report that should be used.
Passthru - No Input - select this check box to use the search data from the Render screen to generate a report. In this case, the search data will be passed onto the Reports functionality to be evaluated in the report.
Passthrou Batch - No Input - select this check box to use the search data from the Render screen to generate a report. In this case, the batch of data will be passed onto the Reports functionality to be evaluated in the report.
CSV File - select the check box to download the report file in the CSV format.
For the correct work of the Passthru - No Input and Passthrou Batch - No Input report options, the search on the screen must be configured correctly.
Document
The Document action allows users to open the pop-up window with the list of available documents.
Multiple upload file - select the check box to allow the upload of several files at the same time.
Document Family - select the Document Family, to which the uploaded documents will be added.
Document Category - select the Document Category, to which the uploaded documents will be assigned.
Notifications
On the Notifications tab, configure the conditions when the notification messages should be sent to users.
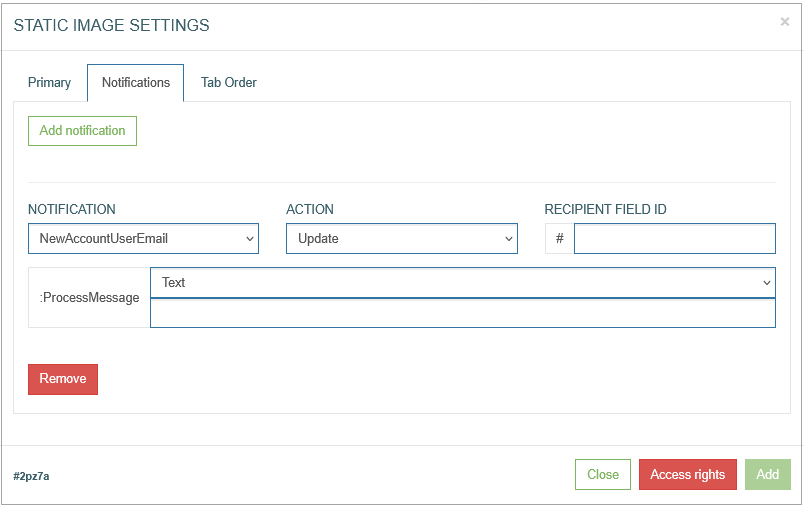
To create a new notification, click the Add Notification button.
After clicking the Add Notification button, an entry for configuring the notification conditions appears. Fill in the required fields:
Notification - select the notification template from the drop-down list of the templates existing in the system. To create a new template or manage existing ones, open the Notifications page (System Data > Notifications). For more details about notification creation and managing, refer to the Create Notification section on the Notifications page of the User Manual.
Currently you can set up Email and SMS notifications. The email address and the phone number for notifications can be set on the Users page. For more details on how to add the email address and the phone number for notifications, refer to the Create User section on the Users page of the user Manual.
Action - select the action that specifies the state of UI element (button) when notification should be sent. There are 2 states of UI elements:
Update - the field value is edited.
Insert - the value is added.
Recipient field ID - add an ID of the field with an Email field format type. The notification will be sent to the email address entered in such a field in the Render application. The field ID can be found at the bottom left corner of the Field Settings pop-up window. The Recipient field ID field is available only for the notification templates with Custom recipient type. For more details about the recipient type, refer to the Create Notification section on the Notifications page (System Data > Notifications) of the User Manual.
In case the notification template contains the variable parameters, the value of these variables can be defined here in the input fields.
To delete the Notification entry, click the Remove button for the corresponding entry.
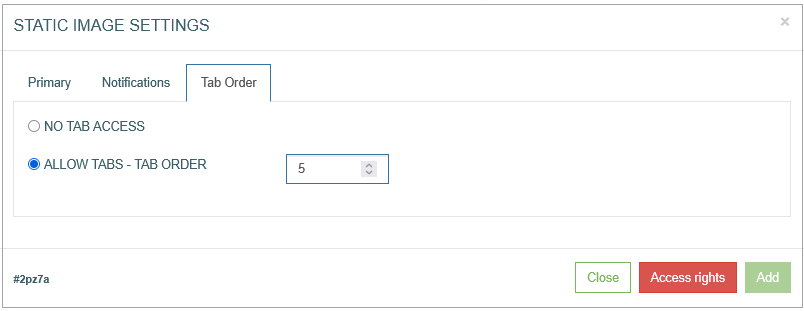
Tab Order
On the Tab Order tab, you can set whether the Tab key can be used to move the cursor on the current UI element. Additionally, you can define the order in which the UI element is selected and allocated with the cursor when using the Tab key.
The following options are available:
No Tab access - select this radio button to restrict the possibility use the Tab key on the keyboard for the current UI element.
Allow Tabs - Tab Order - select this radio button to allow the usage of the Tab key to navigate to the current UI element. Define the Tab order by filling in the input field next to the Tab Order option.
Common Operations
At the bottom of the Button Settings pop-up window, there is a block with common operations displayed and available on any tab of the pop-up window.
The following operations can be performed while updating information in the pop-up window on the tabs mentioned above:
Add
Click the Add button to confirm and add an image to the screen.
Note that in case of the Edit mode, the Add button is changed to the Update button.
Update
Click the Update button to confirm and save the changes made for the image.
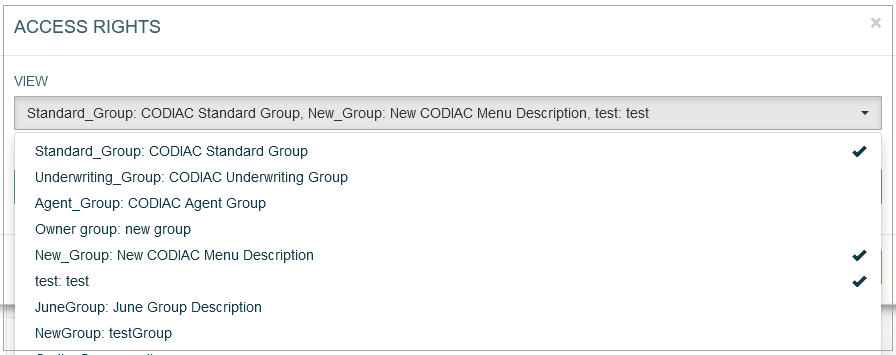
Access Rights
Click the Access Rights button to open the corresponding pop-up window. Here, users can select user groups to set the access right for the View and Update actions for the selected groups:
View - select one or multiple user groups from the drop-down list to provide them with View access rights. The selected user groups will be marked with the check mark to the right from the user group name. In the Render application, the users from the selected user groups can view the image display.
Update - as the images cannot be updated in the Render application, the selected user groups will not be able to update the images there.
Close
Click the Close button at the bottom of the Static Image Settings pop-up window to close the pop-up.