Access
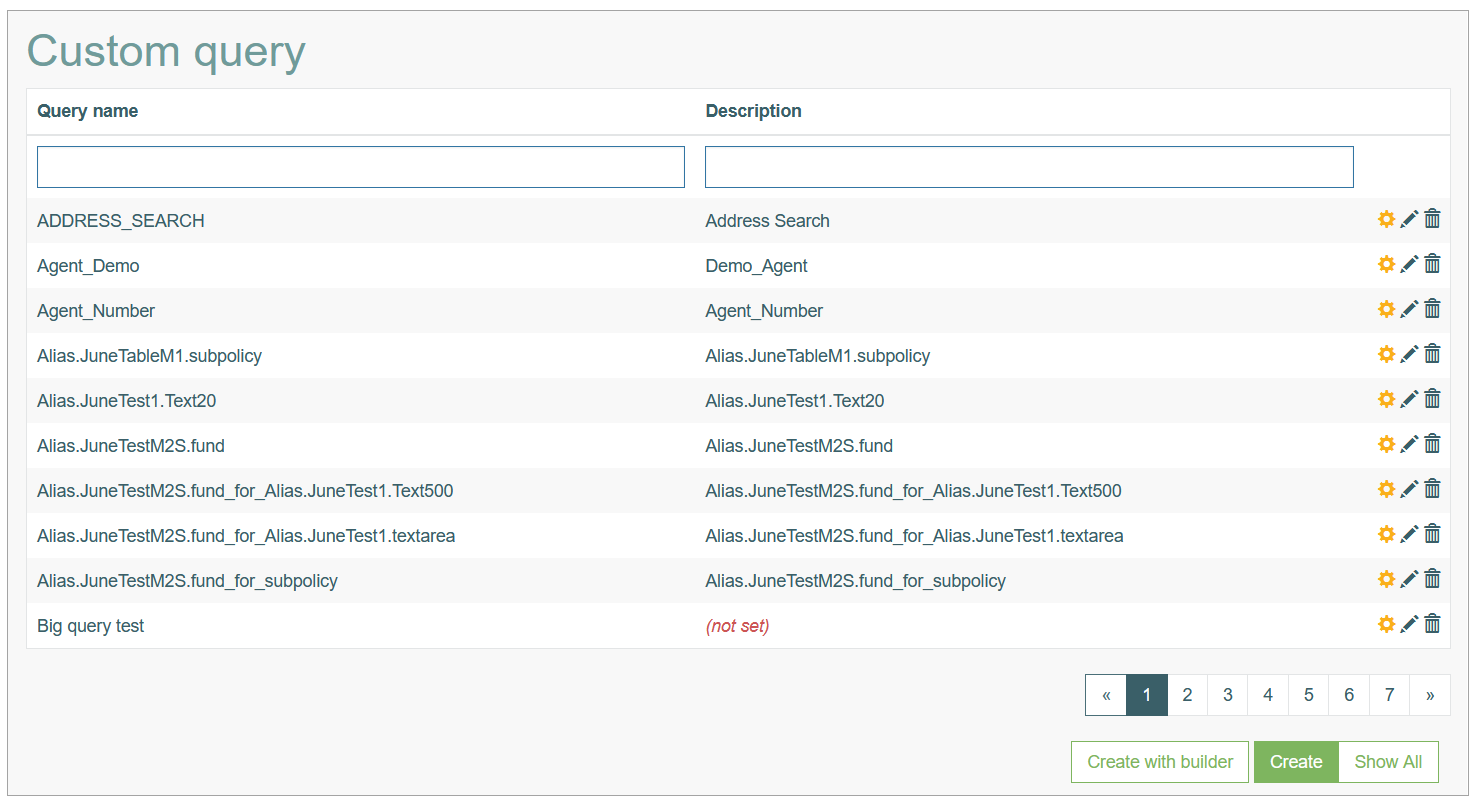
Click Features > Custom Query to have an overview of existing custom queries and manage them.
Table of Contents
Overview
The custom query functionality is designed to manage, retrieve, and show the data of the connected database table. In most cases they are used to receive and show the data using “select“ query. Custom query can be used to configure multi-search with custom query, the fields of the Relation Datalist and Inline Search types.
Search
To search for a required custom query or filter the search results, use the following search filters:
Query name
Description
After filling in the filters, click the Enter key or any screen place. The screen displays search results if found. Please note, that letters or part of the word entered in the search filter fields will be taken into account while searching as well.
Sort Results
You can sort search results by the columns in ascending (arranged from the smallest to the largest number and alphabetically for letters) or descending (arranged from the largest to the smallest number and in reverse alphabetical order for letters) order. Columns' names, by which search results can be sorted, are indicated with arrows. Click the appropriate column name to sort search results by it.
Navigate
Use the navigation bar at the bottom of the Custom Query Overview page to navigate through the pages. Click the appropriate page number to open it. Use the Arrow icons to go to the next page of the previous page of the search results list accordingly.
Click the Show All button to display all the results on one page.
Create Custom Query
There are two possible ways to create a custom query:
Create custom query with builder - this version of a custom query creation will be useful for the multi-search in the screen builder in case of quite simple queries, when the query contains one search parameter and one output parameter.
Create custom query (using simple form) - this is another way to create a screen.
Please note that Create custom query with builder and Create custom query (using simple form) are two different ways of custom query creation.
When you select the particular way of creation, you need to follow the same way when updating the custom query.
I.e., that when you create a Custom Query via builder, you will need to edit the custom query via builder too. And vise versa, if you have created the custom query via simple form, you will be able to edit your custom query via simple form too.
Let’s review these two ways and methods of the custom query creation in detail further.
Create custom query with builder
Click the Create with Builder button on the Custom Query Overview page to create a new custom query. This opens the Create custom query editor page:
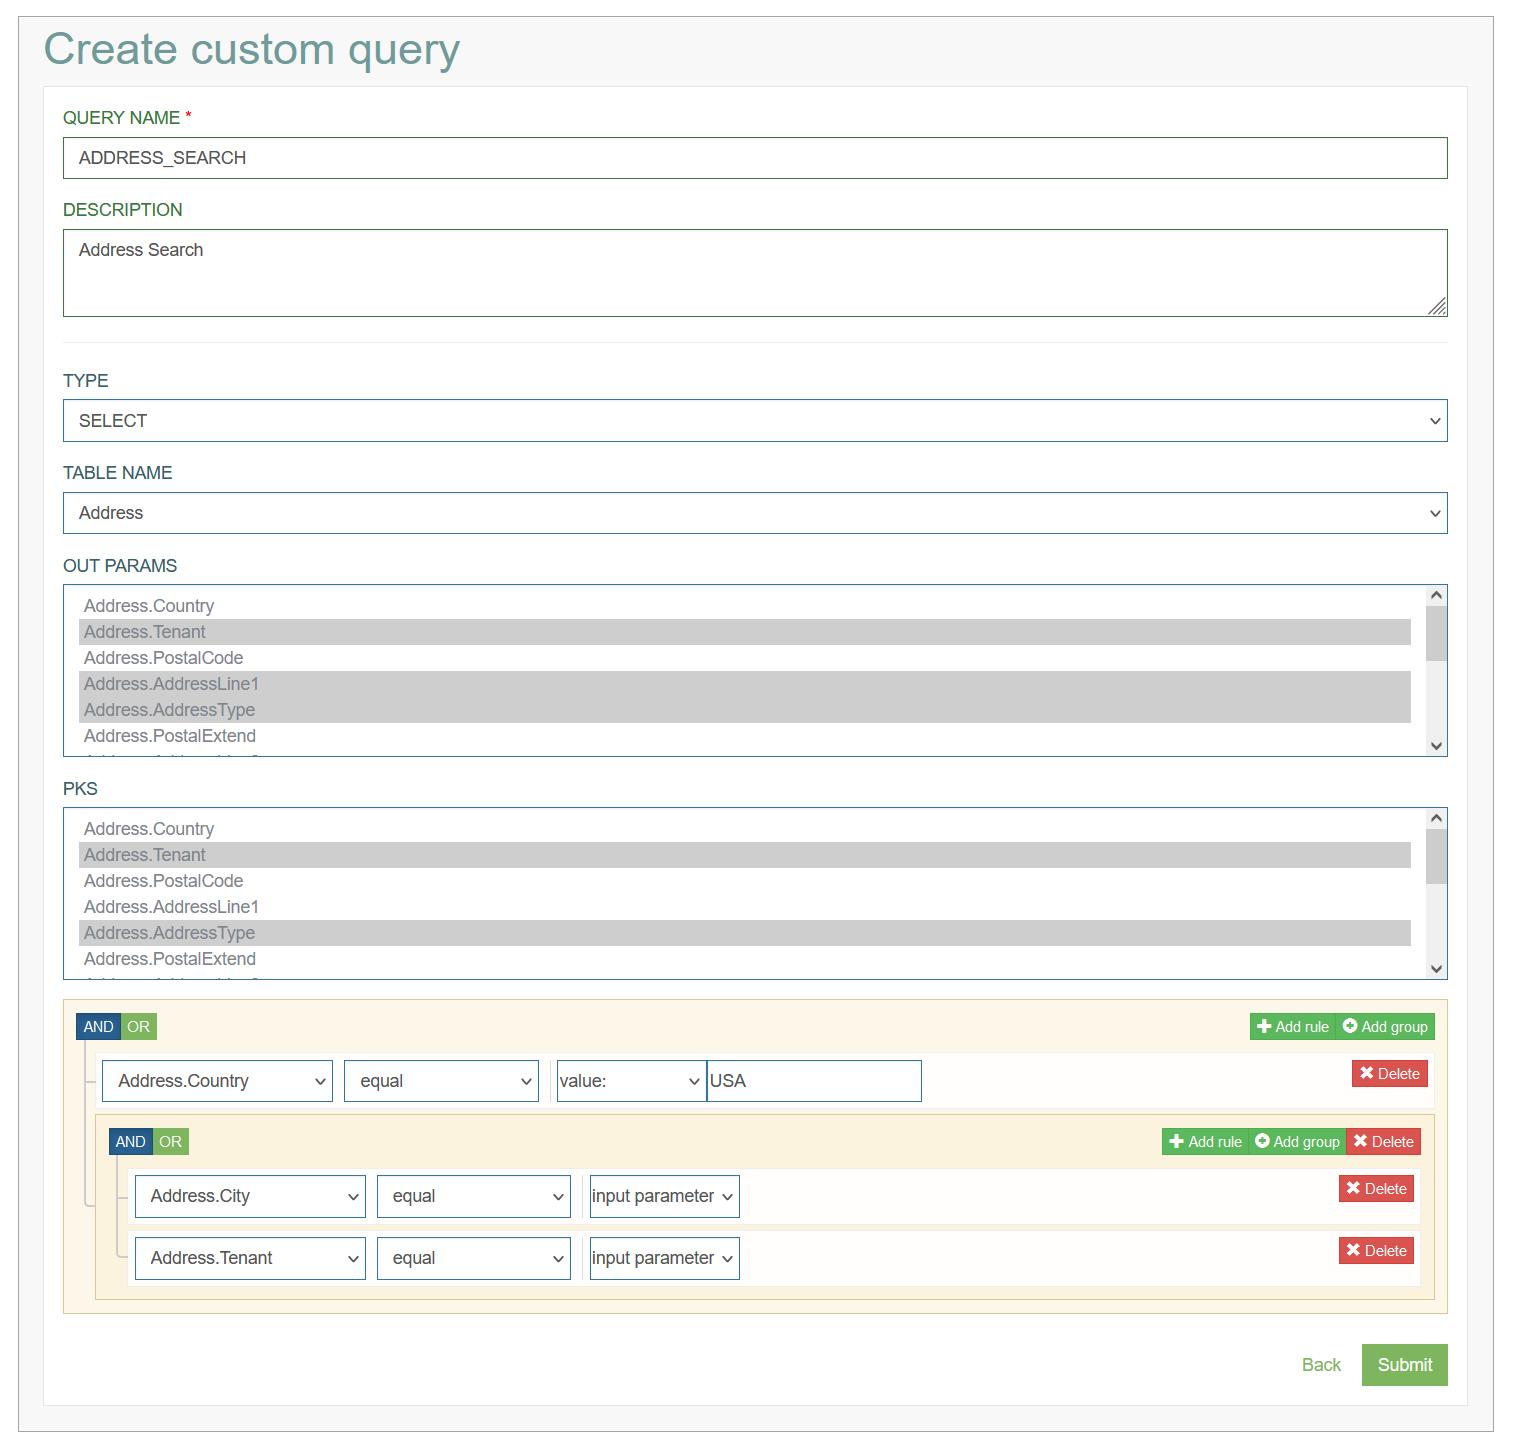
Fill in the following fields:
Query Name – enter a name for a new query.
Description - provide the short and informative description for the query.
Type - select the type of query:
select - is used to return all values that meet the query.
select distinct - is used to return only distinct (different) values.
Table Name - select list the database table, in which the search should be executed.
Out Params - select the parameters that will be returned and displayed in the search results.
PKS - select Primary Key(s) of the database table. The values should be selected manually.
Search Condition Section - in the section, you can configure the additional conditions for the search query.
Add Rule - click the Add Rule button to add a new row for defining the condition.
In the added row, select field, define the operator and specify the value of the field or select the input parameter (will be taken from the screen).Add Group - click the Add Group button to add a group of rows. Several rows with conditions can be grouped for defining one common condition.
After filling in all mandatory and optional fields click the Submit button to save the created Custom Query. Click the Back button to go back to the Custom Query overview page without saving the data.
Create custom query (using simple form)
Click the Create button on the Custom Query Overview page to create a new query. This opens the Create custom query editor page:
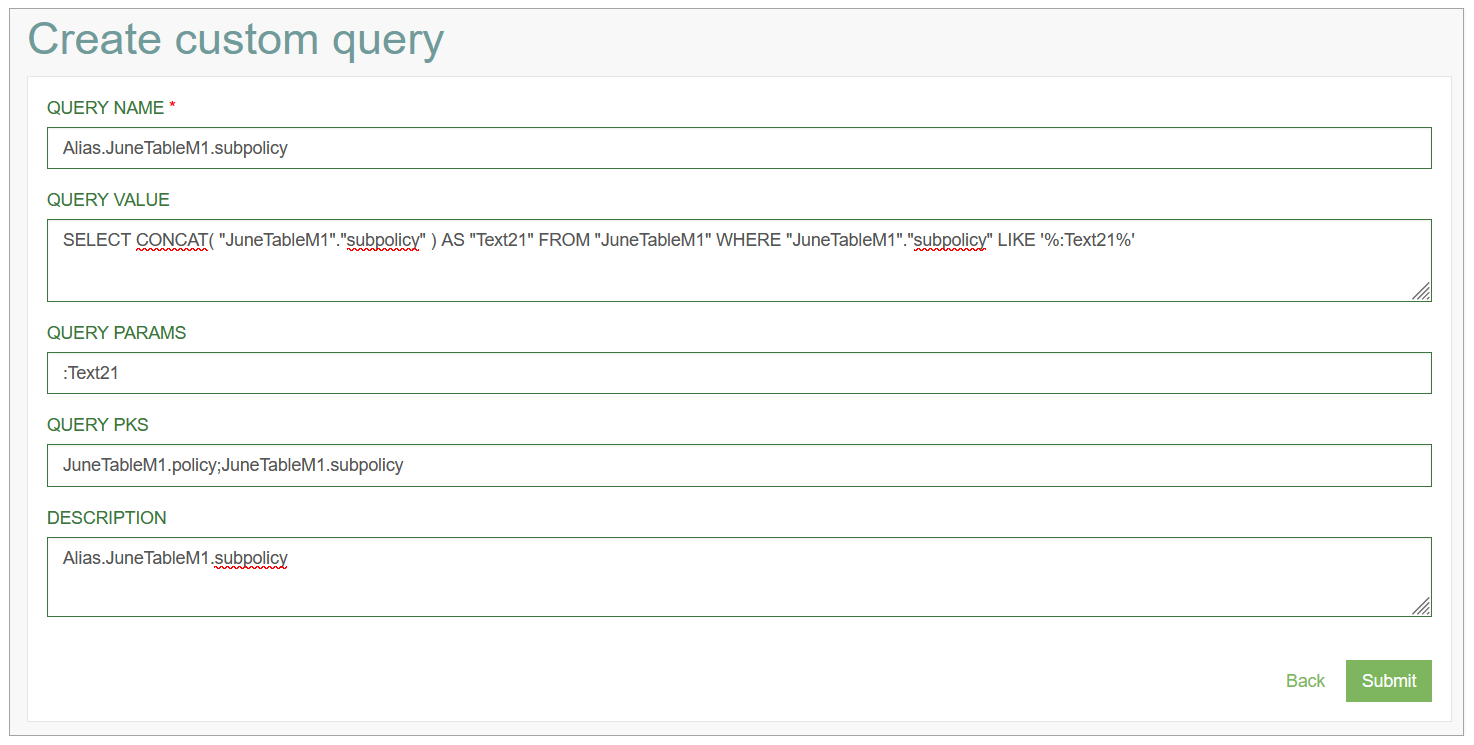
Fill in the following fields:
Query Name – enter a name for a new query.
Query Value – write a custom query to retrieve the data from the required table.
If you use a Custom Query for the Relation Datalist field in the screen configuration, you can improve the query as follows:When requesting
select "unique_field" from "first_table", you will get a select field. The value and description of the field option will be the same (and equal to the value of the unique_field).When requesting
select "unique_field" as "value", "info_field" as "description" from "first_table", you will get a select field. The value of the field option will be equal to unique_field, and the description will be equal to info_field. This way you can store a unique_field in the database, but the user can choose a more understandable option.
Query Params - enter the parameters that are taken for the query execution into account.
Use the following convention to enter the parameters: the parameter should start with “:“. Use letters and numbers only. Multiple parameters should be separated via the “;“ delimiter.
Query PKS - define the Primary Keys.
Use the following convention to define PKS: Use letters and numbers only. Multiple parameters should be separated via the “;“ delimiter.
Description - provide the short and informative description for the query.
Edit Custom Query
To edit the custom query, you can use two options:
editing via clicking the Edit (pencil) icon for the selected custom query entry in the search results table.
editing via builder (clicking the Gear icon).
Your choice will depend on the way the custom query is created.
After making the necessary changes, click the Submit button. To return to the Custom Query Overview page, click the Back link to cancel the changes.
Delete Custom Query
To delete a custom query, click the Delete icon on the Custom Query Overview page for the selected entry. The confirmation pop-up will appear where you can confirm or cancel the action.