Access
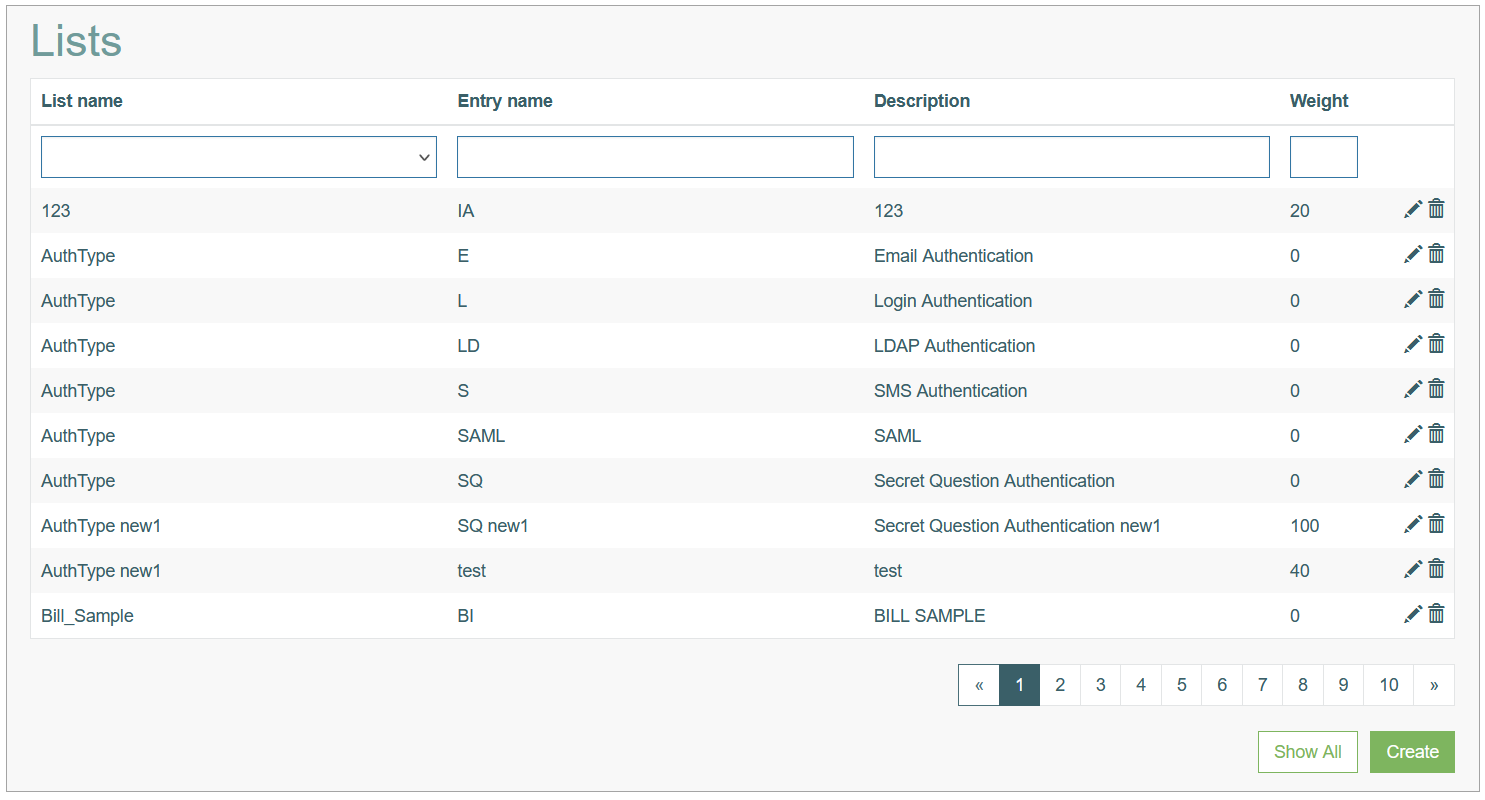
Click System data > Lists to access the lists of values used further on the screens.
Table of Contents
Overview
The Lists functionality provides the possibility to organize and store data in a structured way and further retrieve the data on the Render screens as a list of options.
The data can be used in the various functionalities and screens to complete specific tasks and processes, to fill in the fields.
Search
You can search for a particular list of values or specific value as well as to filter the search results. For this, use any of the search filters such as List Name, Entry Name, Description, Weight and click the Enter key or on any screen place.
The screen displays search results if found. To have an overview of all list values existing the system, leave the filters empty and click the Enter key or on any screen place.
Sort Search Results
You can sort search results by the columns in ascending (arranged from the smallest to the largest number and alphabetically for letters) or descending (arranged from the largest to the smallest number and in reverse alphabetical order for letters) order.
Columns' names, by which search results can be sorted, are indicated with arrows. Click the appropriate column name to sort search results by it.
Navigate
Use the navigation bar at the bottom of the Overview page to navigate through the pages. Click the appropriate page number to open it. Use the Arrow icons to go to the next page or the previous page of the Search Results list accordingly.
Create List
Click the Create button on the Overview page to create a new List of values. This opens the page in creation mode.
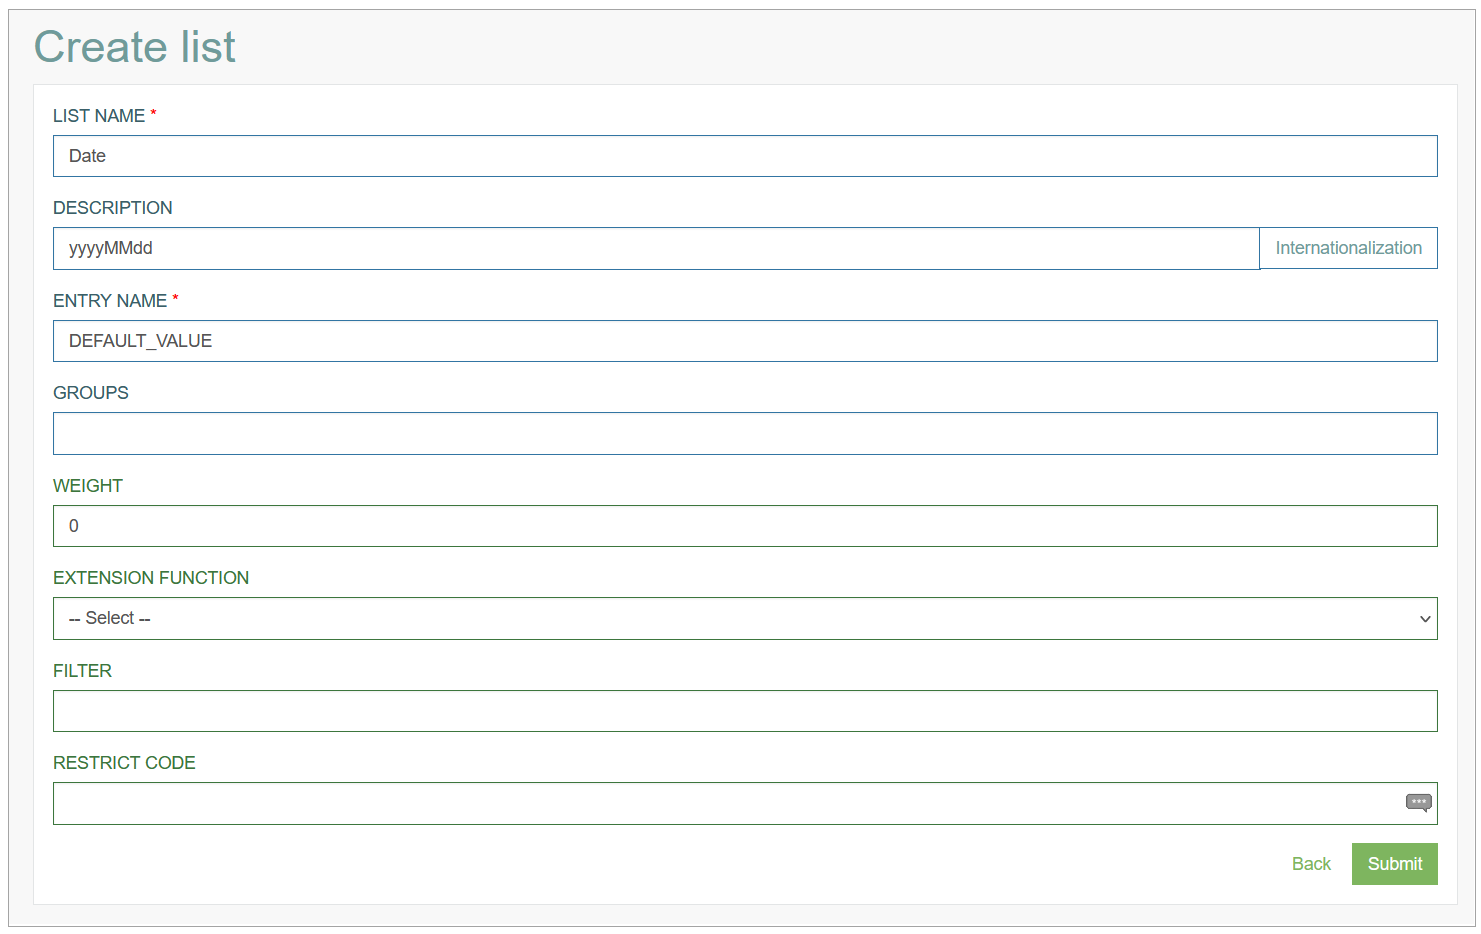
Fill in the following fields:
List Name – enter a name for the List. This field is required.
Description - enter a value of the option.
That value will be displayed as an option in the list of options for selection from the select box on the screen in the Render application. This field is required.Entry Name - this value will be stored for the field in the database. This field is required.
It is not recommended to use the “\” and “/” characters in the Entry Name value.
The Entry Name value is used to form a primary key that will be used to build a link to update a single value page. And if the Entry Name value contains the “\” and “/” characters, the link will be incorrect, and the Update List page for a single value will not be opened. However, users still have the possibility to update the list, using the Update Bulk operation. For more details about update list operations, refer to the Update List section.Groups - enter the User Group name to specify that this option should be visible to the specified group only.
You can enter several comma-separated User Groups.Weight - enter the number defining the weight of the option.
It influences on the ordering in the list of displayed options in the select box.Extension Function - select an extension function from the list of available extensions.
After filling in all mandatory and optional fields click the Submit button to save the created List Value. Click the Back button to go back to the Lists Overview page without saving the data.
Update List
There are two possibilities to edit the lists and values:
Update a single value option.
Bulk update of all value options from one list on a single page.
Update Single Value Option
To update a single value option of a List, click the Edit (pencil) icon for the selected list value in the search results table. The Update list page opens for editing.
Make the necessary changes and click the Submit button to save them.
To return to the Lists Overview page, click the Back link.
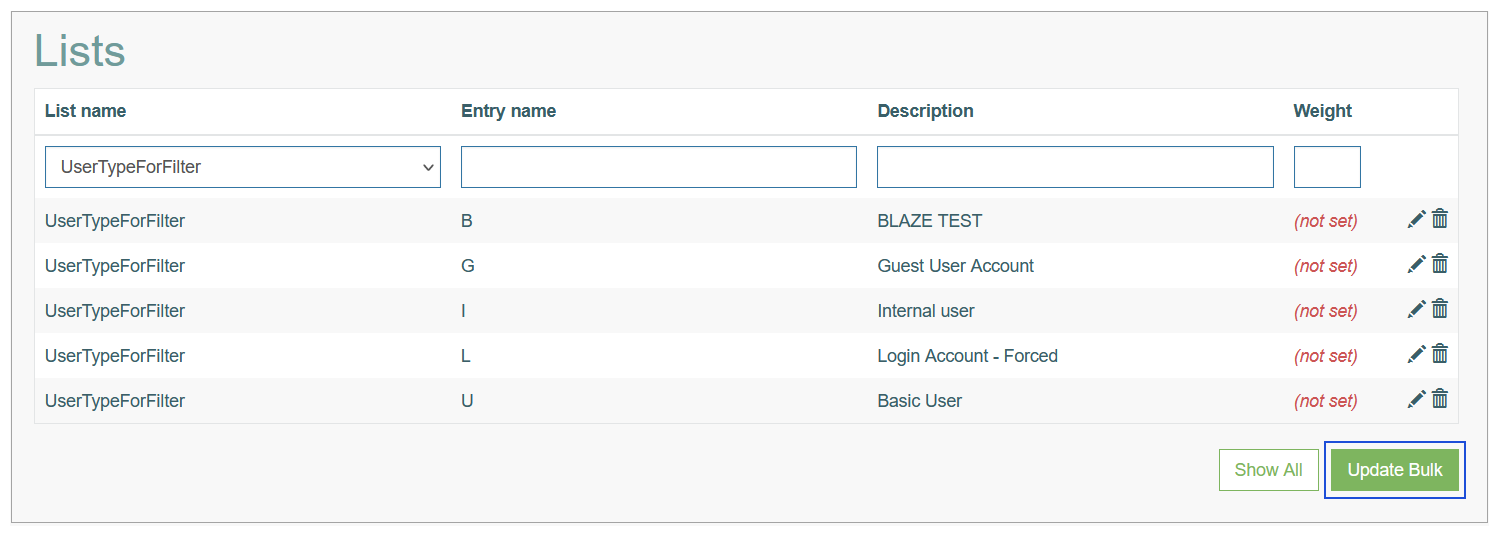
Bulk Update List
To have the possibility to bulk update all the values of one list, follow the steps:
Find the needed list in the search result table on the List Overview page.
Click the Update Bulk button appearing in the bottom right corner of the page:
The Update Bulk page opens:
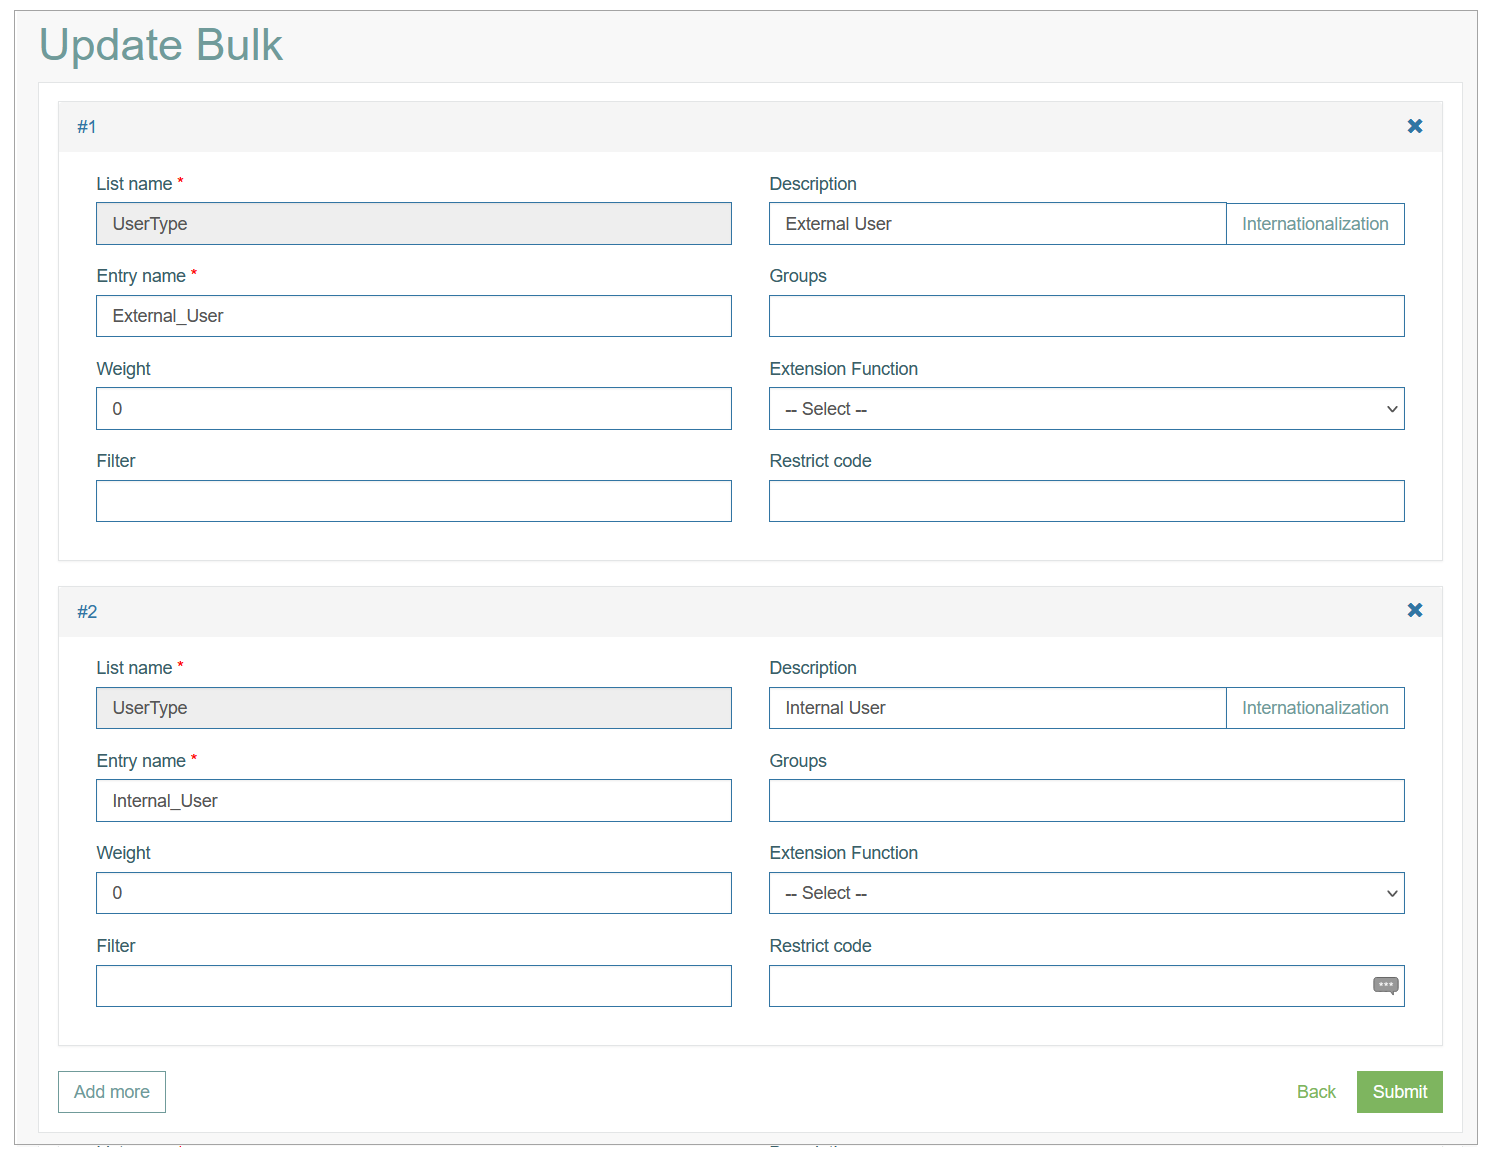
On the Update Bulk page you can:
review all the value options belonging to one list listed out on the page,
change any data of any value option of the list,
create a new value option for the selected list by clicking the Add more button.
Add Options to List
To create a new value option for the current list, click the Add more button in the bottom left corner of the page. A new card with the fields to be filled in will appear at the end of the list.
The List Name will be pre-defined with the current List name.
Fill in other fields and click the Submit button to save the changes. Click the Back link to leave the page.
Delete List
To delete a List, click the Delete icon for the selected list on the Overview page. The confirmation pop-up will appear where you can confirm or cancel the action.